


Siemens Industry, Inc.
Building Technologies Division
A6V10328217_en--_f
4
3.
The Firmware via USB Port dialog displays a list of available firmware for the
selected module. Select the firmware to be transferred.
4.
Reset the module by depressing the reset switch with a pointed object,
such as a pencil. The power and card fail LEDs should be blinking.
5.
Click on Transfer to begin the module firmware transfer.
If the Transfer button is not pressed within 30 seconds of resetting the MLC, the
module will revert back to operation mode.
6.
After the transfer is completed, click on the
button to view the transfer
detail status.
7.
Disconnect the USB cable and reset the module.
Find MLC Software Version
To check for the current version of MLC software in an installed MLC, go to the PMI/
PMI-2/PMI-3 (XLS), FCM2041-U2 (Desigo Fire Safety Modular), FCM2041-U3
(Cerberus PRO Modular) and press the Menu button, select Report, press the More
Info button and select the MLC at that address. Press the Configuration soft key,
press Appl Rev for the Application Version and press View.
WIRING
All field wiring to the MLC is connected to the terminal blocks of the CC-5/CC-2 card
cage slot in which it is installed.
To Connect External Wiring
1.
Loosen the screw of the terminal by turning it counterclockwise.
2.
Insert the wire into the side of the terminal block.
3.
Tighten the screw of the terminal block by turning it clockwise.
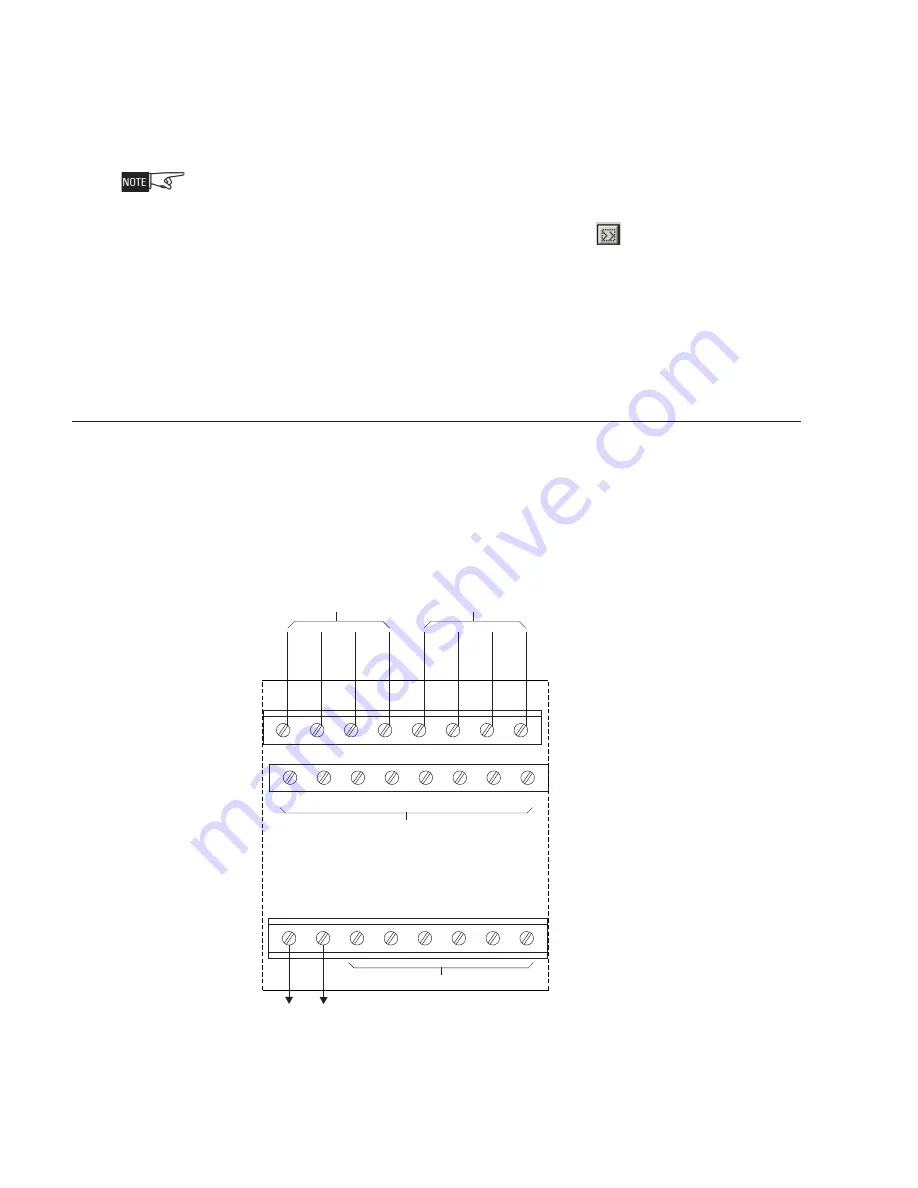
Figure 3
Wiring The 24VDC Power Lines To The MLC Slot In The CC-5/CC-2
1
2
3
4
5
6
7
8
9
10
11
12
13
14
15
16
17
18
19
20
21
22
23
24
24V+
LOOP 1
LOOP 2
24V-
TO 24VDC FROM THE PSC-12
ONE SLOT OF CC-5/CC-2
DO NOT USE
DO NOT USE