s
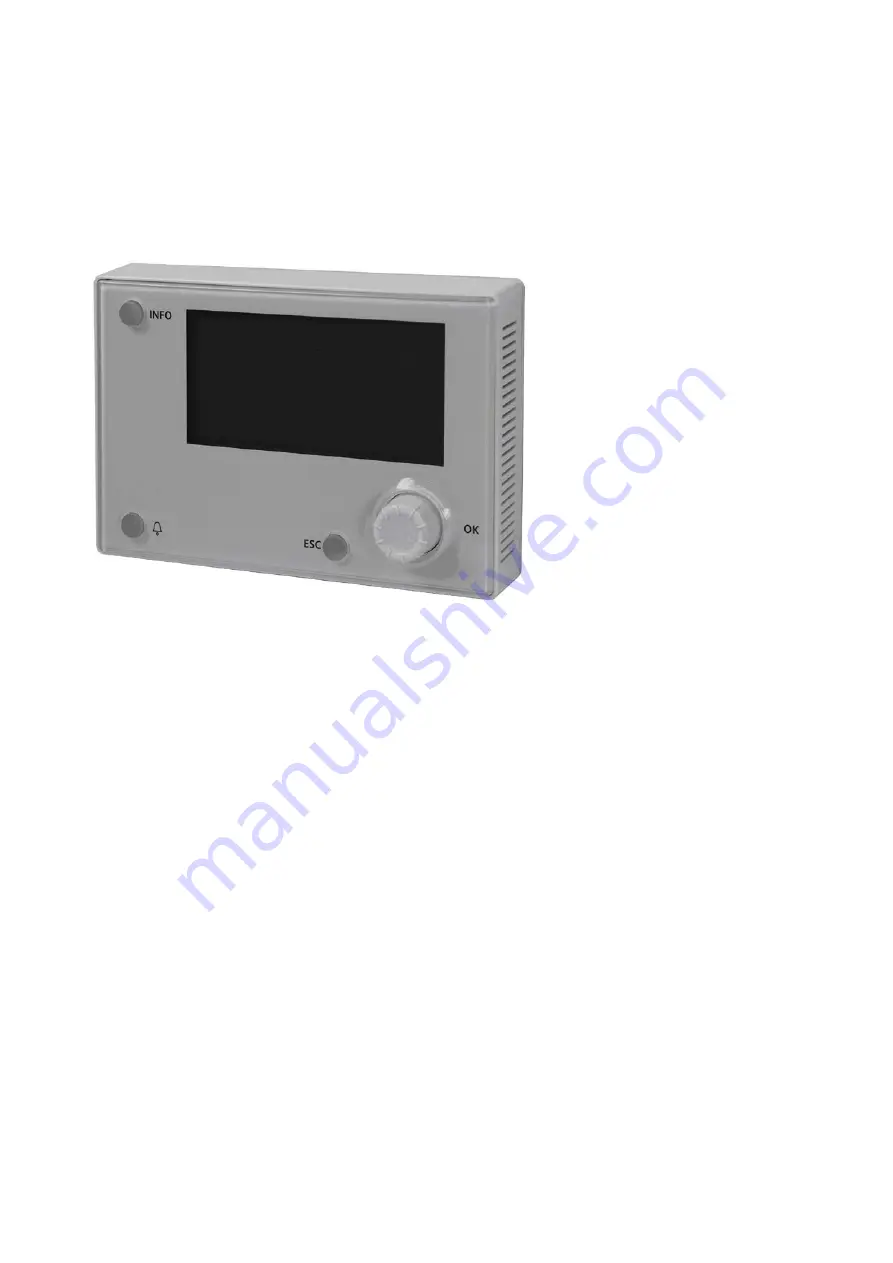
Climatix
TM
Climatix HMI-DM POL895.5X/XXX
Basic documentation
CB1P3916en02 2015-07-02
Building Technologies
Page 1: ...s Climatix TM Climatix HMI DM POL895 5X XXX Basic documentation CB1P3916en02 2015 07 02 Building Technologies ...
Page 2: ...ding technologies 2015 07 02 Siemens Switzerland Ltd Building Technologies Group International Headquarters Gubelstrasse 22 CH 6301 Zug Tel 41 41 724 24 24 Fax 41 41 724 35 22 www siemens com sbt 2013 2015 Siemens Switzerland Ltd Subject to change ...
Page 3: ... connection 7 2 2 Remote connection 7 2 3 Network with both local and remote connection 8 2 4 USB interface 8 3 HMI DM overview 9 3 1 Function keys 9 3 2 LED indicators 10 3 3 Display specification 10 4 Functions and operations 13 4 1 Start up 13 4 2 HMI settings 13 4 3 Controller access 16 4 4 Log in 18 4 5 Log off 22 4 6 Switching to another controller 23 4 7 Context helper 23 4 8 Parameter list...
Page 4: ...been instructed by Siemens Building Technologies or their delegates and whose attention has been drawn to potential risks When wiring the system high voltage section must be strictly segregated from the AC 24 V safety extra low voltage SELV section in order to ensure protection against electric shock hazard Always observe the limits for storage and transport specified in the relevant Data Sheets T...
Page 5: ...de important information requiring appropriate attention Paragraphs with this symbol provide tips The following abbreviations are used in this document Abbreviation Explanation BSP Board Support Package operating system HMI Human Machine Interface operation unit HMI DM Climatix Dot Matrix HMI POL895 xx HMI IB Climatix In Built on POL4xx 6xx HMI SG Climatix Segmented HMI POL822 xx HMI TP Climatix T...
Page 6: ...ence documents The following documents contain further information on the products described in this document Document Document No 1 Data sheet Climatix HMI DM CB1Q3941en 2 Mounting instructions Climatix HMI DM CB1M3940en 3 Climatix controllers POL6xx and I O modules POL9xx Basic documentation CB1P3903en 4 CE declaration of conformity POL895 CB1T3941xx 5 Environment product declaration CB1E3940_01...
Page 7: ...ler is 50 m the other is unshielded cable and its maximum distance is 3 m Without additional power supply one single Climatix 600 400 controller can only supply one HMI DM For detail information refer to Mounting Instruction CB1M3940en 2 2 Remote connection HMI DM can be connected to controller via process bus It is possible to connect in the same system several HMI DM controllers and other Climat...
Page 8: ...tails The HMI DM must exit from the connection with one controller before accessing to another one 2 3 Network with both local and remote connection More than one HMI DM can access to one dedicated controller simultaneously no matter whether the connection is local or remote One locally connected HMI DM and other remotely connected HMI DMs can work together The connection of example is shown as fo...
Page 9: ...onfirm the selection Press and hold If logging in with one user level press and hold key ROLL to activate the log in off page If not press and hold key ROLL to redirect to the password entering page ALARM Press For how to activate and switch among alarm related pages refer to Alarm Management for details INFO Press If users have defined which page it redirects to and the current user level has eno...
Page 10: ...upported For Eastern Asian characters such as Chinese font size 12 12 pixels width height is supported Here are the examples LED Name Status Description ALARM Flashing in red To indicate active but unacknowledged alarm exists Constant light in red To indicate active alarms exist but all alarms acknowledged OFF To indicate no active alarm exists INFO Flashing in red and green To indicate the HMI DM...
Page 11: ...In a line with more than one strings if the end part of a string is covered by the string of next position will be displayed at the end of the string When this line is highlighted the first string with covered text will scroll automatically character by character To indicate a sub menu exists 3 12 To indicate the total number of lines on this page is 12 and the 3 rd line is currently being selecte...
Page 12: ...ghlighted when the line is selected In the case that 6 12 Latin characters are used maximum 8 lines can be displayed in one screen Maximum 31 characters can be displayed in each line including the submenu indictor In the case that 12 12 Eastern Asian characters such as Chinese are used maximum 8 lines can be displayed in one screen Maximum 15 characters can be displayed in each line including the ...
Page 13: ...Press and hold key ESC on any page to go to the following page 4 2 HMI settings The HMI setting page supports multi language The actual displaying language depends on the template configured in the controller Select HMI Settings on the above page Then press key ROLL to go to the following page The first line indicates the version number 0 99 and the build number 0042 as well as the product ID 00 F...
Page 14: ...ng page 2 Press key ROLL and turn the knob to select the color 3 Press key ROLL to confirm Then the backlight color will be changed The backlight of HMI DM will automatically turn off if there is no operation within a period of time 0 300 seconds configurable Follow the steps to change the backlight turn off time 1 Select Backlight Turn Off Time 2 Press key ROLL and then turn the knob to change th...
Page 15: ...L to confirm the selection The backlight is always ON when the value is set to 0 The contrast ratio of HMI DM screen can be configured from 0 to 100 Refer to Backlight color for value editing The brightness of HMI DM screen can be configured from 0 to 100 Refer to Backlight color for value editing Contrast Brightness ...
Page 16: ...to the HMI DM via process bus it will display the individual address and controllers names of all devices The controllers with submenu are accessible Label Name Description Device name Refer to the device name in process bus Individual address Refer to the unique address allocated to a device in process bus Refer to the situation If the device has not been designated a name in process bus 4 Turn t...
Page 17: ... the HMI DM will begin A process bar will be displayed to indicate the process as follows 6 If the version of controller BSP is above 7 32 the line suppression function refer to Climatix SCOPE online help for details in controller will be enabled and the HMI DM will begin to download the objects A process bar will be displayed to indicate the process as follows 7 After the objects have been downlo...
Page 18: ...ers OEM Factory The access rights of this level are suitable for users who will configure and commission the Climatix controllers The specific access right for each user level can be defined by application engineer The password related templates in SCOPE are listed in the following table which can be defined by application engineer in SCOPE Name No 1 Password entering page 65410 2 Password handlin...
Page 19: ...r different user levels 1 Choose a digit by turning the knob of key ROLL 2 Press key ROLL to confirm the input and the input value will become an asterisk as follows Press key ESC to exit from the current page Press and hold key ROLL to re enter the password 3 Enter correct 4 digit password and it will check if the title line of page 65410 has defined the target page and if the user level has enou...
Page 20: ...arget page 1 Press and hold key ROLL to go to the password entering page Choose a digit by turning the knob of key ROLL 2 Press key ROLL to confirm the input and the input value will become an asterisk Press key ESC to exit from the current page Press and hold key ROLL to re enter the password 3 If the password is entered correctly the page where users activate the password entering page will be d...
Page 21: ...d and entered Press and hold key ROLL at any page except the error report page and the log in off page will be displayed If the application engineer configured that both the password of end user and service user level could be changed only Change Factory Password template page will not be displayed and entered Press and hold key ROLL at any page except the error report page and the log in off page...
Page 22: ...el users can log off from any page The log off procedure is as follows 1 Press and hold key ROLL on any page to enter the log in off page 2 Select LogOff and press key ROLL to exit from the current user level The home page will be displayed as Not Login status After logging in with one certain user level it will automatically log off if there is no operation within a certain period defined in the ...
Page 23: ...x SCOPE online help To display the help information Press key INFO The context helper page is fully programmable and should be pre defined For instance application engineer can define the home page as the context helper of all HMI DM pages In this case key INFO serves as homepage 4 8 Parameter list Turn the knob of key ROLL to browse the parameter information The parameter list page is displayed a...
Page 24: ... change value by hundreds or higher If there is no operation for 0 5 second the indicator will move back to the previous digit A dedicated page is used to edit the binary and enumeration type of value The page of binary and enumeration list is illustrated as follows On this page select an item and press key ROLL A dedicated page is used to edit the multi choice type of value Turn the knob and pres...
Page 25: ...rror occurs the ALARM LED will blink As soon as the alarm is acknowledged the ALARM LED will be in red If no alarm exists the ALARM LED will turn off The alarm related pages in SCOPE are listed as follows Name No 1 Alarm list detail page 65110 2 Alarm list page 65100 3 Alarm history list page 65200 4 Alarm list history settings page 65120 Press key ALARM and the alarm related pages will be display...
Page 26: ...e are unacknowledged active alarms The ALARM LED will be constant light in red if there is an active and acknowledged alarm The specific sorting methods of alarms can be defined by application engineer Users can choose to view the alarm information by the order of time object ID class and state To change the sorting methods select SortOrder1 or SortOrder2 on the Alarmlist historysettings page and ...
Page 27: ...d page will keep the trend history for selected data point Users can change the time axis from 150 to 300 seconds by turning the knob of key ROLL Key Action Description INFO Press and hold To select the data point from menu and show it on the online trend page ESC Press To exit from the online trend page ROLL Turn the knob To adjust the time If users activate the online trend of another data point...
Page 28: ... displayed with an arrow If users select more than two data points the trend of oldest data will be phased out 4 11 Graphical time scheduler HMI DM and HMI TM have graphical time scheduler functionality This function is available with BSP 10 xx or above Other HMI types have only text time scheduler e g HMI IB HMI4Web 1 Define the name for time scheduler e g Enumeration Scheduler or Set point Sched...
Page 29: ...g StptValue or any other Analog Object HMI DM TM with BSP 10 xx or above can still display text time scheduler Set up target page for text time scheduler out of above ranges Those page ranges are dedicated for graphical time scheduler function with HMI BSP 10 xx or above 3 Create a function block for time scheduler in SAPRO as follows 4 The screen will be shown as follows Key Action Description ES...
Page 30: ... Time No line No scheduler entry selected Follow the steps to configure the enumeration scheduler 1 Enter the Enumeration Scheduler page 2 Turn the knob of key ROLL to select the weekday and press key ROLL 3 Turn the knob of key ROLL to adjust the time point by 15 minutes per each ROLL and press key ROLL 4 Turn the knob of key ROLL to adjust the value on the vertical axis The value is displayed on...
Page 31: ...er page 2 Turn the knob of key ROLL to select the weekday and press key ROLL 3 Turn the knob of key ROLL to adjust the time point by 15 minutes per each ROLL and press key ROLL 4 Turn the knob of key ROLL to adjust the value on the vertical axis The value is displayed on the top line Press key ROLL 5 Repeat step 3 through 4 until all scheduler points are set Set point scheduler ...
Page 32: ... underlined with a dash line Press key ROLL 5 Turn the knob of key ROLL to modify the value on the vertical axis The value is displayed on the top underlined by a dash line Press key ROLL 6 Repeat step from 3 through 5 to modify another scheduler point if needed Follow the steps to delete a scheduler entry 1 Enter the Scheduler page 2 Turn the knob of key ROLL to select the weekday and press key R...
Page 33: ...ia SCOPE tool If the firmware version is V10 XXB00YY or higher it is possible to upgrade HMI DM via SCOPE tool and SD card Please make sure the correct upgrade file bin is used otherwise HMI DM will be ruined The procedure of upgrading firmware over SD card is as below 1 Save only the POL12289 bin file in the root directory of the SD card and insert the SD card to the controller 2 Connect the HMI ...
Page 34: ...n file e g Desktop OS File POL12289 bin Press Load button 6 On Communication Setting set followings Target POL895 Communication USB 7 On Loader control menu click Load button Firmware is updating The HMI DM will reboot after the downloading is finished If HMI DM is not recognized by SCOPE tool verify connection between HMI DM and running controller Connect USB cable to a USB 2 0 port or USB 2 0 hu...
Page 35: ...rightness setting on page 15 Controller access on page 16 Log in on page 18 User level setting on page 18 Password management on page 18 Log off on page 22 Switching to other controller on page 23 Context helper on page 23 Parameter browsing on page 23 Integer and float editing on page 23 Key ROLL acceleration on page 24 Binary and enumeration editing on page 24 Multi choice editing on page 24 Ala...
Page 36: ...lding technologies 2015 07 02 Siemens Switzerland Ltd Building Technologies Group International Headquarters Gubelstrasse 22 CH 6301 Zug Tel 41 41 724 24 24 Fax 41 41 724 35 22 www siemens com sbt 2013 2015 Siemens Switzerland Ltd Subject to change ...