E87010-A0519-T003-A7-3RE4
Page 2
Installation
General Maintenance
Siemens Industry, Inc. 5300 Triangle Parkway, Norcross, GA 30092
A5E46948882A-002
Install in accordance with the National Electrical Code in
the United States, or Canadian Electrical Code in
Canada, and any applicable local codes.
1. If the enclosure has a hinged door, the enclosure may be
fastened directly to a solid mounting surface via the four
mounting feet, which are included. All four mounting feet
must be attached to the enclosure using the supplied
hardware to retain the NEMA rating of the enclosure.
Follow the instructions included with the mounting feet.
If the enclosure has a lift-off cover, the enclosure must be
fastened directly to a solid mounting surface via the
mounting holes in the back of the enclosure.
Mounting hardware is not included and any suitable
hardware may be used.
2. If the NEMA Type 3/3R/4/12 enclosure is to be used as a
Type 3R enclosure, drill a 1/8" – 1/4" diameter drain hole
at the lowest point in the bottom of the enclosure.
3. Turn off and lock out the power that will be supplying the
controller.
4. Install conduit and necessary grounding means and wire
controller in accordance with the wiring diagram included
with the controller. Conduit knockouts are provided on the
enclosures with lift-off covers. For the hinged enclosures,
use UL Listed conduit hubs with the same NEMA Type
rating as the enclosure. Joint compound or equivalent is
recommended on conduit threads to prevent water from
entering the enclosure.
5. Check that all wiring is secure and does not interfere with
proper operation of any device.
6. Check that all wiring connections, including factory
connections are proper and tightened to the proper torque
values.
7. Remove all foreign materials and debris from enclosure.
8. For thermal OLRs, set the MANUAL / AUTO switch and
FLA dial as shown in Figure 3a. For solid-state OLRs, set
the Trip Class dial, MANUAL / AUTO switch and FLA dial
as shown in Figure 3b. For more information, refer to the
OLR instruction sheet. The publication number may be
found on the side of the device.
9. Depress the OLR Reset button to make sure the OLR is
not tripped.
10. Close and fully latch the cover / door before applying
power.
11. If a local selector switch is installed, make sure it is in the
OFF position.
12. Apply power and turn the controller on. The contactor
should energize. If it does not energize, troubleshoot the
controller to locate the issue.
Periodically conduct the following inspection and
maintenance tasks.
1. Clean the inside of the enclosure by wiping off
dust and dirt which may have accumulated.
2. Clean weep hole in bottom of NEMA Type 3R
enclosure to insure proper drainage.
3. Check all screws for tightness.
4. Refer to the OLR instruction sheet for
instructions on optional device tests.
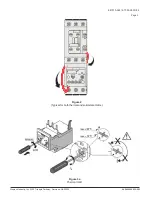
Figure 1
(Typical for both thermal and solid-state OLRs)


