O P E R A T I N G I N S T R U C T I O N S
ZIRKOR302 P Oxygen Analyzer
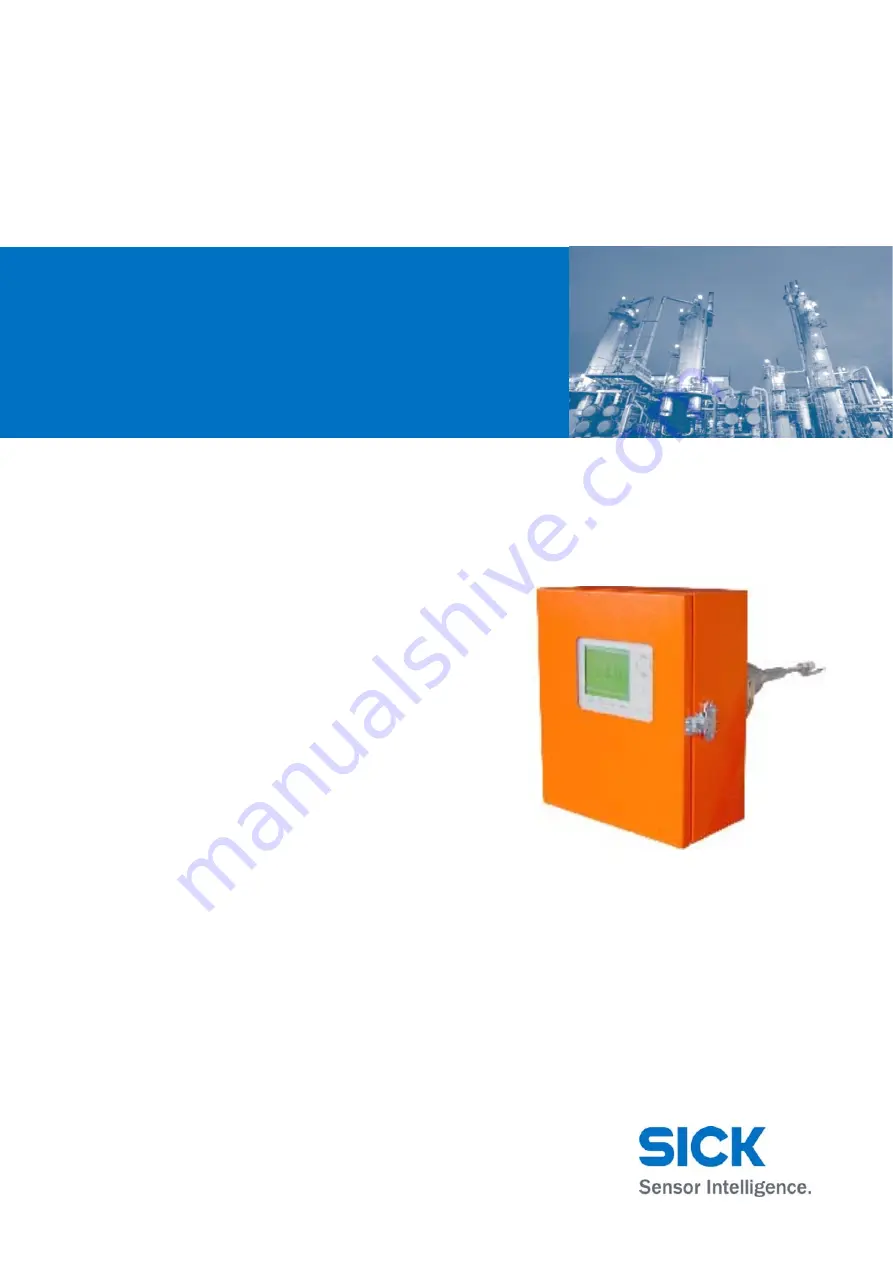
Standalone Version with Measuring Gas Pump
Page 1: ...OPERATING INSTRUCTIONS ZIRKOR302 P Oxygen Analyzer Standalone Version with Measuring Gas Pump ...
Page 2: ...3 1 Prerequisites 26 3 2 Installing the Counterflange 27 3 3 Installing the Gas Extraction Device GED and Protective Pipe 28 3 4 Installing the LAMBDA TRANSMITTER P Oxygen Analyzer 29 3 5 System Settings in Accordance with System Composition Reduced to Case Studies 30 3 6 Installing the Gas Extraction Device and Pre Filter Heater Optional 31 3 7 Installing the High Dust Protective Pipe 39 4 Operat...
Page 3: ... 81 7 14 Replacement of the base electronic 81 8 Disposal 82 9 Optional Accessories 83 9 1 LSB Module with 4 Analog Outputs Voltage alternatively Current 83 9 2 LSB Module with 4 Analog Inputs 86 9 3 LSB Moduel with 4 Digital Outputs 88 9 4 LSB Module with 4 Digital Inputs 93 9 5 Internal Connection of the LSB Module max 2 Pieces 98 9 6 External LSB Module Connections 99 9 7 Activating of LSB Modu...
Page 4: ...and damage to the system Qualified personnel These persons must be qualified by virtue of their expertise training education experience or understanding of the relevant standards specifications accident prevention regulations and properties of the system It is crucial that these persons be able to identify and avoid potential hazards in good time Technical experts are those persons defined in DIN ...
Page 5: ...iately Warranty and liability Our General Terms of Sale and Delivery always apply These are available to the operator as soon as a contract has been concluded Warranty and liability claims for personal injury or material damage shall be excluded if they are attributable to one or more of the following causes The LAMBDA TRANSMITTER P oxygen analyzer and connected components have not been used for t...
Page 6: ...sures the O2 concentration in gases in the hyperstoichiometric range All planning mounting installation commissioning maintenance and repair work must be carried out by adequately trained personnel only and checked by experts You must make sure that The system is used in accordance with the technical data and specifications regarding usage assembly connection ambient and operating conditions see t...
Page 7: ...n the device e g for transportation and storage as well as maintenance and inspection requirements are provided If the system is used or handled incorrectly this can pose a risk to health or cause material damage To prevent damage observe the safety precautions at all times If the LAMBDA TRANSMITTER P is used as a sensor in conjunction with a control system the operator must ensure that a failure ...
Page 8: ... this reason you must observe the following Switch the system off before you open it If this is not possible wear protective clothing and a mask Attach warning signs in the vicinity of the mounting location Close the opening immediately Cover flange plates dummy flanges are available as accessories WARNING The flange and the tube of the LAMBDA TRANSMITTER P is very hot Cooling down before removing...
Page 9: ...tial pressure N ZrO2 electrolyte pipe Pt electrodes Flow control capillary Calibration gas Differential pressure V Probe section Absolut pressure Calibration GED gas extraction device Measured gas System Bus LSB Analog output 0 4 20mA 0 10V Connection terminals Absolut pressure sensor Differential pressure sensor Processor card Electronics power pack Electronic section Measuring gas pump frequentl...
Page 10: ... vol I mA I Current as function of oxygen H Electric sensor heater M Test gas A Adjustment value Iair 21 vol O2 d Test sample gas quantity This characteristic shows that it is not necessary to know the proportionality factor or the measuring gas quantity in order to measure the oxygen It is sufficient to assign the oxygen concentration O2 21 to the probe current measured with air I air and then dr...
Page 11: ...ing principle is extremely resistant to contamination provided that the LAMBDA TRANSMITTER P Lambda transmitter is used properly Cross sensitivity with non combustible gas components e g H2O N2 CO2 NOX SO2 etc is not an issue When oxygen is present combustible gas components are incinerated on the platinum coated surface of the sensor which is approx 800 C 1470 F Example 2CO O2 2CO2 This means tha...
Page 12: ...g and adjustment with ageing compensation for the ZrO2 measuring cell Sensor element outside of the flue gas system stack no ignition source in the flue gas duct TÜV confirmed No gas preparation required measurement directly in the humid flue gas Test gas temperature of max 950 C 1750 F with metal extraction and up to 1 600 C 2900 F with ceramic gas extraction device A small measuring gas quantity...
Page 13: ...rameter 297 has to be set The setting of the calibration offset parameter P297 at works 0 3 vol of O2 The influence of the rel humidity of air in relation to the air temperature is shown in the following diagram 1 10 1 00 0 90 0 80 0 70 0 60 0 50 0 40 0 30 0 20 0 10 0 00 0 5 10 15 20 25 30 35 40 45 50 55 60 Temperature C Calibration offset in vol O 2 P297 90 80 70 60 50 40 30 20 10 relative humidi...
Page 14: ... with fixed zero cycle the calibration offset is applied at high O2 values higher than 10 0 8 16 24 32 400 600 200 850 C 800 C O2 vol I mA Influence of the calibration offset Iair Test gas d 0 42 l h d 0 5 l h Inflluence of the calibration offset 1 560 F 1 470 F 0 11 gal hr 0 13 gal hr ...
Page 15: ...flue gas The diagram shows the typical ratio of CO2 to H2O in the flue gas calibration with dry air Fig 2 3 Fault effect for different fuels 0 2 4 6 8 10 Measuring value vol O2 Natural gas Propane Brown raw coal Fuel oil EL Fuel oil S Wood air dry Brown coal briquette Hard coal 0 10 0 05 0 00 0 05 0 10 0 15 0 20 Butane NOTE Fuel specific flow rate compensation is deactivated by default It can be a...
Page 16: ...en switched off Once the probe temperature is above 260 C it can be interrupted at any time as follows Via the multi function key Via the remote display software Via the display control unit During the cold start delay the system outputs either a substitute value or the current measured value Factory setting Non substitute value Can be setted via parameters 361 and 362 Fig 2 4 Intelligent cold sta...
Page 17: ...eating power The internal resistance of the ZrO2 sensor is measured and if necessary an aging compensation increasing the heating power is accomplished This takes place after the 1 calibration after coldstart and then approx 1x per week every 10000 minutes The measured internal resistance of the sensor Ri is registered into the table in Par 1805 1898 Thus the aging of the sensor can be supervised ...
Page 18: ...sorted the newest entry always stands at the beginning Examples for text parameter in the display Calibration Drift History Operating Hours Par 3600 7430 h Calibration modified about Par 3601 0 07 Operating Hours Par 3602 7454 h Calibration modified about Par 3603 0 03 e c up to Par 3679 Not used values are setted to 0 The values can be read aout via the display or via the Remote Display Software ...
Page 19: ... Electronics section 2 Probe section Fig 2 6 LAMBDA TRANSMITTER P installed on the flue gas duct side view 1 2 3 5 6 4 1 Electronics section 2 Flange 3 Counterflange 4 Insulation 5 Protective pipe for gas extraction device with sintered metal pre heater 6 Gas extraction device GED 1 2 ...
Page 20: ... PC interface for connecting the remote display software DANGER Before opening the internal door entry electronic section disconnect line voltage Condensate tanks for differential and absolute pressure measurements Fig 2 8 In sheet steel housing internal view of electronics section Probe and electronics transformer Measuring gas pump Pump protection filter Automatic calibration unit Probe section ...
Page 21: ...re measuring element 4 O2 measuring cell inside 5 Measuring gas outlet 6 Exhaust device and flue gas return Fig 2 10 Probe section connection side 1 2 3 4 5 1 PT100 temperature measuring element 2 Flue gas return connection for measuring gas pump 3 Measuring gas sampling connection for condensate tank 4 Connections for differential pressure sensor 5 Air Calibration gas inlet connection for pressur...
Page 22: ...Power terminal NOTE The drain plug for the condensate container does not normally need to be opened The LAMBDA TRANSMITTER P is equipped with an automatic condensate drain with an integrated hose pump 6 7 pin LSB CAN female connection to gas extraction device and filter heater 7 7 pin LSB CAN male connection to other devices with a LSB CAN terminal 1 NC 2 CAN GND 3 CAN low 4 CAN high 5 GND from EV...
Page 23: ...Hastelloy X Protective pipe Material Inconell 600 Pre filter Material Hastelloy X Test gas temperature from 950 C to 1400 C 1750 F to 2550 F Ceramic gas extraction device Capillary tube Material Al2O3 Protective pipe Material Al2O3 Pre filter Material Al2O3 Filter mesh 50 µm Test gas temperature up to 1 600 C 2900 F on request Test gas temperature below 180 C 355 F The temperature across the entir...
Page 24: ...ing aid max temperatures Fig 2 15 Using a gas extraction device and filter heater 2 5 3 Length of the Gas Extraction Device Max length of the gas extraction device 3m 9 84 ft Recommended length Only as long as required Meas gas Heater required for gas extraction device and filter Acid dew point 180 C 355 F Water dew point 100 C 210 F Heater required for gas extraction device Dimension X in mm Max ...
Page 25: ... Pipe with Aluminum Core The protective pipe with an aluminum core standard ex immersion depth 500mm distributes the heat of the measuring gas equally across the entire length of the gas extraction device An electrical heater is not usually needed Protective pipe with aluminum core without heater Type 6 57 R 3441 R 3444 IMPORTANT With horizontal installation it is recommended that the protective p...
Page 26: ...d exhaust vapors a sintered metal pre filter must also be used NOTE Corrosion on the gas extraction device indicates that the temperature is below the dew point If the gas extraction device is blocked this is a sure sign that the temperature has fallen below the dew point The desired heater temperature should never be set higher than required The greater the heat output the shorter the service lif...
Page 27: ...eason a wire must be used to secure parts that are to be cut away Appropriate measures must be taken to protect against hot explosive or poisonous flue gases that may escape 3 Align the counterflange see diagram and weld it securely to the measuring point The two threaded holes M8 must face up down Isolation waterproof and thermic Fig 3 2 Align the counterflange with the measuring point and weld o...
Page 28: ...d with anti seize paste type 650 R 1090 1 Remove the protective cap from the measuring gas inlet 2 Mount the gas extraction device a and carefully secure max 6 Nm 3 Screw in the absolute pressure capillary b by hand 4 Install the protective pipe f with the sintered metal filter d on the probe installation fitting 5 Align the baffle plate c in such a way that it protects the filter d against contam...
Page 29: ... Device on the LAMBDA TRANSMITTER P 2 Remove the dummy cover if installed from the counterflange 3 Place the seal type 657 R 3540 between the threaded rods of the counterflange 4 Install the LAMBDA TRANSMITTER P 5 Connect the LAMBDA TRANSMITTER P Power supply LSB BUS if required LSB modules if required Analog output if required RS232 interface for connecting a PC with remote display software if re...
Page 30: ... 12 1 1 1 0 0 yes MEV filter heater LSB default ON The variants with ONLY a filter heater have been omitted inapplicable RS422 on board can be switched between RS422 and CAN LSB using the jumper setting see section 12 5 1 Used with the GED filter heater LSB OR for LSB modules LSB OR for the RS422 GM31 connection RS422 Second optional RS232 interface if the RS422 GM31 connection is used and the fir...
Page 31: ...e for gas extraction device heater incl 2 M8 x 35 securing bolts g DN80PN6 flange seal Type 657R3542 h Safety device for protective pipe incl 2 splints i Copper seal for protective pipe j Cutting ring 2x k Scew caps 2x l baffle plate with the filter attachment m Strut of the protective pipe n Cable box for gas extraction device and pre filter heater power pack incl feeder and 5m 16 4 ft LSB CAN li...
Page 32: ...fragile Once installed adjustment cannot be carried out without the filter 10 Install the safety device for the protective pipe h and secure using the two splints provided 11 Push the screw caps k and the cutting ring j over the connection cable for the pre filter heater d 12 Route the connection cable for the pre filter heater d through the second threaded connector end c on the connection flange...
Page 33: ...device and the sintered metal pre filter Note this is supplied in the gas extraction kit with heater for gas extraction device and gas extraction kit with gas extraction device and filter heater Design Wall mounting case IP 65 Features configurable heating power via LAMBDA TRANSMITTER P Interface LSB BUS or CANopen for connection to LAMBDA TRANSMITTER P Fig 3 6 Power pack of the gas extraction dev...
Page 34: ...60Hz Changing trafo plug to X2 Exchanging F1 see 4 6 3 Power consumption only GED max 400VA GED and pre filter max 500VA 1 L 2 N 3 4 PE 2 3 4 1 7 pin LSB CAN connection to LAMBDA TRANSMITTER P 7 pin LSB CAN connection to other devices with a LSB CAN terminal Cable gland M20 for pre filter heater Cable gland M20 for GED heater with PT100 Fig 3 7 Suitable cable connection ...
Page 35: ... BUS X13 Æ 11 12 Electrically connection GED heating X13 Æ 13 14 Electrically connection prefilter heating X14 Æ Electrically connection PT100 measuring element for the GED heating X15 Æ Trafo connector secondary winding AC42V DIP Æ Micro switches SW1 SW12 BR1 Æ Position 1 2 Æ Normaly operation mode Position 2 3 Æ Mode for software update BR2 Æ Position 1 2 Æ 120R termination resistor SYSTEM BUS d...
Page 36: ...e corresponding LED flashes very rapidly approx every 0 2 sec instead of every second A current of approx 0 6 A must be flowing through the filter heater and 1 3 A through the gas extraction device heater to trigger monitoring 3 6 6 Assignment of DIP switches on the board of the power pack SW 1 OFF CAN SW 1 ON LSB software version 4V24a or more recent SW2 only relevant for standalone versions SW 2...
Page 37: ...NSMITTER P and the power pack see also chapter 4 5 Check the DIP switch 1 on power supply unit for MEV Filter heater and the parameter setting in LAMBDA TRANSMITTER P Set DIP switch 1 on electronic board of the power pack for MEV Filter heater for operation without EvU ON LSB operation for operation together with EvU OFF CAN operation Set parameters service level in LAMBDA TRANSMITTER P Parameter ...
Page 38: ...heater Lenght 100mm 3 9 in External diameter 24mm 0 9 in Conductor 2 5 sqmm Diameter cond min 5mm max 12 5mm Item no 657R3167 5 pole for GED heater with Pt100 Lenght 150mm 5 9 in External diameter 35mm 1 4 in Conductor 2 5 sqmm Diameter cond min 10mm max 19mm Item no 657R3168 Type of protection IP67 Range of temperature 20 C 66 C 4 150 F 3 6 10 Dimensions of the powerpack ...
Page 39: ...ns d Adapter flange for protective pipe for gas extraction device e Grub screw f M8x25 hexagon socket screws with spring washer for securing the adapter flange to the counterflange g Standard flange seal for the adapter flange h Seal set Fig 3 9 Installing the gas extraction device for high dust applications 8 a a b b 1 d f f g c d f f g c 2 3 4 5 h3 h1 h2 h1 h3 h1 h2 h1 6 IMPORTANT All glands and...
Page 40: ...he spring washer f 5 Place the standard seal g between the threaded rods of the counterflange a 6 Attach the seal set h to the probe unit on the LAMBDA TRANSMITTER P Make sure that you do this in the correct order h1 Pressure disk h2 Graphite seal for high dust applications h1 Pressure disk h3 Disk spring 7 Remove the baffle plate from the protective pipe for the gas extraction device 8 Install th...
Page 41: ... T2 operation Toggle the displayed warning fault Briefly Reset the displayed warning fault 3 sec Quick start of measuring gas pump interruption of cold start 3 sec 6 sec Some warnings faults cannot be reset if the fault is still present or the routine is still running If more than one warning fault is present the key must be pressed for 6 seconds The mode Maintenance can be activated via maintenan...
Page 42: ...alarm is present Function Key operation Toggle the displayed alarm fault Briefly Reset the displayed alarm fault 3 sec Quick start of measuring gas pump interruption of cold start 3 sec 6 sec Some alarms faults cannot be reset if the fault is still present or the routine is still running If more than one alarm fault is present the key must be pressed for 6 seconds The mode Maintenance can be activ...
Page 43: ...s 31 and 32 Measured O2 value Probe voltage Probe current Measurement Conversion DIP switch SW1 SW2 Measured O2 value 0 2 5 V 0 25 O2 off off Probe voltage 0 1 4 V 0 1400 mV on off Probe current 0 1 V 0 1000 mA off on 4 4 Remote Display Software For operation of the LAMBDA TRANSMITTER P via RS232 interface To backup and restore the data set Instructions are provided in the software ...
Page 44: ... is overshot Li 4 The limit value is below NOTE The limit values Li 1 to Li 4 are only displayed if the limit value monitoring function has been activated meas Measurement cal Calibration par Parameter setup diag Diagnostic 4 5 1 Functions of the menus meas meas Brightness and contrast Limit values Menu keys Menu keys Enter key Cursor keys ...
Page 45: ...Operation and Display Controls Display Control Unit 45 cal ENTER ENTER ENTER ENTER see chapter 8 3 see chapter 8 2 ...
Page 46: ... and Display Controls Display Control Unit 46 exit Return to previous menu exit Return to previous menu clear Reset to Released customer level 0 0 1 2 9 A B 0 0 Z Y A 9 8 0 0 psw Password entry Confirm password ...
Page 47: ...ange for Change of parameter Default value base value in EPROM ÒR eleased customer levelÓand parameter type b operation k customer s service f production w write r read Scroll back to previo us group of paramet er group group Scroll forward to next group of paramet er Display all parameters These are divided into groups These groups contain other parameters ...
Page 48: ...previous menu without change 2 2 2 2 dflt Confirm default value 30 Parameter cannot be changed 30 Parameter cannot be changed 30 Value flashes Mode of change is active OK Confirm change Scroll back to previous group of parameter group group Scroll forward to next group of parameter exit Back to previous menu s l view s l ...
Page 49: ... recently Switch to older entries exit Back to prev ious menu Switch on off maintenance mode Maintenance switch S1 must be set on Òo ffÓ Establish connection with other LT dev ices via LSB Confirmation of error Note Not all alarms faults can be confirmed Carry out troubleshooting P V exit Return to prev ious menu diag1 Via Trigger in par 118 the fault history can be reseted ...
Page 50: ...g 354 358 Curve 7 2300 2315 O2 test data configuration 360 362 Curve 8 2350 2365 Monitor output 380 383 Curve 9 2400 2415 Differential pressure adjustment 386 396 Curve 10 2450 2465 Heater for gas extraction device 400 409 Curve 11 2500 2515 Differential pressure sensor 410 416 Curve 12 2550 2565 Pressure compensation 420 439 Calibration drift history 3600 3679 Pressure measurement 440 442 Tempera...
Page 51: ...alibration will be listed in a history par 1570 1791 The history can be deleted via par 119 See also chapter 3 1 10 Typical values during initial commissioning after calibration with compressured air 20 96 vol O2 Probe current uncompensated 500 50 mA Differential pressure via the capillary 20 30 mbar 0 3 0 43 psi Temperature of capillary 300 500 C 572 932 F Pressure increase during Calibration rea...
Page 52: ... timer it makes first a check up If the actual O2 value on air is inside the range of 21 O2 0 2 P 250 it will be carried out no calibration by reason of reduction of the routine Also will be issuded no Zero Span values If the Zero Span values will be required via a digital input will be always be carried out the value of the last complete calibration Will be set P 250 Check up tolerance to 0 will ...
Page 53: ...ry ageing compensation is carried out every 10000 min the measured Ri is registered into the table in par 1805 1898 2 calibration An optional second automatic calibration is carried out after aging compensation Wait for measure Whenever the device is switched to or from measurement mode the device remains in the wait for measurement status for a short period a few minutes to ensure that the measur...
Page 54: ...2 When conditions are stable measuring gas temperature this occurs at almost regular intervals Fig 5 1 Jumping display values Vol O2 5 3 2 Measurement in Flue Gases with a High Water Content Downstream of Wet Scrubber Flow rate compensation is recommended in highly unbalanced flue gases with a high moisture and low CO2 content see General Description Flow Rate Compensation Parameter group 1280 to ...
Page 55: ...fore See figure 6 2 Fig 5 2 Theoretical max deviations of the O2 concentration in wet and dry measurement Fuel natural gas or oil O2 wet Natural gas CH4 Oil CH2 x 0 8 0 7 0 6 0 5 0 4 0 3 0 2 0 1 0 1 2 3 4 5 6 O 2 O2 dry O wet O2 Fig 5 3 Calibration plot for the concentration values of O2 dry and O2 wet O 2 wet O2 dry 12 10 8 6 4 2 2 0 4 6 8 10 12 Gas Oil O dry K x O2 wet 2 O2 concentration range C...
Page 56: ...ce for longer than 10 weeks or if measurement is deactivated you are advised to remove the Lambda transmitter before or immediately after you have switched off the power supply This prevents the flow control capillary from corroding and becoming blocked NOTE Once removed the LAMBDA TRANSMITTER P can be stored for an unlimited period The zirconium dioxide measuring element is only subject to wear d...
Page 57: ...ress multi function key T1 for 3 sec fault 6 2 2 LED Code Faults Off Legend LED Flashes Lights up 7 8 9 10 11 12 Faults No fault Cell damaged Flow throughput too low probe current 200 mA 1 Difference pressure too low Defective probe heater Probe broken wire Wrong current input of solenoid valves Flue gas pump I Probe too high throughput Dynamic is missing Dirty pre filter Error analog output Error...
Page 58: ...g Delta p by calibration too low P abs to high too low Probe tempeture to high too low Addon heating defect Capillary nearly blocked Defective MEV GED heater temperature measuring Not used Probe current limitation Lin voltage to high too low Calibration air flow to low No constant probe current while calibration Not used Not used Not used Not used Not used Not used Not used Dynamic is missing Dyna...
Page 59: ...y via Display Control Unit One or more faults are present Press diag 1x In the diag menu all faults and warnings are listed Press hist 1x The fault history is present Press exit 3x for changing to the main menu Via Trigger in par 118 the fault history can be reseted ...
Page 60: ...lue gas pump Flue gas pump defective Check replace I Probe too high throughput Gas extraction device not secure Measuring chamber broken ZrO2 measuring cell broken Adjusting screw at capillary lose Capillary GED flow to large Short circuit between pin 94 and 97 on probe plug Differential pressure sensor out of the socket or defective Secure gas extraction device Replace measuring chamber Replace m...
Page 61: ... heater resistance replace 4 6 Delta p by calibration too low Calibration unit defective No pre filter broken off Check replace Check replace 3 3 8 5 3 P abs to high too low Absolut pressure sensor out of the socket or defective Incorrect setting factory setting max permissible pressure 1100 mbar min permissible pressure 700 mbar Check replace Correct setting Consult manufacturer 8 12 3 3 Probe te...
Page 62: ...in gas supply Measuring chamber broken Check pressure increase and increase smoothing par 360 Replace sintered metal pre filter Check seals glands Check replace 5 5 5 8 5 3 8 5 10 Probe exchanged If yes activate P 104 Has the measuring cell been replaced If so activate parameter 104 5 5 3 Housing temperature too high The internal temperature is greater than 75 C Check housing fans Check switching ...
Page 63: ...dual cases the correctness of the calibration can be examined by the task of test gases on zero and reference point Due to the measurement principle becomes the examination of the zero point no nitrogen but a test gas with 2 Vol O2 In all other respects the instructions of the manufacturer are to be considered 7 1 2 Functional test and calibration abridgement from TÜV inspection report For the exe...
Page 64: ...al NOTE The calibration is protected with a password Which release level is to be used can be set in par 260 OFF Æ No password is necessary CUSTOMER Æ Customer s password is necessary factory setting SERVICE Æ Service password is necessary MAINTENANCE Æ Maintenance mode is necessary CUSTOMER MAINTENANCE Æ Customer s pw Maintenance mode is necessary SERVICE MAINTENANCE Æ Service password Maintenanc...
Page 65: ...rox 0 5 l h required for the measurement Each calibration is registered into calibration history Par 1570 1791 The calibration history can be reseted via par 119 7 3 Check with Test Gas A check can be triggered as follows Display control unit optional Via the PC in conjunction with the remote display software optional NOTE The calibration is protected with a password Which release level is to be u...
Page 66: ... this time no hose may be attached to the calibration gas inlet since the pump adjusts the necessary positive pressure As soon as the text Manual operation open test gas appears the test gas with a pre pressure by 1 bar can be attached at the calibration gas inlet Æ ENTER 3 Manal calibration Æ Change value by arrow keys 4 End of calibration Æ Press OK Æ End of calibration back to measure Æ ENTER A...
Page 67: ...2 Switch OFF LAMBDA TRANSMITTER P Set plug in jumper BR10 in LAMBDA TRANSMITTER P on processor board into position P enables programming mode Connect PC at RS232 interface from LAMBDA TRANSMITTER P Switch ON LAMBDA TRANSMITTER P no display Start LT Flash Update Software LTFlashUpdate V1 2 exe Select COM Port and CONNECT to LAMBDA TRANSMITTER P ...
Page 68: ...e Software V1 2 68 Datas are reading out and a backup file will be created Continue with NEXT Select directory for bachup file and save it Continue with NEXT Select dirctory with update file and open it The file for update must be named so that it begins with update ...
Page 69: ... old device P 48 PW probe heating P 51 Value of calibration P 57 Flow rate P 70 bis 81 All counters and times P 121 MEV pre filter heating ON OFF P 358 Cabinet cooling power on time P 386 Nomial value of differential pressure P 392 bis 395 Limits for differential pressure P 400 bis 409 Setting of MEV heating P 411 Offset differential pressure sensor P 970 up to 973 Setting display language and con...
Page 70: ...the lower safety splint 2 Unscrew the protective pipe f and carefully push forwards to remove 3 Unscrew in the absolute pressure capillary b by hand 4 Unscrew the gas extraction device a and carefully push forwards to remove IMPORTANT The tip of the gas extraction device which projects into the probe is very hot 5 Check the penetrability of the gas extraction device Place one side into a tumbler a...
Page 71: ... Remove the extraction attachment If the sintered metal filter cannot be removed it must be drilled out and replaced Replacement filters are available in packs of 10 order no type 6 55 R 2803 2 Clean the extraction attachment and sintered metal filter 3 Install the extraction attachment 7 5 3 Sintered Metal Pre Filter Contaminated To prevent errors occurring due to overpressure during adjustment t...
Page 72: ...ctor 5 Remove all 3 hoses from the probe body To do so press down the blue connectors 6 Remove the thermal cover plate by pulling the pins Combination pliers can be used here 7 Separate the LAMBDA TRANSMITTER P from the probe body at the neck of the housing and carefully remove To do so remove the 4 nuts M8 width across flats 13 The probe body has now been separated The measuring cell and temperat...
Page 73: ...owards the heater is defective and must be replaced If the resistance is within the permissible range the electronics are defective and the base electronics must be replaced 7 8 Replacing the Measuring Cell and Measuring Cell Heater Required tools 1 5 and 2 5 hexagon socket spanners Fig 7 5 Sensor unit 2 5mm Fig 7 6 Measuring cell with heater 1 2 1 3 5 4 1 Teflon seals 2 Sensor contact 3 Sensor 4 ...
Page 74: ...o Teflon seals see picture During installation make sure that the sensor does not come into direct contact with the metal sleeve 8 Reset the heater control to the base value To do so set parameter 104 to Trigger and acknowledge with Enter Once the command has been executed parameter 104 returns to 0 7 9 Cleaning and Replacing the Extraction Device Incl Heater Fig 7 7 Probe section connection side ...
Page 75: ...0 160 240 300 0 1 Remove connector X15 2 Measure the resistance between pins 24 and 26 on connector X15 At room temperature this should be approx 110 Ω see graph If this is not the case the PT100 is defective and must be replaced 7 10 1 Replacing the PT100 Thermocouple Fig 7 9 Probe section connection side 1 1 PT100 thermocouple Required tools Size 8 spanner 1 Remove the probe body see Removing th...
Page 76: ...r d Graphite seal for measuring chamber e Absolute pressure intake pipe f Disk springs g Aluminum filler ring a Protective pipe intake b Metal O ring c Test gas adapter d Graphite seal for measuring chamber e Absolute pressure intake pipe f Disk springs g Aluminum filler ring Required tools Screwdriver 0 5 x 3 5 Spanner 5 5 mm 8 mm 10 mm 13 mm 14 mm 24 mm Combination pliers Hexagon socket spanners...
Page 77: ...amber 77 7 11 1 Removing the quartz glass chamber Fig 7 11 Removing the quartz glass measuring chamber work steps specified part 1 4mm 6 a 7 b e 7 c 8 9 l j 10 11 12 h 13 Fig 7 12 Removing the quartz glass measuring chamber work steps specified part 2 f g h d 13 14 ...
Page 78: ...ve pipe intake a 7 Remove the protective pipe intake a and the metal O ring b 8 Loosen the absolute pressure intake pipe e using the spanner and turn to the side 9 Loosen the screw cap for the measuring gas adapter c using a spanner and remove the measuring gas adapter c 10 Remove both hose connections l 11 Remove the 6 hexagon socket screws on the upper flange j by rotating them 90 diagonally opp...
Page 79: ...ance Replacing the Quartz Glass Measuring Chamber 79 7 11 2 Installing the quartz glass chamber Fig 7 13 Installing the quartz glass measuring chamber work steps specified h 3 f g 2 l j 4 5 6 b e c 7 8 9 4mm a 9 10 h d 1 ...
Page 80: ... ring b and insert the protective pipe intake a 10 Secure the 6 hexagon socket screws on the protective pipe intake a by rotating them 90 in diagonally opposite sequence 11 Install the PT100 thermocouple see 8 10 12 Install the measuring cell and heater see 8 8 13 Install the probe body see 8 6 14 Install the protective pipe for the gas extraction device the gas extraction device and the absolute ...
Page 81: ...secure See also chapter 12 5 2 7 14 Replacement of the base electronic Pressure sensors Analog output card Mounting of the processor card Remove both pressure sensors do not remove the hoses Remove analog output card Unscrew the mounting of the processor card and remove processor card out of the 96 pole socket Be careful Remove all plug in connectors Unscrew the 7 fastening bolts of the base elctr...
Page 82: ...placement of the base electronic 82 8 Disposal The LAMBDA TRANSMITTER P oxygen analyzer was designed to minimize the impact on the environment The individual modules can be easily separated and sent for recycling ...
Page 83: ...tatus of outputs is transferred to the data bits If an analog output module with the same address is used in the system the voltage current measured there will be reproduced at the corresponding output The 4 analog output values 1 to 4 P530 to P569 are output to the analog output module activate using P3820 The address to be set is shown in parameter 3820 If voltage modules are used 10 V is equal ...
Page 84: ...robe current Probe voltage Internal O2 value 9 1 4 Parameter 531 541 551 561 Here set the measurement range for each analog output The following settings are possible 0 20 mA 0 10 V 4 20 mA 4 20 mA error 0 mA 4 20 mA error maintenance 0 mA 9 1 5 Parameter 532 542 552 562 Here set the start of the measurement range for each analog output E g 0 for 0 O2 9 1 6 Parameter 533 543 553 563 Here set the e...
Page 85: ...ltage Red LED for BUS error messages 663R4025S with connection cable 663R4029S with connection cable 663R4024 Analog Outputs Voltage Output current 10 V DC Analog output Output voltage Measurement error tolerance Response time from receiving to sending Recovery time 5 mA 0 10 V DC U N 32 x 9 9165 mV 20 mV 1 1 U output voltage in V N numerical value BUS 15 ms msec 550 ms msec Analog Outputs Current...
Page 86: ... to 400 C 4 to 752 F Temperature sensors that can be used Pt1000 Ni1000 To use the analog input module configured using P3821 LSB input1 to LSB input4 must be set as the desired analog input in P572 582 592 602 This enables asynchronous balanced mode with integrated analog inputs and LSB inputs which is necessary with the LAMBDA TRANSMITTER P since input 4 is assigned entirely to temperature measu...
Page 87: ...ture meas range Resolution Tolerance Additional meas Range Resolution Tolerance Voltage measurement range Resolution Tolerance Input resistance Response time from receiving to sending Analog value updates Recovery time Pt1000 Ni1000 50 C to 150 C 50 to 300 F 50 C to 150 C 10 bit appr 0 2 C 50 C to 150 C approx 0 2 C Pt1000 0 C to 400 C 32 to 750 F 0 C to 400 C 10 bit approx 0 5 C 0 C to 400 C appr...
Page 88: ...olled by CAN The module is triggered by a variable address 1 99 and the databits are informed whether data is required or commands are to be carried out The 7 relay outputs can be output to 2 LSB relay modules output 1 to 4 on the module set in P3822 and output 5 to 7 on the modules selected in P3823 You can find the address to be set in parameter 3822 and P3823 NOTE Make sure that the address you...
Page 89: ...RANMITTER P The same parameters are available for the configuration of each digital output These are Off position Four functions ORed that trigger a switching operation Display of the current relay position Factory assignment of digital outputs Output 1 general fault Output 2 general alarm and or maintenance Output 3 calibration Output 4 limit value 1 LI 1 Output 5 not configured Output 6 not conf...
Page 90: ...ting statuses as switching criteria although limit values LI1 4 or measuring gases are only allocated to individual functions Limit value 1 and measuring gas 1 can only be allocated to function A similarly limit value 2 and measuring gas 2 can only be assigned to function B etc However the OR operation used for the four functions allows all combinations to be varied The following operating statuse...
Page 91: ...952 961 962 Form for maximum comparison value for LI 1 2 3 4 0 off 1 constant value 2 13 calculated analog value 1 12 Form for minimum comparison value for LI 1 2 3 4 0 off 1 constant value 2 13 calculated analog value 1 12 Parameter 933 943 953 963 Constant for maximum comparison value for LI 1 2 3 4 only when 931 941 951 961 constant value Parameter 934 944 954 964 Constant for minimum compariso...
Page 92: ...tion level with confirmation via BUS 663R4027S with connection cable 663R4024 Digital Outputs Output contact material Switching voltage Max making breaking current Continuous current Protection of contacts Mechanical durability Contact life Permissible number of operations cycles per hour Insulation in accordance with VDE 0110 Rated voltage Overvoltage category Contamination level Coil contact tes...
Page 93: ...e 663R4028 Pin assignment of the module 663R4028 deliverable till December 2007 Pin assignment of the module 663R4228 deliverable from January 2008 24V DC Supply voltage CAN BUS Interface LSB Ub GND CAN CAN 1 input 1 1 2 input 2 2 3 input 3 3 4 input 4 4 24V DC 0V Spannungs Versorgung 24V AC DC Supply voltage CAN BUS Interface LSB H L 1 input 1 1 2 input 2 2 3 input 3 3 4 4 24V AC DC 0V ...
Page 94: ...iggered by a variable address 1 99 and the status of inputs is transferred to the data bits If the input status changes a message is immediately sent to the BUS Digital inputs can be specified via 2 LSB modules the module set in P3824 specifies inputs 1 to 4 the module set in P3825 specifies 5 to 8 If communication fails or a module is missing the input signals change to 0 and timeout occurs after...
Page 95: ...e parameters listed below Factory assignment of digital inputs Input 1 pump on Input 2 triggers calibration Input 3 triggers check Input 4 triggers cyclical calibration Input 5 resets faults Input 6 fuel 2 Input 7 fuel 3 Input 8 fuel 4 Idle Level Parameters 1170 1180 1190 1200 1210 1220 1230 1240 Here you can set the idle setting for digital inputs If the setting deviates from the one that is set ...
Page 96: ...y triggering calibration when it reaches a certain value parameter 272 The counter is then reset to zero Fault reset Acknowledges faults present Alarm reset Acknowledges alarms present LV 1 4 reset Function A resets limit value 1 functions B C D reset limit values 2 3 4 Fuel 1 Function A only selects fuel 1 function B C D select fuels 2 3 4 No cal If there is a signal at this input the device cann...
Page 97: ... messages Manual operation level with confirmation via BUS 2 500 V AC 50 Hz 1 min 663R4028S till December 2007 663R4228S from January 2008 with connecting cable 663R4024 Digital inputs Input voltage control input Input current 24 V DC control input High signal detection Low signal detection Response time from receiving to sending Recovery time 30 V DC 6 mA 7 V DC 3 V DC 15 ms msec 550 ms msec Hous...
Page 98: ...nnect these using the jumper plugs provided 2 Accomplish the cable from the LSB module under the air fan and strap it with cable ties 3 Connect the wires numbered 72 and 73 with the X12 plug to numbers 72 and 73 4 Die Connect wires labeled to the X206 plug pin 3 pin 9 for the power supply 5 Set the parameters in LAMBDA TRANSMITTER P see chapter 4 5 10 1 10 4 6 Check the plug in jumpers on the base...
Page 99: ... the external power supply 24 V DC and the LSB Ext power supply for DIN rail mounting type 663R4024 NOTE The maximum cable length between the LAMBDA TRANSMITTER P and the LSB module is 500 m The module is connected to the LSB using the 7 pin connector on the housing See also section 3 4 7 pin LSB CAN connection to the gas extraction device and filter heater 7 pin LSB CAN connection to other device...
Page 100: ... P560 569 configured analog output 4 P3821 Activated a LSB module with 4 analog inputs P570 579 configured analog input 1 P580 589 configured analog input 2 P590 599 configured analog input 3 P600 609 configured analog input 4 P3822 Activated a LSB module with digital outputs 1 4 P1030 1039 configured relay output 1 P1040 1049 configured relay output 2 P1050 1059 configured relay output 3 P1060 10...
Page 101: ...to CAN OFF The jumpers BR12 and BR13 selection CAN RS422 on the processor card must be set to C CAN The jumper JP2 termination resistor ON OFF on the power pack electronic board must be set to 2 3 ON see chapter 4 6 3 The DIP switch 1 on the power pack electronic board must be set to ON LSB operation After power on the following condition must be present Red LED at LSB module is OFF Green LED at L...
Page 102: ... Stainless steel 1 4571 1 400 mm 55 1 in 6 57 R 3053A 2 m 6 6 ft Stainless steel 1 4571 1 800 mm 70 9 in 6 57 R 3054A 2 m 6 6 ft Stainless steel 1 4571 Type corrosion resistant steel REA on request 1 4539 Additional protective pipe fpr Type REA steel on request Polyester Cable connector for extension the connecting cable 657R3168 9 9 Gas Extraction Kit with Gas Extraction Device and Filter Heater ...
Page 103: ... Protective pipe for high dust applications standard material stainless steel 1 4571 External diameter 60mm Internal diameter 55mm 500mm 19 7 in 657 R 3560 800mm 31 5 in 657 R 3561 1000mm 39 4 in 657 R 3562 1400mm 55 1 in 657 R 3563 1800mm 70 9 in 657 R 3564 5 Gas extraction kit standard material stainless steel 1 4571 500mm 19 7 in 657 R 3010 800mm 31 5 in 657 R 3011 1000mm 39 4 in 657 R 3012 140...
Page 104: ...Gas extraction tube 2 Ceramic filter filter mesh 50µm 3 Ceramic protective pipe with filter 4 Protective pipe to prevent heat transfer 5 Cladding insulation 6 Boiler wall 7 Insulation 8 Flange Immersion depth Type 500 mm 19 7 in 6 57 R 3030 800 mm 31 5 in 6 57 R 3031 1 000 mm 39 4 in 6 57 R 3032 1 400 mm 55 1 in 6 57 R 3033A 1 800 mm 70 9 in 6 57 R 3034A 9 12 Counterflange Fig 9 6 Counterflange 4 ...
Page 105: ...nd RS422 interface 1 RS422 module 2 Adapter board 3 Bracket for LAMBDA TRANSMITTER P in sheet steel housing 4 Bracket for LAMBDA TRANMITTER P in cast aluminum housing 5 Connection cable The second RS422 interface is required if a GM31 analyzer is to be connected and the CAN or LSB interface is already assigned to an Evaluation unit or gas extraction device and filter heater or an LSB module If the...
Page 106: ...face Type K6029318 106 9 13 1 Installing the 2nd RS422 Interface Fig 10 8 Installing the Second RS422 Interface in Sheet Steel Housin Fig 10 9 Installing the adapter board on the processor board Fig 10 10 Connecting and laying the connection cable a ...
Page 107: ...board To do this you must loosen three 3 screws 6 Remove the jumpers x 9 from the processor board b See Fig 10 9 7 Unscrew the three plastic screws c from the spacer on the processor board 8 Plug the adapter board 2 into the socket of the processor card d e 9 Screw the adapter board 2 back together with the spacer f 10 Snap off and remove the small lugs on the jumpers g 11 Connect the RS422 module...
Page 108: ...placement pack for pump protection filter x 10 Type 657 R 0791 1 measuring gas pump Average service life 2 to 4 years depending on fuel Type 657 R 4161 1 calibration gas pump Average service life 3 years Type 657 R 0837 1 mounting paste anti seize paste x 5 Type 6 50 R 1090 1 condensate pump Average service life 2 to 4 years Type 657 P 0398 1 sampling filter for gas extraction device up to 950 C T...
Page 109: ...uring gas temperatures up to 700 C 1300 F for following insertion depths 500 mm 19 7 in Type 6 57 R 3410 800 mm 31 5 in Type 6 57 R 3411 1000 mm 39 4 in Type 6 57 R 3412 1400 mm 55 1 in Type 6 57 R 3413 1800 mm 70 9 in Type 6 57 R 3414 1 2 1 protective pipe Inconell 600 for gas extraction device incl sintered metal pre filter securing mechanism and seal for measuring gas temperatures up to 950 C 1...
Page 110: ...2 Type 6 57 R 3250 1 1 replacement fuse box Type 6 57 R 3190 1 1 solenoid valve Type 6 57 P 4105 1 1 replacement air fan Type 03 L 0102 1 1 replacement control display unit Type 6 57 P 4130 1 2 External power supply for DIN rail AC230V DC24V for ext LSB module Type 6 63 R 4024 1 2 1 replacement LSB module analog output voltage without connecting cabel Type 6 63 R 4025 1 2 1 replacement LSB module ...
Page 111: ...e of measuring cell 800 C to 1000 C Sample gas flow rate typical 0 5 l h 500 mA probe current Resolution 0 1 vol O2 Measurement accuracy Better than 0 2 vol O2 across the entire range 0 to 25 vol O2 after previous adjustment Detection limit 0 1 vol O2 Cross sensitivity None vis à vis H2O CO2 SO2 or HCl Signal interference from combustible gases At concentrations 1000 ppm CO 0 05 vol O2 1000 ppm NO...
Page 112: ... Digital inputs via LSB module possible Controls Display control unit multi function key maintenance switch and 2 rows of 6 LEDs Display control unit optional Remote control unit optional Remote display software optional Interfaces LSB BUS for connection with other LAMBDA TRANSMITTERs and other devices alternative RS422 Additional 2nd RS422 optional Field bus interfaces optional Profibus DP Modbus...
Page 113: ...5At at 230V AC F1 5At at 115V AC 1 PE 2 N 3 L RS232 Interface 9 pole Sub D male F1 e g to connect a multi meter for servicing purposes Ri 10kR Grounding Neutral conductor Phase 115V 230V typ 150VA 48 62Hz Connection power max 250VA To connect the Remote Display Software 657R1103 Optional 2 RS422 Interface additional modul 1 PE 2 N 3 L Analog output 0 4 20mA 0 10V 42 43 Analog output card floating ...
Page 114: ...to 950 C 1750 F Ceramic 950 C 1400 C 1750 1550 F 300 mm 657R3015 On request On request 500 mm 657R3010 657R3020 657R3030 800 mm 657R3041 657R3021 657R3031 1000 mm 657R3042 657R3022 657R3032 1400 mm 657R3043A 657R3023A 657R3033A 1800 mm 657R3044A 657R3024A 657R3034A CAUTION With order of replacement GED s always immersion depth starting from flange never the length of the GED ...
Page 115: ...een Operating voltage 12 V DC proportional valves F13 T1 6A LED4 green Operating voltage 6 V DC probe F14 T0 8A LED5 green Operating voltage 24 V DC analog section F15 T1 6A LED6 green LED7 green Operating voltage 5 V DC digital section Operating voltage 5 V DC digital section F16 T4A LED8 green Operating voltage 36 V AC probe heater F17 T4A LED9 green Operating voltage 29 V AC emergency probe hea...
Page 116: ... 83 Extraction device heater 92 Probe heater 93 Probe heater 94 Measured current 95 Measured voltage 96 Measured voltage 97 Measured current X202 Connection of solenoid and proportional valves 1 MV1 calibration 2 MV1 calibration 3 PV1 calibration 4 MV2 air fan 5 MV2 air fan 6 PV1 calibration 7 Measuring gas pump 8 Measuring gas pump X203 Transformer connection primary side for 230 V AC F1 T2 5A X2...
Page 117: ...d 13 RS422 S Testing RS422 interface Connect terminals 73 with 74 and terminals 72 with 75 Switch ON LAMBDA TRANSMITTER P LED s 11 and 12 for RS422 communication begin to pulse in the common mode 10ms impuls IMPORTANT This RS422 interface can only be used if it is connected directly to the motherboard at the X12 connector If you use devices that are connected at the LSB CAN bus you cannot use the ...
Page 118: ...d T 902 T 901 T 933 BF 901 1 2 1 Voltage output 0 2 to 10 V 2 Current output 0 4 to 20 mA Type 657 R 0051 floating Parameter group 530 539 Factory setting 4 20 mA 0 21 O2 Output terminals 42 43 Voltage current output setting Plug in jumpers Output range setting 0 or 2 to 10 V or 0 or 4 to 20mA Parameter 531 For exchanging the card see chapter 8 12 ...
Page 119: ...nt Probe voltage Internal O2 value Parameter 531 Here set the measurement range for each analog output 1 The following settings are possible 0 20 mA 0 10 V for voltage output 4 20 mA 4 20 mA error 0 mA 4 20 mA error maintenance 0 mA Parameter 532 Here set the start of the measurement range for each analog output E g 0 for 0 O2 Parameter 533 Here set the end of the measurement range for each analog...
Page 120: ...Appendix Probe Record Pass Front 120 11 7 Probe Record Pass Front ...
Page 121: ...Appendix Probe Record Pass Front 121 11 7 1 Probe Record Pass back side ...
Page 122: ...AG Waldkirch Germany www sick com ZIRKOR302 P SICK worldwide You will find our local subsidiary or agency at www sick com 8010926 2013 03 Subject to change without notice Your local sales and service partner ...