6
7
IMPORTANT SAFETY INSTRUCTIONS
WARNING
-
To guard against injury, basic safety precautions should be observed, including the following:
READ AND FOLLOW
ALL SAFETY INSTRUCTIONS
WARNING:
To avoid possible electric shock, special care should be taken since water is employed in the use of
aquarium and pond equipment. For each of the following situations, do not attempt repairs by yourself. Return the appliance
to an authorized service facility for service or discard the appliance.
1) Carefully examine the appliance after installation. It should not be plugged in if there is water on parts not intended to
be wet.
2) Do not operate any appliance if it has a damaged cord or plug, if it doesn’t work properly or has been dropped or
damaged in any manner.
3) To avoid the possibility of the appliance plug or receptacle getting wet, position aquarium stand and tank or the fountain
to one side of a wall-mounted receptacle to prevent water from dripping onto the receptacle or plug.
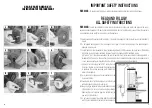
A “drip-loop” (fig. 1) should be arranged by the user for each cord connecting an aquarium or pond appliance to a
receptacle. The “drip-loop” is the part of the cord below the level of the receptacle or the connector if an extension cord
is used, which prevents water travelling along the cord and coming in contact with the receptacle.
If the plug or socket does get wet, DON’T unplug the cord.
Disconnect the fuse or circuit breaker that supplies power
to appliance. Then unplug and examine for presence of
water in the receptacle.
4) Close supervision is necessary when any appliance is used
by or near children.
5) To avoid injury, do not contact moving parts or hot parts such
as heaters, reflectors, lamp bulbs and similar.
6) Always unplug an appliance from an outlet when not in use,
before putting on or taking off parts and before cleaning.
Never pull the cord to remove plug from outlet. Grasp the
plug and pull to disconnect.
7) Do not use an appliance for anything other than intended
use. The use of attachments, that are not recommended or
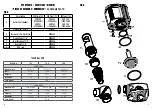
SPARE PART ROTOR KIT:
instruction for replacement
L
O
R
M
P
S
N
Q
T


