background image

P/N 1126870 Rev. B

4

Shur-Co

®

 SMART3™ remote has five channels for controlling up 

to five different devices. Channels can be configured as follows:

•  Unused channels can be disabled to be skipped when 

Select


button is pressed.

•  Operating mode of each channel can be set to 

Momentary 

Mode

 or 

Express Mode

.

1.

  Hold 

Select

 button down for five seconds and remote will 

enter 

Channel Configuration Mode

. LED of first channel will 

be lit solid on remote. This indicates first channel is ready to 

be configured.

2.

  Set operating mode of channel. If 

Express Mode

 indicator 

light is lit solid, then channel will operate in 

Express Mode

. If 

Express Mode

 indicator light is not on, channel will operate 

in 

Momentary Mode

. Press 

Select

 button to toggle operating 

mode to desired setting.

3.

  Enable or disable channel. If channel will be used and paired 

with receiver, press 

Open/On

 button. If channel will not be 

used, channel can be disabled by pressing 

Close/Off

 button. 

Indicator light will automatically jump to next channel.

TIP: 

To cancel changes and exit 

CHANNEL CONFIGURA-

TION MODE

, close remote cover.

NOTE: 

Remote will NOT activate any motor or lighting system 

while remote is in 

CHANNEL CONFIGURATION MODE

.

CONFIGURING REMOTE CHANNELS

4.

  Repeat steps 2 and 3 for remaining channels.

5.


After configuring last channel, channel status for all channels 

will be displayed for three seconds. Channel indicator lights of 

enabled channels will be lit solid and channel indicator lights 

of disabled channels will be off. Remote will then automatically 

return to 

Operational Mode

.

to


access


battery

unfasten


screw


on


back


of


remote


with


phillips


screwdriver

REPLACING BATTERIES

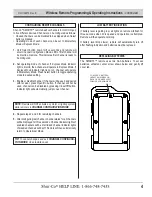
The  SMART3™  remote  uses  two  AAA  batteries.  To  access  

batteries,  unfasten  center  screw  shown  below  and  gently  lift 

cover tab.

LOW BATTERY INDICATION

If battery level is getting low, all lights on remote will flash for 

three seconds when lid is opened and operation is attempted. 

Remote will then operate normally.

If  battery  level  drops  lower,  remote  will  automatically  turn  off 

after flashing indication and batteries must be replaced.

Wireless Remote Programming & Operating Instructions 

- continued

Summary of Contents for SMART3

Page 1: ...Wireless Remote P N 1126870 Rev B ...

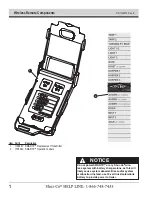
Page 2: ...cement Transmitter 2 1705940 SMART3 Operation Labels 1 1 NOTICE Do not power SMART3 or any Shur Co wire less system with battery charger alone as this will likely cause system abnormalities and or system malfunction Instead use 12 volt truck automobile battery to provide power to trailer 2 ...

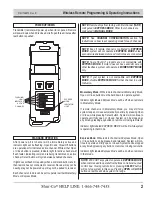
Page 3: ...closed System can be stopped at any time by pressing any button on remote or closing remote lid Indicator light labeled Express Mode will be on when remote is in that mode express mode indicator light If remote channel is in Momentary Mode you may still force system to open or close automatically one time by pressing Open or Close while pressing Select button System will continue to operate until ...

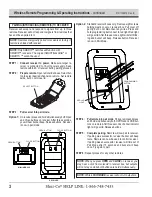
Page 4: ...ns are held simultaneously NOTE While in PAIR MODE receiver will not turn outputs on STEP 2 Prepare remote Open remote lid and use Select but ton to select desired channel on remote Set remote aside but do not close lid STEP 3 Put receiver into pair mode STEP 4 Putremoteintopairmode Pickupremoteandpress and hold simultaneously both OPEN and CLOSE but tons on remote After three seconds channel indi...

Page 5: ...tomatically jump to next channel TIP To cancel changes and exit CHANNEL CONFIGURA TION MODE close remote cover NOTE Remote will NOT activate any motor or lighting system while remote is in CHANNEL CONFIGURATION MODE CONFIGURING REMOTE CHANNELS 4 Repeat steps 2 and 3 for remaining channels 5 After configuring last channel channel status for all channels will be displayed for three seconds Channel i...

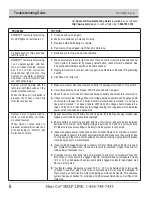
Page 6: ... marked at base of posts With truck off voltage should measure be tween 12 5 and 12 7 volts Make sure voltage reading is not negative which indicates power wires are hooked up backwards System will not operate with re mote or with buttons on trailer mounted receiver When Open or Close button is pressed solenoid in receiver box will click loudly or chatter but motor does not turn 1 Bypass circuit b...

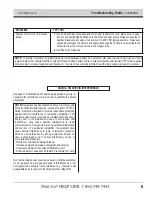
Page 7: ...pment NOTE Equipment has been tested and found to comply with limits for Class B digital devices pursuant to part 15 of FCC Rules Limits are designed to provide reasonable protection against harmful interference in residential installation This equipment generates uses and can radiate radio frequency energy and if not installed and used in accordance with instructions may cause harmful interferenc...

Page 8: ......

Reviews: