


Installation
(i) Hardware Installation:
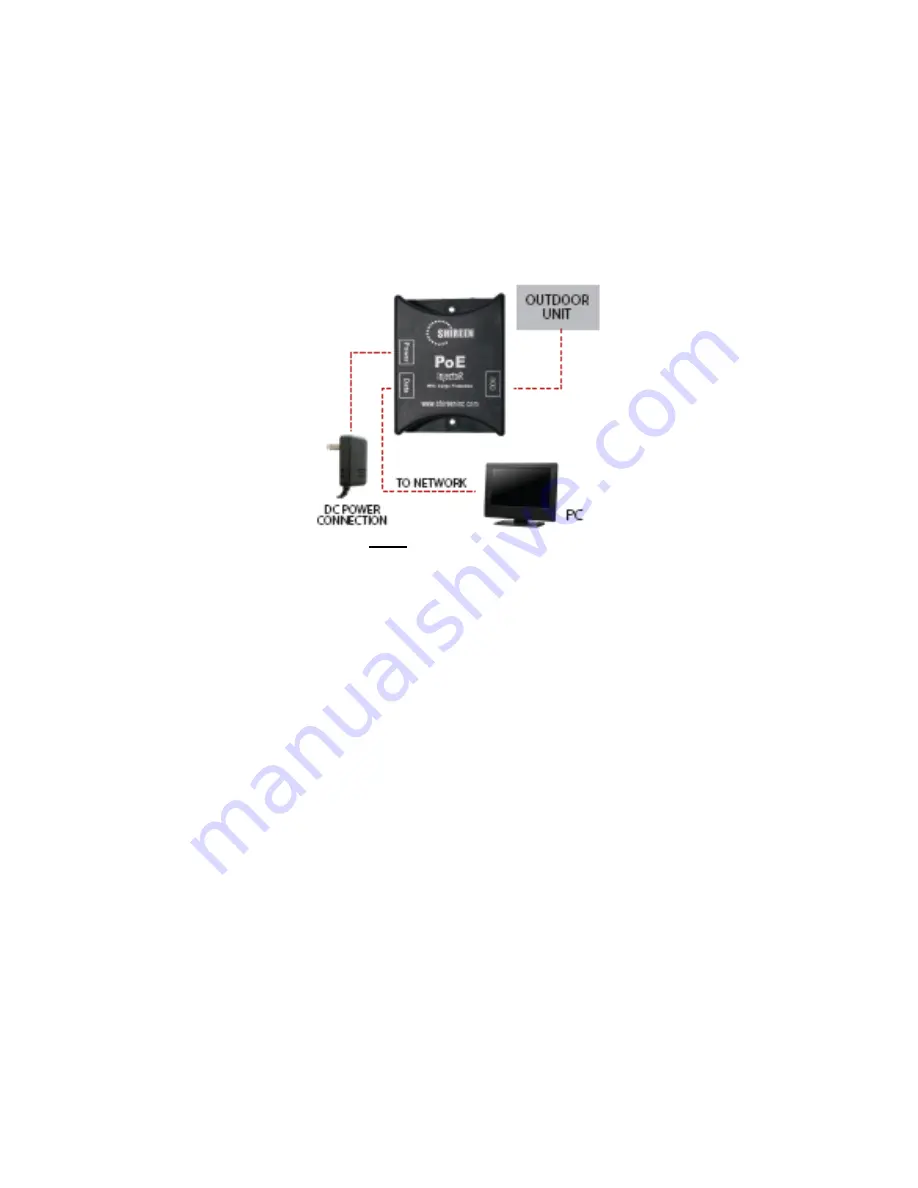
Please follow the following procedure to install the Octopus 5800 ODU.
1. Connect the Data connector of the POE injector to a suitable network PC or switch with a cat5e cable.
2. Connect the ODU connector of the POE injector to the Ethernet connector of the Octopus ODU using a cat5e
cable.
3. Power up the POE injector using the provided 48V DC Power Supply.
Fig 3.
Setting up the ODU
4. Check LEDs on the ODU to confirm status. At this point the PWR LED should be red and Ethernet LED should be
green. The RF LED would light up once wireless transmission has started or the device has associated itself to an
AP.
5. To access the web manager of the device we need to configure the Windows IP Address Setting so that we are
on the same subnet as the device is and are easily able to access the web manager of the device.
(ii) Windows IP Configuration:
In factory mode the device is not able to assign IP addresses dynamically. You would need to configure your PC
to a static address of a subnet range 192.168.0.x to access the web manager and configure the device according
to your own liking.
Please follow the steps below:
1. Click
Start
on the taskbar and from the
Control Panel
choose
Network Connections
. Right-click the
Local
Area Connection
icon and then choose
Properties
from the menu. You should see the
Local Area
Connection Properties
dialog box shown below.
Page | 8
Summary of Contents for Octopus 5800
Page 1: ...Octopus 5800 Series User Manual www shireeninc com Page 1...
Page 12: ...Fig 5 4 the Main Control Panel of the Web Manager GUI in Client Mode Page 12...
Page 19: ...a Admin Page 19...
Page 20: ...b Time Page 20...
Page 21: ...c System d Firmware Page 21...
Page 22: ...iv Status a Device Info Page 22...
Page 23: ...b Wireless c Logs Page 23...
Page 24: ...d Statistics v Help Page 24...