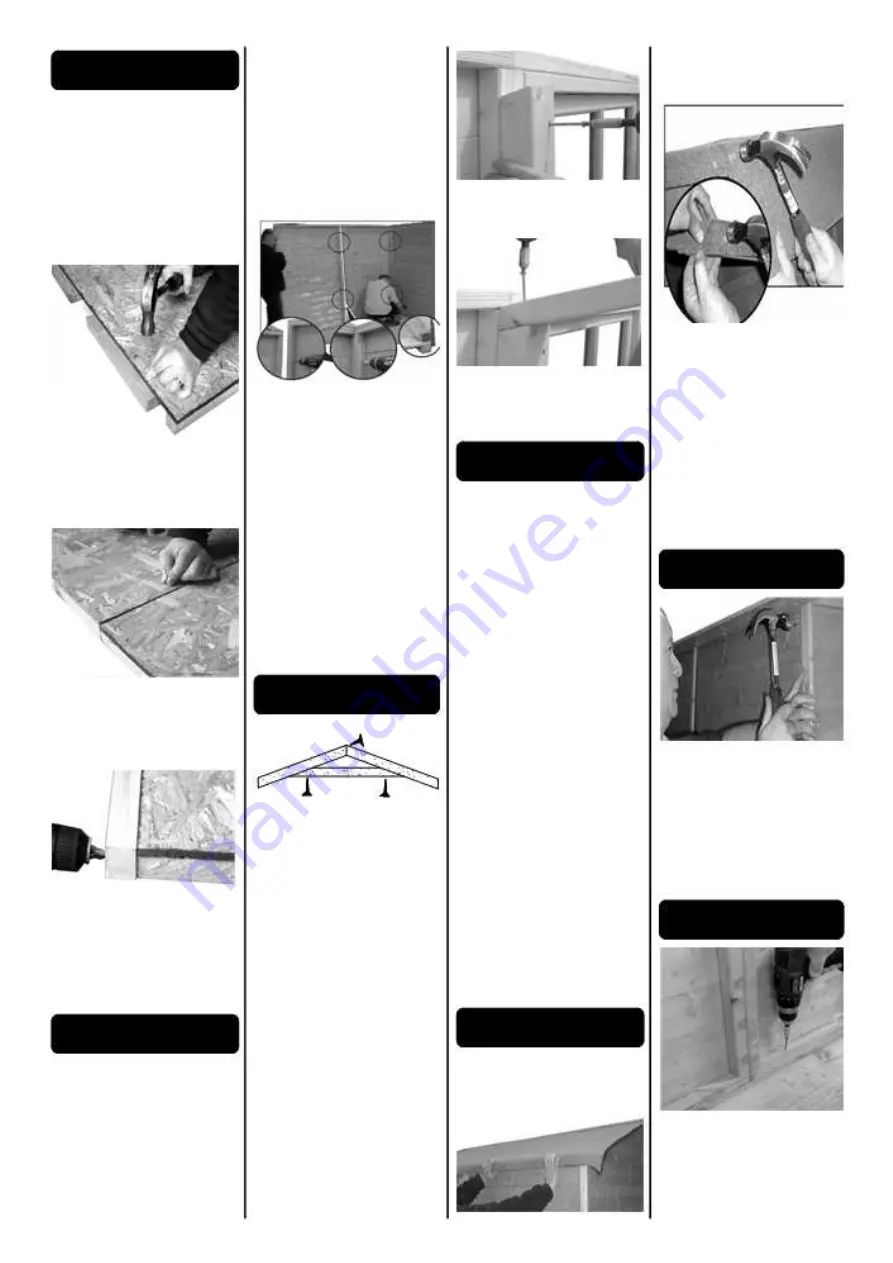
A Floor Assembly
Remove travel protection blocks
from bottom edge of panels. 1.
Ensure that your base is firm and
absolutely level.
2. Take two sections of floor and
secure together through floor
bearers (990mm side) using 3 x
60 mm screws. You will need to
turn the floor over to do this.
Repeat for other four pairs.
3. Take 6 pieces of 34x46x345
floor joiners and place between
each floor bearer. Nail half of the
widest part to the floor using 3 x 40
mm nails per piece.
4. Once floor joiners are fitted
between floor bearers, slide
another floor pair on top of floor
joiners and secure again using 3 x
40 mm nails per piece.
5. Along the front and back edge
of the completed floor fix two
34x46x1485 framework pieces.
Secure into floor bearers using 4
x 60 mm screws per framework
piece. Note: the 46mm edge sits
against the floor of the building.
B Wall Assembly
Please see truss assembly before
beginning wall assembly.
1. Pre drill panels in 3 places, top,
middle and bottom.
2. Decide which side of the build-
ing you want your window panels
to go. Place one half of the back
panel onto the floor ensuring the
cladding has overhung the floor.
Place side/window panel next to
this and join together from the
inside using 3 x 60 mm screws.
You can start with either single or
double side/window panel.
The panels along the front and
back extend from floor edge to
floor edge, the side/window
panels sit inside the front and
back panels.
3. Place other back panel half
and secure using 3 x 60 mm
screws.
4. Fit other side/window panel
next to one already in position
and secure using 3 x 60 mm
screws.
5. Place side/window panel next to
back panel and secure using 3 x 60
mm screws.
6. Place remaining side/window
panels and secure using 3 x 60
mm screws.
7. The front panels are now ready
to be placed. Secure to side panels
and to each other using 3 x 60 mm
screws per panel.
C Truss Assembly
You can use framework of back
panels as a template to construct
the truss. Lay back panels down.
1. Take the two pieces of truss
framework and the one piece of
bracing bar framework and place
together to make an ‘A’ shape.
2. Secure together at the ridge
using 1 x 60 mm screw.
3. Screw bracing bar into truss
using 1 x 60 mm screw at each
end.
4. Mark the position of the lower
angled side of the truss support
block on the back panel frame.
5. Measure from top of framework
of adjoining side panel to mark
previously made. Measure and
mark from top of framework of
adjoining side panels and centre
position of double panels. The
mark is where the lower angled
side of the truss block will be
placed.
6. Secure truss blocks in position
using 2 x 60 mm screws per
block.
7. Place the truss on top of the
two opposite support blocks and
secure using 2 x 80 mm screws
per side. Repeat for other trusses
D Roof Assembly
1. Staring at the back slide one
1036x1625 mm roof panel into
position using the cut-out of the
ridge as a guide. Make sure the
panel is flush with the back of the
building and resting on one half of
the truss.
Repeat for the other side.
2. Screw roof panels together at the
ridge from the inside using 3 x 60
mm screws.
3. Secure roof panels into frame-
work of gable ends using 3 x 40
mm nails per side.
4. Place the 990x1625 mm roof
panels next to the back ones and
resting on both trusses. Secure
panels together at the ridge from
the inside using 3 x 60 mm
screws. Repeat for all 990 panels.
5. Place the 1220x1625 mm
panels at the front using the cut-
out of the ridge as a guide and
resting on the truss. Secure at
ridge and into gable walls.
6. Secure panels into trusses at
the ridge using a total of 16 x 60
mm nails.
7. Secure along the length of the
building into framework of walls
using 12 x 40 mm nails per side.
E Felt Roof
1. Measure and cut the required
four lengths allowing an overhang
of approx 50 mm on all sides.
Starting at the lower edge (the
eaves) place one piece of felt
along the length of the building.
Secure the felt using felt nails
spaced at 100 mm intervals, but
do not nail along centre of
building until the piece of felt
covering the ridge is in place.
2. Place another strip along the
length of building overlapping the
first strip and overlapping the
ridge. Nail into position along both
edges of this piece and at both
ends using felt nails spaced at
approx 100 mm intervals.
Repeat for other side of roof.
F Corner Strips
1. Fix the corner strips in position
where the panels meet using 4 x
40 mm nails per strip. Place
another 1720 mm strip in the
centre of the double window
panel and centre of plain panel.
There are 3 longer cover strips,
these are for the front and back
panel joins.
G Secure Walls
1. Secure wall panels to the floor
on the inside of the building
through framework into floor
bearers using 2 x 60 mm screws
per panel.


