background image

5

English

-   Never yank cord to disconnect from outlet. Instead, grasp just the plug and pull 

to disconnect.

-   Do not use power cord as handle, allow it to hang over edge of counters, or be 

crimped or closed in doors.

-   Do not operate appliance with a damaged cord, or if the appliance has been 

dropped or damaged. To reduce the risk of electric shock, do not disassemble 

or attempt to repair the appliance. All repairs must be performed by a qualified 

service professional. Incorrect reassembly or repair could cause a risk of fire, 

electric shock, or injury when the appliance is used.

-   A loose fit between wall outlet (receptacle) and plug may cause overheating 

and distortion of the plug. Discontinue use of the product in this outlet. Contact a 

qualified electrician to replace loose or worn outlets.

-   Before plugging power cord into electrical outlet, be sure that all electrical 

information on rating label agrees with your power supply. 

-   To reduce the likelihood of circuit overload, do not operate another high 

wattage appliance on the same circuit.

-   Do not use an extension cord or power strip to operate this unit. Only plug power 

cord directly into 120V outlet.

-   This appliance has a polarized plug (one blade is wider than the other.) To 

reduce the risk of electrical shock, this plug is intended to fit in a polarized 

outlet only one way. If the plug does not fit fully in the outlet, reverse the plug. If 

it still does not fit, contact a qualified electrician. Do not attempt to defeat this 

safety feature.

-   Do not sit or stand on unit.

-   Do not set anything on top of unit during use.

WARNING:


Changes or modifications not expressly approved by the party 

responsible for compliance could void the user’s authority to operate the 

equipment.

Please refer to our website for the most current version of our owner’s guide.

SAVE THESE INSTRUCTIONS

Summary of Contents for SI-470

Page 1: ...MODEL SI 470 CANISTER GARMENT STEAMER OWNER S GUIDE...

Page 2: ......

Page 3: ...3 English Important Safety Instructions 4 Product Information 6 Assembly 8 Filling Water Tank 10 Fabric Steaming 11 Storage Care 12 Troubleshooting 13 Warranty 14 CONTENTS...

Page 4: ...iance its parts and packaging material Directions to reduce risk of fire electrical shock and injury Read all instructions before use Use caution when handling this steam unit Burns could occur from t...

Page 5: ...ord into electrical outlet be sure that all electrical information on rating label agrees with your power supply To reduce the likelihood of circuit overload do not operate another high wattage applia...

Page 6: ...eam Knob Water Tank Water Tank Cap Internal Water Tank Handle Water Level Window Drain Plug The following features are included with your product Carefully inspect the packing material for all parts l...

Page 7: ...convenient storage The Steam Knob powers the unit on and off The Water Tank is the container that holds water to be transferred into the Water Reservoir The Water Tank is removeable for convenient fi...

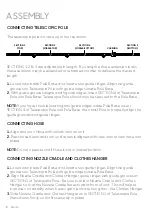
Page 8: ...ges CONNECTING HOSE 1 Align arrow on Hose with unlock icon on unit 2 Press hose down and turn until arrow is aligned with lock icon to lock hose into place NOTE Do not operate unit if Hose is not in l...

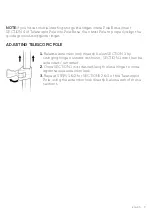
Page 9: ...s and guide ridges ADJUSTING TELESCOPIC POLE 1 Release extension lock directly below SECTION 1 by swinging hinge outward as shown SECTION 1 can then be extended retracted 2 Once SECTION 1 is at desire...

Page 10: ...o main unit The sound of water flowing from Water Tank into Water Reservoir should be audible for a short period of time NOTE Water Tank can be removed and refilled at any time during operation there...

Page 11: ...wrinkle free GENERAL STEAMING TIPS For most effective results hold Steam Nozzle within 1 2 of fabrics or press it directly against surfaces Curtains and draperies can be steamed while still hanging To...

Page 12: ...move any deposits that form This will help to extend the life of your unit and keep it functioning at its maximum potential TO REMOVE MINERAL BUILD UP 1 Set Steam Knob to OFF position and unplug power...

Page 13: ...mmediately cease usage and unplug Contact Consumer Service for assistance No water in Water Tank Refer to FILLING WATER TANK procedure on Page 10 to refill Water Tank Steam output is weak or intermitt...

Page 14: ...pair center or use of non approved replacement parts is not recommended and any consequences will not be covered by support services or product warranties The product warranty will be honored only on...

Page 15: ...T470 001 R V00 SHARPER IMAGE 833 800 8669 sihomecomfort com help sihomecomfort com...

Reviews: