background image

10

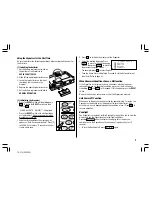
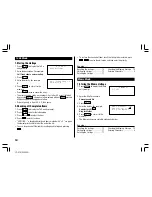
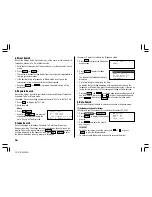
(1) Enter the desired date in Calendar mode

<Example> Enter the following data.

“Lunch with Tom” from 11:30 AM to 1:00 PM on June 24,
2001.

1. Press 

2nd


CALENDAR

 in Calendar mode to display the calendar for

the current date (For example, April 12, 2001).

2. Press 

NEXT

NEXT

 to move the cursor to June

24, 2001.

3. Press 

SCHEDULE

 to change to the

Schedule mode.

Time entry prompt for June 24, 2001 is
displayed.

4. Enter the starting and ending time.

1130 

AM

 01 

PM

(For the 24-hour clock, press 1130 

 13 

.)

“DESCRIPTION?” is displayed.

• “:00” will be entered automatically.

• You can enter schedule details without the ending time. Press 

ENTER

(or 

) after entering the starting time to display the “DESCRIPTION?”

prompt.

• You can also enter schedule details without a specified time, except

details starting with a number. Skip entering time and start to enter
letters for the details as described in step 5.

• The hour and minute should each consist of 2 digits.

• The time can be set using either the 12-hour or 24-hour format. When

you move the cursor to the next entry field, the time is displayed in the
format selected in the Clock mode.

• If an attempt is made to store an invalid time, you cannot move the

cursor to the next entry field. Enter the correct time and follow the next
procedure.

5. Enter the schedule detail.

Lunch with Tom

6. Press 

ENTER

 to store the listing.

7. Now, press 

CALENDAR

 to check if the

listing is stored in the memory.

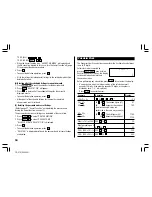
• Notice the tag (

) on the right of  “24”. It indicates a scheduled item for

that date:

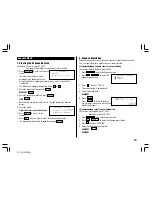
(2) Enter the desired date with 

NEXT

 (or

PREV

)

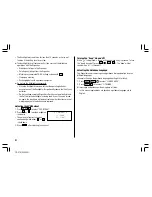
This is a convenient way of entering a nearby date. Press 

NEXT

 (or

PREV

) and change the display day by day until the desired date appears.

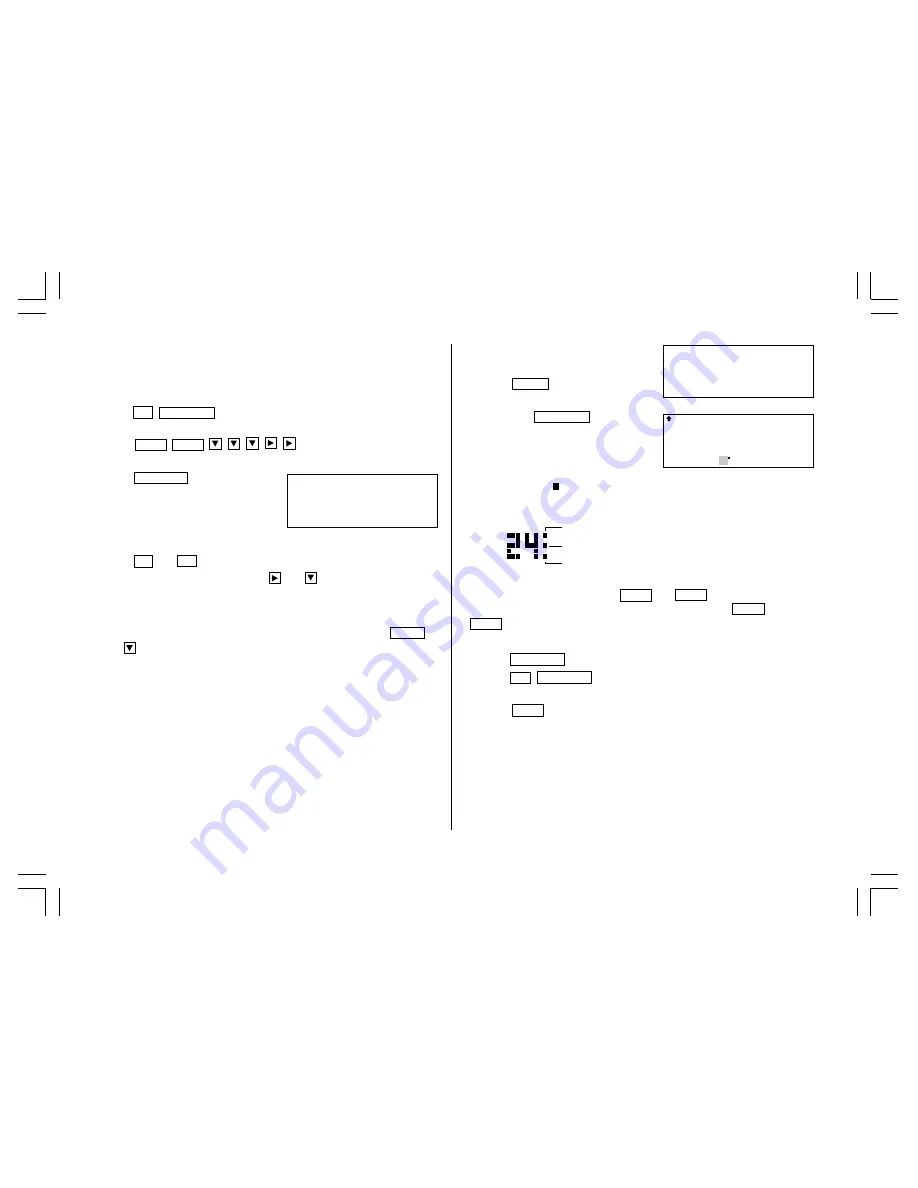
<Example> Enter a schedule listing on April 17, 2001.

1. Press 

SCHEDULE

 to display the Schedule mode screen.

2. Press 

2nd


SCHEDULE

 to display the time entry prompt for the current

date (For example, April 12, 2001).

3. Press 

NEXT

 repeatedly until the time entry prompt for April 17, 2001

appears. Enter the time and detail following the procedure for “(1) Enter
the desired date in Calendar mode” (from step 4) on this page.

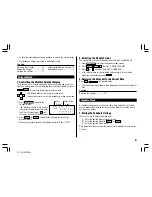
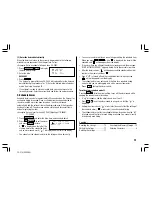
Schedule items beginning in the morning or schedule
items without a specified time
Anniversary items
Schedule items beginning in the afternoon

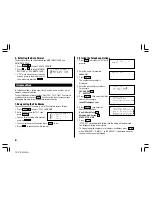
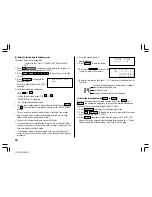
 SUN JUN 24,2001
TIME?

 SUN JUN 24,2001

Lunch with Tom–

 11:30AM~ 1:00PM

S M T W T F S

2001

JUN

 3  4  5  6  7  8  9
10 11 12 13 14 15 16
17 18 19 20 21 22 23
24 25 26 27 28 29 30

YO-515 (E0426E)

Summary of Contents for YO-515

Page 1: ...mbols 4 Entering Characters 4 Note on the Description of the MENU Key Operations 5 Notes for the Built in Calendar and the Time 5 Clock Mode 6 Telephone Mode 8 Calendar Mode 9 Schedule Mode 9 To Do Mode 12 Memo Mode 12 Expense Mode 13 Anniversary Mode 14 Checking the Memory Storage 15 Freeing Up Memory 15 Recalling the Listings 15 Editing the Listings 17 Deleting the Listings 17 Calculator Mode 18...

Page 2: ... credit card numbers the loss of or alteration of stored data etc This Organizer is not designed to transfer receive e mails by using the E mail addresses you will store The information provided in this manual is subject to change without notice All company and or product names are trademarks and or registered trademarks of their respective manufacturers CAUTIONS Do not carry the Organizer in the ...

Page 3: ... next language screen then press PREV to move to the previous language screen For example press 2 to select English Then the Home Clock is displayed Proceed to set the date and time of the clock Refer to page 6 When Abnormal Conditions Cause a Malfunction If the Organizer is subjected to strong extraneous electrical noises or shocks during use an abnormal condition may occur in which no keys inclu...

Page 4: ...in the clock time will be incorrect and other functions may not work properly until the batteries are replaced Adjusting the LCD Contrast 1 Press MENU 2 to select 2 CONTRAST 2 Press or to darken or lighten the display The amount of contrast changes continuously while either or is held down 3 Press C CE after adjusting the contrast CONTRAST DARK LIGHT Turning the beep On and Off While is displayed ...

Page 5: ...e represented by symbols for example Indicates the key 7 Indicates the numeric 7 key SCHEDULE Mode key with only one function The key These keys are used to select capital uppercase or small lowercase letters or to access the symbols above the number key and and While holding down press the desired key to be entered Numbers letters and space for operation are shown in italic and bold 1 2 3 4 6 5 7...

Page 6: ...symbol entry mode You can also enter the following symbols special characters by pressing and an appropriate key q or directly from the numeric keys w located next to the LCD display q w You cannot enter 았앙 symbol Display Symbols A beep will sound when a key is pressed The schedule alarm will sound CAPS Capital uppercase letters will be entered To enter small lowercase letters turn CAPS off by pre...

Page 7: ... current display Note on the Description of the MENU Key Operations This Organizer offers a variety of functions which you choose from the menus see the following table To switch or scroll the menu screens displayed by pressing MENU press NEXT or to move to the next screen or PREV or to move to the previous screen Menu See page Checking the Memory Storage 15 Adjusting the LCD Contrast 2 Deleting t...

Page 8: ...e Set the date and time to April 12 2001 10 05 PM or 22 05 1 Press CLOCK once or twice to display the Home clock 2 Press 2nd EDIT The cursor will flash 3 Press 12 24 to select the 12 hour or 24 hour clock The display switches between the two clocks each time 12 24 is pressed AM or PM is displayed for the 12 hour clock default Note 12 00PM noon 12 00AM midnight 4 Enter the hour and minutes 1005 PM ...

Page 9: ...the city name line Only one changed city name can be stored in each of the Home and World clocks Each changed name is stored until you next change the zone number 4 Setting Daylight Saving Time Summer Time If DST daylight saving time summer time is used the local time is advanced one hour during the summer Both the Home clock and World clock can be set for DST as follows 1 Home clock 1 Press CLOCK...

Page 10: ...l entering the file names press C CE twice 3 Press TEL to check the new file name s TEL FILE NAME 1 TEL 1 2 TEL 2 3 TEL 3 Johns Pat Johns Pat F 265 1234 201 265 5600 07430 2135 U S A 201 265 5600 Box G Sharp Plaza johns P sharpsec com Mahwah New Jersey Johns Pat johns P sharpsec com 201 265 5600 2 Storing the Telephone Listings 1 Press TEL to display the TEL1 entry prompt 2 Enter the name For exam...

Page 11: ...1 2001 2 Selecting the Weekly Format The weekly format can be switched between SUN SAT and MON SUN 1 Press CALENDAR to display the Calendar mode screen 2 Press MENU NEXT 1 to select 1 WEEKLY FORMAT 3 Press 1 or 2 to select SUN SAT or MON SUN A mark moves to your selection and you return to the mode in which you were before pressing MENU 3 Returning the Calendar to the Current Date Press 2nd CALEND...

Page 12: ...ttempt is made to store an invalid time you cannot move the cursor to the next entry field Enter the correct time and follow the next procedure 5 Enter the schedule detail Lunch with Tom 6 Press ENTER to store the listing 7 Now press CALENDAR to check if the listing is stored in the memory Notice the tag on the right of 24 It indicates a scheduled item for that date 2 Enter the desired date with N...

Page 13: ... the display You cannot set the schedule alarm to the listings with no time entry MM DD YYYY DAY 12 MONTH 04 YEAR 2001 You can set an alarm while you are entering or editing the schedule item When you press 2nd ALARM while is displayed the alarm will be canceled and will disappear from the display If the alarm time you attempt to enter has already passed the message ALARM TIME ELAPSED appears brie...

Page 14: ...st priority and listed at the end of the list You can also check off the item by recalling each listing and pressing TO DO DESCRIPTION Call Frank about a s PRIORITY 2 To restore the checked off item recall the listing to be restored press 2nd EDIT to enter the edit mode and then enter the priority See also Recalling the Listings 15 Checking the Memory Storage 15 Editing the Listings 17 Entering Ch...

Page 15: ... 4 12 2001 DATE 2 Expense Summaries Expense summaries are a collection of records stored in Expense mode You can recall them for a specific day or a certain period 1 Summarizing an expense report for a specific day Example Specify the date April 5 2001 1 Press EXPENSE to enter the Expense mode 2 Press 2nd EXPENSE to enter the Expense report mode 3 Press 1 to select 1 DAILY The current date will be...

Page 16: ...lect 1 MONTH DAY to enter the date entry prompt FROM APR 1 2001 PERIOD 1 415 25 TO APR 30 2001 3 Enter the date and press ENTER or 0212 ENTER If an attempt is made to store an invalid date you cannot move to the description entry prompt Enter the correct date and follow the next procedure 4 Enter the description of the anniver sary Nancy s Birthday 5 Press ENTER to store it in the memory Example 2...

Page 17: ...ode repeatedly to recall the listings skipping empty dates Press C CE C CE then press 2nd NEXT or 2nd PREV to display the first or last listing in chronological order After the last or first listing in chronological order has been found NOT FOUND is displayed briefly Checking the Memory Storage 1 Press MENU 1 to select 1 CHECK MEMORY The number of listings stored in TEL1 TEL2 and TEL3 files is dis...

Page 18: ... C CE ENTER to enter the index mode when the entry prompt is displayed Johns Pat F 265 1234 201 265 5600 Box G Sharp Plaza johns P sharpsec com Example Display the Index in the Telephone mode 1 Press TEL to display the Telephone mode screen 2 Press ENTER to enter the index mode The index of the Telephone listing is displayed Up to five listings are displayed at a time To display the first listing ...

Page 19: ...instead in step 4 in the above section 1 Editing the Listings creates a new listing without deleting the previously stored listing This operation is useful when you enter a new listing whose contents are the same as or similar to the previously stored listing Deleting the Listings 1 Deleting One Listing 1 Recall the listing to be deleted 2 Press DEL DELETE Y N will appear 3 Press Y to delete the c...

Page 20: ...ss MENU 3 to select 3 DATA DELETION 2 Press NEXT 2 to select 2 SECRET DATA ALL SECRET DATA DELETE Y N is displayed 3 Press Y To cancel the deletion operation press N DELETED is displayed briefly and the password and all secret listings are deleted Calculator Mode The Organizer s built in calculator can perform the 4 arithmetic calculations in up to 12 digits Calculator mode is selected by pressing...

Page 21: ... Conversion pattern Unit A Unit B Unit A Unit B 1 10 gal l 2 DM 11 I gal l 3 12 fl oz ml 13 I fl oz ml 4 inch cm 14 oz g 5 feet m 15 lb kg 6 yard m 16 F C 7 mile km 17 cal J 8 acre m2 18 hp W 9 acre ha 19 PS W 1 Changing the Conversion Display 1 Press CALC CONV once or twice to select the Conversion mode 2 Press NEXT and PREV until the desired conversion type is displayed Conversion Mode Each time...

Page 22: ...unit B press To convert unit B to unit A press Example 1 Convert 198 to 1 Press NEXT or PREV to select the unit In this example select the conversion display number 1 1 0 6 2 Enter the value to be converted 198 0 CONVERSION 1 0 6 198 CONVERSION 1 0 6 118 8 CONVERSION 1 0 6 3 Press to convert it The conversion result is displayed Once you have set each rate you can perform a consecutive conversion ...

Page 23: ... password and press ENTER Enter 1234567 in this case SECRET DATA ACCESSIBLE is displayed briefly The Secret function is now off and secret listings can be recalled The display changes into the entry prompt without the S If the incorrect password is entered INCORRECT PASSWORD will be displayed briefly and the display changes into the entry prompt Even after the Secret function is turned off the Sec...

Page 24: ...y the mode screen in which you want to recall the listing 3 Press 2nd MARK to display the 4 Press 2nd NEXT or 2nd PREV The secret listings only are sequentially recalled If no secret listing is found NOT FOUND is displayed briefly and the display returns to the entry prompt 6 Deleting and changing the password 1 Turn the Secret function off Refer to page 21 2 Press 2nd SECRET 3 Press 2 to select 2...

Page 25: ...re warning and fatal When the batteries is in warning level the BATT symbol appears at the display In fatal level the organizer will turn off automatically without indication If the BATT symbol still appears or nothing is shown replace both of the operating batteries immediately 1 Press OFF to turn off the Organizer 2 Set the battery replacement switch on the bottom of the Organizer to REPLACE BAT...

Page 26: ...cters entry Tel 8 characters entry in the name field 10 characters entry in number field Memo 12 characters entry in title field 18 characters entry in description field To Do 30 characters entry in description field Expense 6 characters entry in amount field 11 characters entry in memo field Maximum data size per entry Approx 2 000 bytes Calculator digits 12 The following are the settings and con...

Page 27: ...DC Alkaline batteries LR03 2 Battery life Battery life may vary depending on usage Approx 1200 hours When data is continuously displayed without Backlight at 25 C 77 F Approx 300 hours When data is continuously displayed with Backlight for 2 minutes per hourly use at 25 C 77 F Approx 270 hours When data is searched for 5 minutes and displayed for 55 minutes per hourly use and Backlight is on for 2...

Page 28: ...o del Organizador por primera vez 1 Instalación de las pilas 1 Ajuste el interruptor de recambio de las pilas en la parte inferior del Organizador a REPLACE BATTERIES 2 Deslice y saque la tapa del compartimiento de las pilas 3 Instale las dos pilas encima de la tira de cinta tal como se observa en la figura 4 Reinstale la tapa del compartimiento de las pilas 5 Ajuste el interruptor de recambio de ...

Page 29: ...a hora y los minutos Por ejemplo 1005 PM Para el reloj de 24 horas pulse 2205 Introduzca 2 dígitos tanto para la hora como para los minutos CONTRAST DARK LIGHT NYC 18 0 MON JAN 1 2001 12 00AM 6 Introduzca el mes el día y el año Por ejemplo 04122001 Utilice para omitir la entrada de un número que no necesita cambiar 7 Pulse ENTER El reloj comenzará a funcionar desde 0 segundo 8 Pulse CLOCK para que...

Page 30: ...a SUN JUN 24 2001 Lunch with Tom 11 30AM 1 00PM Almacenamiento de los listines del programa de actividades Ingrese un listín del programa de actividades del 24 de junio de 2001 1 Pulse SCHEDULE para que se visualice la pantalla del modo de programa de actividades 2 Pulse C CE para que se visualice el indicador de entrada de fecha 3 Introduzca la fecha las horas de inicio y de fin los detalles del ...

Page 31: ... la semana y el día de la semana como el Día de la Madre segundo domingo de mayo Mes Día 1 Pulse ANN para ingresar el modo de aniversario 2 Pulse 1 para seleccionar 1 MONTH DAY 1 MES DÍA y visualizar el indicador de entrada de fecha 3 Introduzca la fecha y la descripción 0212 ENTER Nancy s Birthday ENTER Mes Semana 1 Pulse ANN para ingresar el modo de aniversario 2 Pulse 2 para seleccionar 2 MONTH...

Page 32: ...1 Llame un listín en el modo deseado 2 Pulse 2nd EDIT 3 Modifique los datos según se desee 4 Pulse ENTER para almacenarlo en la memoria Borrado de los listines 1 Borrado de un listín 1 Liame el listin que desea borrar 2 Pulse DEL Aparecerá DELETE Y N BORRAR S N 3 Pulse Y para borrar el listín actualmente visualizado Para cancelar la operación de borrado pulse N 2 Borrado de todos los listines en c...

Page 33: ... la unidad B en la unidad A pulse 1 Pulse NEXT o PREV para seleccionar la unidad En este ejemplo seleccione el número de la pantalla de conversión 1 1 0 6 2 Introduzca el valor que desea convertir 198 3 Pulse para convertirlo Aparecerá el resultado de la conversión 198 CONVERSION 1 0 6 YO 515 E0426E ...

Page 34: ...ed in accordance with the instructions may cause harmful interference to radio communications However there is no guarantee that interference will not occur in a particular installation If this equipment does cause harmful interference to radio or television reception which can be determined by turning the equipment off and on the user is encouraged to try to correct the interference by one or mor...

Page 35: ...rranties granted by Sharp and shall be the sole and exclusive remedy available to the purchaser Correction of defects in the manner and for the period of time described herein shall constitute complete fulfillment of all liabilities and responsibilities of Sharp to the purchaser with respect to the Product and shall constitute full satisfaction of all claims whether based on contract negligence st...

Page 36: ...PRINTED IN CHINA IMPRESO EN CHINA 00FTO TINSE0426EHZZ SHARP ELECTRONICS CORPORATION Sharp Plaza Mahwah New Jersey 07430 2135 YO 515 E0426E ...

Reviews:

Related manuals for YO-515