


15
Dimensions: 257
⳯
182 mm
V C - A 5 6 5 U / H 9 6 5 U ( 1 1 - 2 2 )
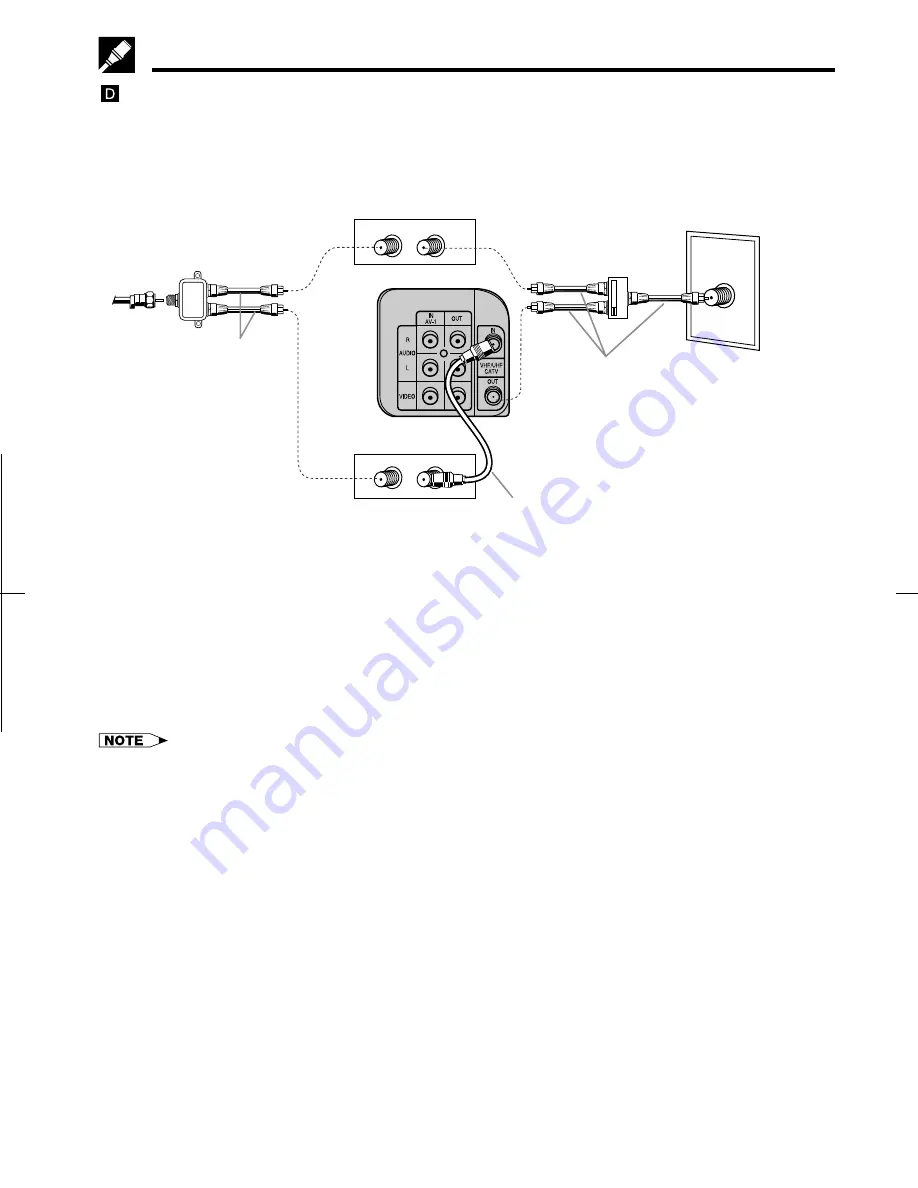
Cable TV Connections
Connection with two cable boxes, A/B switch and splitter
The following connection is necessary to record a cable TV programme (even those scrambled by a cable
company) while watching another cable TV programme. The following connection requires two cable boxes, a
2-way splitter and an A/B switch.
• Connect as shown. Then go to “
After the Connection
”.
Splitter
(Not supplied)
Coaxial cable
(Not supplied)
A/B switch
(Not supplied)
Coaxial cable
(Supplied)
TV Rear
Using the A/B Switch
1.
Set the A/B switch to the “A” position in the following situations.
!
To watch a cable TV programme while recording another programme.
@
To watch a cable TV programme when the VCR is turned off.
2.
Set the A/B switch to the “B” position in the following situations.
!
To playback a cassette on the VCR.
@
To watch a programme being recorded or to change (or watch) channels with the cable box 2. The
output channel of the cable box 2 and the VCR must be the same.
• If you turn off the cable box, you cannot record or view a CATV programme.
• If you have questions regarding any connection procedure, please contact your cable company or the nearest Sharp
Authorized Service.
After the Connection
Plug in the power cords of the TV and cable box.
Then go to
EZ Set Up
.
VCR Rear (Hi-Fi model)
OUT
IN
Cable Box 2
ANT/CABLE
From
CATV
system
A
B
OUT
IN
Cable Box 1
Coaxial cable
(Not supplied)
Summary of Contents for VC-A565U
Page 39: ...39 Memo ...


