background image

EN

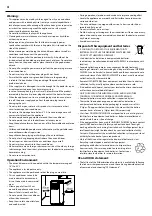
Exception Clauses

Sharp will not be held responsible for personal injury or loss to property 
for the following:

1. 

Any damage to the product caused by neglect, poor maintenance, 
incorrect handling or misuse;

2. 

Any altering, changing or use of the product with any other equipment 
which is not detailed in this User Manual;

3. 

If, after verification, damage or gas leakage has been caused by 
corrosive gas;

4. 

If, after verification, damage or gas leakage has been caused by 
incorrect transportation of the product;

5. 

Operate, repair, maintain the unit without abiding to the instructions in 
this User Manual or related regulations;

6. 

After verification, the problem or dispute is caused by the quality 
specification or performance of parts and components that have been 
produced by other manufacturers;

7. 

If any damage has been caused by natural calamities, bad using 
environment or force majeure.

• 

When refrigerant leaks or requires discharge during installation, 
maintenance, should carried out by certified professionals or otherwise 
in compliance with local laws and regulations.

• 

This appliance is not intended for use by persons (including children) 
with reduced physical, sensory or mental capabilities or lack of 
experience and knowledge, unless they have been given supervision or 
instruction concerning use of the appliance by a person responsible for 
their safety.

• 

Children should be supervised to ensure that they do not play with the 
appliance.

The Refrigerant

• 

To realize the function of the air conditioner unit, a special refrigerant 
circulates in the system. The used refrigerant is fluoride R290, which has 
been specially cleaned before installation to the refrigeration system. 
The refrigerant is flammable and inodorous. Furthermore, it can lead to 
explosion under certain conditions.

• 

Compared to common refrigerants, R290 is a nonpolluting refrigerant 
which does not harm the ozonosphere. The influence upon the 
greenhouse effect is also lower. R290 has got very good thermodynamic 
features which leads to a really high energy efficiency. The units 
therefore need a less filling.

Warning:

• 

Appliance filled with flammable gas R290.

• 

Appliance is recommended to be installed, operated and stored in a 
room with a floor area larger than 11m².

• 

The appliance is not to be stored in a room with continuously operating 
ignition sources. (for example: open flames, an operating gas appliance 
or an operating electric heater).

• 

The appliance shall be stored in a well-ventilated area where the room 
size corresponds to the room area as specified for operation.

• 

The appliance shall be stored so as to prevent mechanical damage from 
occurring.

• 

Ducts connected to an appliance shall not contain an ignition source.

• 

Keep any required ventilation openings clear of obstruction.

• 

Do not pierce or burn.

• 

Be aware that refrigerants may not contain an odour.

• 

Do not use means to accelerate the defrosting process or to clean, other 
than those recommended by the manufacturer.

• 

Servicing shall be performed only as recommended by the 
manufacturer.

• 

Should repair be necessary, contact your nearest authorized Service 
Centre. Any repairs carried out by unqualified personnel may be 

dangerous, not covered under warrant and not supported by the 
manufacturer.

• 

Compliance with national gas regulations have to be observed.

Important safety instructions

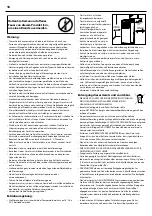
CAUTION

RISK OF ELECTRIC SHOCK

DO NOT OPEN

WARNING

Risk of Fire / Flammable 

Materials

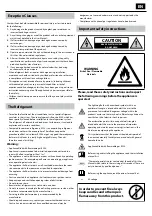
Please, read these safety instructions and respect 
the following warnings before the appliance is 
operated:

The lightning flash with arrowhead symbol, within an 
equilateral triangle, is intended to alert the user to the 
presence of uninsulated “dangerous voltage” within the 
product’s enclosure that may be of sufficient magnitude as to 
constitute a risk of electric shock to persons.

The exclamation point within an equilateral triangle is 
intended to alert the user to the presence of important 
operating and maintenance (servicing) instructions in the 
literature accompanying the appliance.

This symbol means that the product should be disposed of 
in an environmentally friendly manner and not with general 
household waste.

Appliance filled with flammable gas R290.

Before using and installing the appliance, read the installation 
manual first.

"There are Specialists notes contained at the end of this User 
Manual which relate to the servicing of this product. These are 
only to be used by qualified persons."

Before using the appliance, read the owner’s manual first.

AC voltage

In order to prevent fi re always 

keep candles and other open 

fl ames away from this product.

CAUTION

RISK OF ELECTRIC SHOCK

DO NOT OPEN

CAUTION

RISK OF ELECTRIC SHOCK

DO NOT OPEN

Summary of Contents for UL-C09EA-W

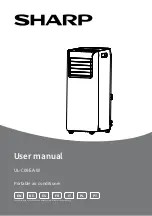
Page 1: ...Product images are for illustration purposes only Actual product may vary EN ES IT PT DE FR PL UL C09EA W Portable air conditioner User manual ...

Page 2: ......

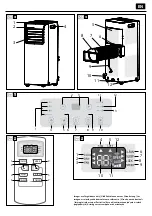
Page 3: ...s non contractuels Immagini solo a scopo illustrativo Rysunki zamieszczono jedynie w celach poglądowych As imagens servem apenas de orientação MODE X FAN TIMER T OFF COOL DRY LOCK AUTO H OPER 1 2 4 5 3 6 7 4 T OFF COOL DRY LOCK AUTO H OPER 1 4 5 2 3 6 7 8 9 12 10 11 5 5 6 7 8 9 10 11 12 2 1 2 4 3 1 1 2 3 11 12 13 5 6 9 7 10 4 8 3 ...

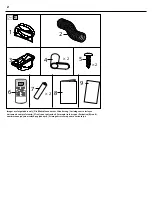
Page 4: ... L 1 2 3 4 5 6 8 7 2 2 2 9 6 Images are for guidance only Die Bilder dienen nur zur Orientierung Las imágenes se incluyen únicamente como referencia Visuels non contractuels Immagini solo a scopo illustrativo Rysunki zamieszczono jedynie w celach poglądowych As imagens servem apenas de orientação ...

Page 5: ...er than 11m The appliance is not to be stored in a room with continuously operating ignition sources for example open flames an operating gas appliance or an operating electric heater The appliance shall be stored in a well ventilated area where the room size corresponds to the room area as specified for operation The appliance shall be stored so as to prevent mechanical damage from occurring Duct...

Page 6: ...ercial areas Allow a gap of at least 30 cm around the appliance and ensure floor surface is smooth and flat Do not operate the air conditioner at humid environment Keep the air inlet and outlet clean and unobstructed During operation close doors and windows to improve cooling effect Locate the appliance on a smooth and flat surface to avoid excessive noise and vibration This air conditioner is equ...

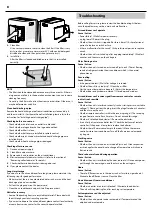
Page 7: ...el 2 Signal receiver 3 Guide louver 4 Handles 5 Filter 6 Joint 7 Heat Discharge Pipe 8 Rear clip 9 Power cord 10 Power cord hooks 11 Bottom drainage port 12 Castors NOTICE Some installation accessories can t be discarded Control Panel Refer to the pictures 3 on page 1 1 Fan speed indicator 2 button 3 Display panel 4 Fan button 5 Sleep button 6 Sleep indicator 7 ON OFF button 8 Timer button 9 Timer...

Page 8: ...with the word PUSH This will open the guide louver Do this before using the unit In order to allow maximum air flow it is suggested to open the air guide louver to the maximum position Remote control Remote control buttons Refer to the pictures 4 on page 1 1 ON OFF 2 MODE 3 4 FAN 5 X FAN 6 SLEEP 7 TIMER Remote control display Refer to the pictures 5 on page 1 1 COOL Cool mode 2 DRY Dry mode 3 FAN ...

Page 9: ...ns simultaneously can turn on or turn off child lock function When child lock function is started up child lock indicator on remote controller is ON If you operate the remote control remote control won t send signal This function works only for remote controller the buttons on the unit itself can not be locked Temperature display switchover function Under OFF status press button and MODE button si...

Page 10: ...conditioner can t operate Cause Action Power failure Wait after power recovery Is plug loose Reinsert the plug Whether the air switch is tripped off or fuse is burnt Ask professional person to replace air switch or fuse Is there malfunction for the circuit Ask professional person to replace circuit Whether the unit is restarted up after stopping immediately Wait for 3 minutes and then turn on the ...

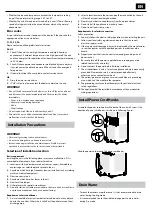
Page 11: ...h as welding machine medical equipment 3 Near to a coastal area 4 Anywhere which has oil or fumes in the air 5 Near to sulfureted gas 6 Other places with special circumstances 7 Do not install on unstable or motive base structure such as truck or in a corrosive environment such as chemical factory Requirement of air conditioner 1 Air inlet should be far away from obstacles and do not put any objec...

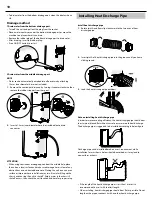
Page 12: ...on an uneven surface or improper hose installation may result in water filling up the chassis and causing the unit to shut off Empty water in the chassis if shut off occurs then check the unit location and hose for proper setup Installing Heat Discharge Pipe Install heat discharge pipe 1 Rotate joint A and Rear clip clockwise into the two ends of heat discharge pipe 2 Insert joint A of heat discha...

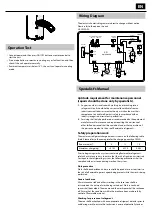
Page 13: ...erformed as recommended by the equipment manufacturer Maintenance and repair requiring the assistance of other skilled personnel shall be carried out under the supervision of the person competent in the use of flammable refrigerants Safety preparation work The maximum refrigerant charge amount is shown on the following table Note Please refer to the nameplate for the charging quantity of R290 Room...

Page 14: ...any removal of sealed covers etc If it is absolutely necessary to have an electrical supply to equipment during servicing then a permanently operating form of leak detection shall be located at the most critical point to warn of a potentially hazardous situation Particular attention shall be paid to the following to ensure that by working on electrical components the casing is not altered in such ...

Page 15: ...ld so that refrigerant can be removed from various parts of the system f Make sure that cylinder is situated on the scales before recovery takes place g Start the recovery machine and operate in accordance with manufacturer s instructions h Do not overfill cylinders No more than 80 volume liquid charge i Do not exceed the maximum working pressure of the cylinder even temporarily j When the cylinde...

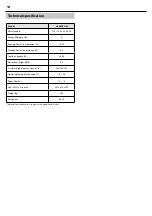
Page 16: ...umption W 1000 Standby Power Consumption W 0 5 Cooling Capacity W 2600 Noise Level High dB A 64 Air Flow High Medium Low m h 260 240 220 Operating Temperature Range C 16 30 Room Size m 12 18 Size W x D x H in mm 287 x 326 x 705 Weight kg 24 5 Refrigerant R290 Technical specifications are subject to change without notice ...

Page 17: ...rät ist mit dem brennbaren Gas R290 gefüllt Das Gerät sollte in einem Raum mit einer Grundfläche von über 15 m2 eingebaut betrieben und gelagert werden Das Gerät muss in einem Raum gelagert werden in dem es keine ständig aktiven Zündquellen gibt Beispielsweise offene Flammen ein laufendes Gasgerät oder eine laufende elektrische Heizung Das Gerät muss in einem gut belüfteten Bereich gelagert werden...

Page 18: ...raturbereichs von 16 C bis 35 C betrieben werden Das Gerät ist nur für den Innengebrauch bestimmt Das Gerät muss so aufgestellt werden dass der Stecker jederzeit leicht zugänglich ist Dieses Klimagerät darf nur im häuslichen Bereich eingesetzt werden es ist nicht für den gewerblichen Bereich geeignet Achten Sie darauf dass um das Gerät herum ein Abstand von mindestens 30 cm eingehalten wird und de...

Page 19: ...iehen Sie sich auf die Bilder 6 auf Seite 2 1 Verbindungsstück 1 2 Wärmeabfuhrrohr 1 3 Hinterer Clip 1 4 Netzkabelhaken 2 5 Schrauben 2 6 Fernbedienung 1 7 Batterien AAA 1 5 V R03 2 8 Benutzerhandbuch 1 9 Garantiekarte 1 Bezeichnung der Teile Beziehen Sie sich auf die Bilder 1 und 2 auf Seite 1 1 Bedienfeld 2 Signalempfänger 3 Führungsjalousie 4 Griffe 5 Filter 6 Verbindungsstück 7 Wärmeabfuhrrohr...

Page 20: ...e Zeit in Intervallen von 1 Stunde ein Drücken Sie nach dem Einstellen der Zeitdauer erneut die Timer Taste um die Einstellung zu bestätigen Wenn der EINSCHALT Timer eingestellt ist schaltet das Gerät wird in den Betriebsmodus sobald die eingestellte Zeit abgelaufen ist Wenn der AUSSCHALT Timer eingestellt ist wird die Timer Anzeige nach der Einstellung des Timers nach fünf Sekunden mit der Temper...

Page 21: ...n Sie innerhalb von 5 Sekunden die Taste oder um die Zeit für den Ausschalt Timer anzupassen Wenn Sie die Taste oder einmal drücken wird die Zeit um 0 5 Stunden verlängert oder verkürzt Wenn Sie die Taste oder 2 Sekunden lang gedrückt halten ändert sich die Zeit schnell Lassen Sie die Taste los nachdem die eingestellte Zeit erreicht ist Drücken Sie anschließend zur Bestätigung die Taste TIMER Die ...

Page 22: ...hn ordnungsgemäß wieder ein HINWEIS ū Der Filter sollte ungefähr alle drei Monate gereinigt werden Wenn die Betriebsumgebung sehr staubig ist können Sie die Reinigungsfrequenz erhöhen ū Trocknen Sie den Filter mit einer direkten Wärmequelle oder einem Föhn Ansonsten kann er sich verformen oder entzünden Wärmeabfuhrrohr Entfernen Sie das Wärmeabfuhrrohr aus der Klimaanlage reinigen und trocknen Sie...

Page 23: ...age bläst keine Luft Ursache Handlung Ist der Lufteinlass oder der Luftauslass blockiert Beseitigen Sie die Hindernisse Der Gerätelüfter hört auf zu arbeiten nachdem die Sollwerttemperatur erreicht ist Sollwerttemperatur kann nicht eingestellt werden Ursache Handlung Wir das Gerät im Auto Modus betrieben Im Automatikbetrieb kann die Temperatur nicht eingestellt werden Überschreitet die erforderlic...

Page 24: ...heit zu tun haben 6 Verbinden Sie die Stromzufuhr erst nach dem Abschluss der Installation 7 Die Klimaanlage ist ein elektrisches Gerät der Klasse 1 und muss ordnungsgemäß geerdet werden Bitte vergewissern Sie sich dass die Klimaanlage immer ordnungsgemäß geerdet ist ansonsten kann es zu einem elektrischen Schlag kommen 8 Der gelb grüne Draht oder der grüne Draht in der Klimaanlage ist eine Schutz...

Page 25: ...rmeabfuhrrohrs in die Nut bis Sie ein klickendes Geräusch hören Verschluss Nut 3 Führen Sie das Wärmeabflussrohr nach draußen Hinweis zur Installation des Wärmeabflussrohrs Zur Verbesserung der Kühleffizienz sollte das Wärmeabgaberohr so kurz wie möglich und flach sein und keine Krümmung aufweisen damit eine gleichmäßige Wärmeabgabe gewährleistet wird Installieren Sie das Wärmeabflussrohr entsprec...

Page 26: ...nkenbildung ausreichend abgedichtet oder eigensicher Vorhandensein eines Feuerlöschers Wenn Heißarbeiten an der Kühleinrichtung oder den zugehörigen Teilen durchgeführt werden muss eine geeignete Feuerlöschausrüstung zur Verfügung stehen Stellen Sie einen Pulverfeuerlöscher oder CO2 Feuerlöscher neben den Befüllungsbereich Keine Zündquellen Keine Person die Arbeiten an einer Kälteanlage ausführt w...

Page 27: ...könnte eine Neukalibrierung erforderlich sein Detektionsausrüstung muss in einem kältemittelfreien Bereich kalibriert werden Vergewissern Sie sich dass der Detektor keine potenzielle Zündquelle darstellt und sich für das verwendete Kältemittel eignet Die Lecksuchgeräte müssen auf einen Prozentsatz des LFL Lower Flammable Limit untere Explosionsgrenze des Kältemittels eingestellt und entsprechend d...

Page 28: ...res Kältemittel enthält Rückgewinnung Wenn Sie Kältemittel aus einem System rückgewinnen egal ob für einen Service Wartung oder eine Außerbetriebnahme wird die Einhaltung bewährter Verfahrensweisen empfohlen damit alle Kältemittel sicher rückgewonnen werden Wenn Sie Kältemittel in Flaschen rückgewinnen müssen Sie darauf achten dass nur Flaschen benutzt werden die sich für die Kältemittelrückgewinn...

Page 29: ...1 m La unidad no debe almacenarse en una estancia con fuentes de ignición continuas por ejemplo llamas descubiertas un aparato a gas en funcio namiento o un calentador eléctrico en marcha La unidad debe almacenarse en un área bien ventilada cuyo tamaño se corresponda con el área de la sala especificada para su funcionamiento La unidad deberá almacenarse de forma que se eviten daños mecánicos Los t...

Page 30: ... en áreas comerciales Deje un espacio de al menos 30 cm alrededor del aparato y asegúrese de que la superficie del suelo es lisa y plana No utilice el acondicionador de aire en un entorno húmedo Mantenga la entrada y salida de aire limpia y sin obstrucciones Durante el uso cierre las puertas y ventanas de la estancia para mejorar el efecto de frío Disponga el aparato sobre una superficie lisa y pl...

Page 31: ...jeta de garantía 1 Nombre de las piezas Consulte las imágenes 1 y 2 de la página 1 1 Panel de control 2 Receptor de señal 3 Lama guía 4 Asas 5 Filtro 6 Junta 7 Tubo de descarga de calor 8 Sujetador posterior 9 Cable de alimentación 10 Ganchos para sujetar el cable 11 Orificio de drenaje inferior 12 Ruedas AVISO Algunos accesorios de instalación no se pueden eliminar Panel de control Consulte las i...

Page 32: ...establecer la duración vuelva a pulsar el botón del temporiza dor para confirmar el ajuste Si el temporizador de conexión está establecido la unidad empezará a funcionar cuando el tiempo fijado haya transcurrido Si el temporizador de desconexión está establecido tras fijarlo la pantalla del temporizador será sustituida por la temperatura transcurridos cinco segundos Para detener el temporizador pu...

Page 33: ...damente Suelte el botón cuando se alcance el tiempo establecido deseado A continuación pulse el botón TIMER para confirmar los cambios Los iconos T OFF y H dejarán de parpadear Con la unidad apagada pulsa este botón para establecer el temporiza dor de conexión Los iconos T ON y H parpadearán En los siguientes cinco segundos pulse el botón o para ajustar el tiempo del tempo rizador de conexión Puls...

Page 34: ...el mando a distancia tiene pilas Compruebe que la junta el brazo de la ventana y la tubería de descarga de calor están correctamente instalados Compruebe que el tubo de descarga de calor no presenta daños Verificaciones tras la temporada de uso 1 Desconecte el aparato de la corriente 2 Limpie el filtro y la carcasa exterior 3 Retire el polvo y los elementos extraños del acondicionador de aire 4 El...

Page 35: ...ad ADVERTENCIA Si ocurre alguno de los fenómenos enumerados a continuación apague el acondicionador de aire desconecte la corriente de inmediato y póngase en contacto con el distribuidor cuanto antes ū El cable de alimentación se sobrecalienta o está dañado ū Sonido anormal durante el funcionamiento ū Olores ū Fuga de agua No repare ni reajuste el acondicionador de aire personalmente Si se utiliza...

Page 36: ...renaje inferior o mueva el aparato para colocarlo en un lugar donde pueda drenar Retire el tapón de goma de la orificio de drenaje inferior para drenar el agua Tras completar el drenaje inserte el tapón de goma Pulse el botón de encendido apagado para reiniciar el aparato 2 Drene el agua de la orificio de drenaje intermedio NOTA ū El agua se puede vaciar automáticamente en un drenaje de suelo fija...

Page 37: ...ación que se ilustra debajo debe evitarse ya que podría dar lugar a escapes no uniformes Si la longitud del tubo de descarga de calor es inferior a un metro se recomienda utilizar un tubo de la menor longitud posible Al instalar el tubo debe disponerse de la forma más recta posible No am plíe la longitud del tubo ni lo conecte a otro tubo de descarga de calor Prueba de funcionamiento Conecte el ap...

Page 38: ...refri geración o cualquier parte asociada deben existir equipos de extinción de incendios adecuados a mano Mantenga un extintor de incendios de CO2 o de espuma en las inmediaciones del área de carga Evitar las fuentes de ignición Ninguna persona que lleve a cabo trabajos relacionados con el sistema de refrigeración que impliquen exposición a cualquier trabajo con tubería debe utilizar fuentes de i...

Page 39: ...unción del refrigerante empleado y se deberá confirmar el porcentaje adecuado de gas 25 como máximo El uso de fluidos de detección de fugas es adecuado con la mayor parte de refrigerantes pero se deberá evitar el uso de detergentes que contengan cloro pues esta sustancia puede reaccionar con el refrigerante y corroer las tuberías de cobre Si se sospecha de una fuga se deben eliminar o apagar todas...

Page 40: ...sistema Los cilindros previstos para su utilización deben ser adecuados para la recuperación de refrigerante y estar etiquetados para el refrigerante concreto es decir de ben utilizarse cilindros especiales para la recuperación de refrigerante Los cilindros deben incorporar una válvula de alivio de presión y las válvulas de corte correspondientes en buen estado Los cilindros de recuperación deben ...

Page 41: ... appareil dans une pièce dont la surface au sol est supérieure à 11 m L appareil doit être rangé dans une pièce sans sources d inflammation fonctionnant en continu par exemple des flammes nues un appareil à gaz en fonctionnement ou un radiateur électrique en fonctionnement L appareil doit être rangé dans un endroit bien ventilé où la taille de la pièce correspond à la surface de la pièce telle que...

Page 42: ...e peut être utilisé que dans des environnements domes tiques il ne doit pas être utilisé dans des zones commerciales Laissez un espace d au moins 30 cm autour de l appareil et assu rez vous que le sol est lisse et plat N utilisez pas le climatiseur dans un environnement humide Maintenez l entrée et la sortie d air propres et non obstruées Pendant le fonctionnement fermez les portes et fenêtres pou...

Page 43: ...1 Nomenclature Reportez vous aux images 1 et 2 en page 1 1 Panneau de commande 2 Récepteur de signaux 3 Volet de guidage 4 Poignées 5 Filtre 6 Joint 7 Tuyau d évacuation de la chaleur 8 Fixation arrière 9 Cordon d alimentation 10 Crochets du cordon d alimentation 11 Port de drainage inférieur 12 Roues REMARQUE Certains accessoires d installa tion ne peuvent pas être mis au rebut Panneau de configu...

Page 44: ...e régler par intervalles de 1 heure Après avoir réglé la durée appuyez à nouveau sur le bouton de la minuterie pour confirmer le réglage Lorsque la minuterie d allumage est réglée l appareil commence à fonc tionner lorsque le temps réglé est écoulé Lorsque la minuterie d arrêt est réglée après avoir réglé la minuterie l affichage de la minuterie est remplacé par la température au bout de cinq seco...

Page 45: ... temps rapidement Relâchez le bouton une fois le temps souhaité atteint Ensuite appuyez sur TIMER pour confirmer Les icônes T OFF et H cessent de clignoter Lorsque l appareil est éteint appuyez sur ce bouton pour régler la minuterie de démarrage Les icônes T ON et H clignotent Dans les 5 secondes appuyez sur or pour régler le temps de la minuterie de démarrage Appuyez sur ou une fois pour augmente...

Page 46: ...tat Vérifiez si le filtre est propre Vérifiez si les piles sont installées dans la télécommande Vérifiez si le joint le support de fenêtre et le tuyau d évacuation de la chaleur sont fermement installés Vérifiez si le tuyau d évacuation de la chaleur est endommagé Vérification après la saison d utilisation 1 Débranchez l alimentation 2 Nettoyez le filtre et le boîtier extérieur 3 Retirez la poussi...

Page 47: ...ion pour le faire fonctionner 3 Si le dysfonctionnement persiste veuillez contacter notre centre de service H8 1 Videz l eau à l intérieur du châssis 2 Si H8 s affiche encore contactez le revendeur pour réparer l appareil AVERTISSEMENT Si l un des phénomènes énumérés ci dessous se produit éteignez le climatiseur et débranchez immédiatement l alimentation puis contactez le revendeur ū Cordon d alim...

Page 48: ...thode de drainage 1 Vidangez l eau du port de drainage inférieur Éteignez l appareil et retirez la fiche de la prise Placez un récipient d eau dans le port de drainage inférieur ou déplacez la machine à un endroit où elle peut vidanger Retirez le bouchon en caoutchouc du port de drainage inférieur pour vidanger l eau Après la vidange insérez le bouchon en caoutchouc Appuyez sur le bouton ON OFF po...

Page 49: ...orme d installation illustrée ci dessous doit être évitée car elle peut entraîner un échappement non uniforme Si la longueur de la conduite d évacuation de chaleur est inférieure à 1 m Il est recommandé de l utiliser avec la longueur la plus courte Lors de l installation le tuyau d évacuation de la chaleur doit être aussi plat que possible N allongez pas le tuyau et ne le connectez pas à un autre ...

Page 50: ...ur l équipement de réfrigé ration ou sur toute pièce connexe un équipement d extinction d incendie approprié devra être disponible Veuillez disposer d un extincteur à poudre sèche ou CO2 à côté de la zone de chargement Pas de sources d inflammation Aucune personne effectuant des travaux en relation avec un système de réfrigération qui implique d exposer une tuyauterie contenant ou ayant contenu un...

Page 51: ...ibrage L équipement de détection doit être étalonné dans une zone sans réfrigérant Assurez vous que le détecteur n est pas une source potentielle d inflammation et est adapté pour le réfrigérant utilisé L équipement de détection des fuites doit être paramétré à un pourcentage de LII du réfrigérant et doit être étalonné sur le réfrigérant utilisé et le pourcentage approprié de gaz 25 maximum est co...

Page 52: ...utiliser que des bouteilles de récupération de réfrigérant appropriées Assurez vous que le nombre correct de bouteilles permettant de contenir la charge totale du système est disponible Tous les cylindres à utiliser sont désignés pour le réfrigérant récupéré et étiquetés pour que ce réfrigérant Ayez des cylindres spéciaux pour la récupération du réfrigérant Les bouteilles doivent comporter une sou...

Page 53: ...icie superiore a 4 m L apparecchio deve essere tenuto in una stanza priva di sorgenti di ignizione continua come ad esempio fiamme aperte apparecchi a gas o stufe elettriche L apparecchio deve essere posizionato in un area ben ventilata in cui la dimensione della stanza corrisponda all area specificata per il funzionamento L apparecchio deve essere posizionato in modo tale da evitare danni meccani...

Page 54: ...o in aree commerciali Assicurati che ci sia uno spazio di almeno 30 cm attorno all apparecchio e assicurati che la superficie del pavimento sia liscia e piatta Non utilizzare il condizionatore d aria in un ambiente umido Assicurati che l ingresso e l uscita dell aria siano sempre puliti e senza ostruzioni Durante l utilizzo chiudi porte e finestre per migliorare l effetto di raffreddamento Colloca...

Page 55: ...i 1 e 2 a pagina 1 1 Pannello di controllo 2 Ricevitore del segnale 3 Deflettore guida 4 Impugnatura 5 Filtro 6 Giunto 7 Tubo di scarico del calore 8 Chiusura posteriore 9 Cavo di alimentazione 10 Ganci cavo di alimentazione 11 Bocca di scarico inferiore 12 Rotelle ATTENZIONE alcuni accessori di installazione non possono essere gettati Pannello di controllo Vedi le immagini 3 a pagina 1 1 Indicato...

Page 56: ...tra 10 ore i pulsanti e imposteranno il tempo a intervalli di 1 ora Dopo aver configurato il tempo della durata premi di nuovo il pulsante timer per confermare l impostazione Quando viene impostato il timer di accensione l unità inizierà a funzionare quando passa il tempo impostato Quando viene importato il timer di spegnimento il display del timer sarà sostituito con la temperatura dopo cinque se...

Page 57: ... 2 secondi e il tempo cambierà rapidamente Lascia il pulsante dopo aver raggiunto il tempo richiesto Quindi premi il pulsante TIMER per confermare Le icone T OFF e H smetteranno di lampeggiare Quando l unità è spenta premi questo pulsante per impostare il Timer accensione Le icone T ON e H lampeggeranno Entro 5 secondi premi il pulsante o per regolare il tempo per il Timer accensione Premendo una ...

Page 58: ...e ci sono danni al tubo di scarico del calore Controllare dopo la stagione di utilizzo 1 Scollega il cavo di alimentazione 2 Pulisci il filtro e l involucro esterno 3 Rimuovi polvere e altro da sopra il condizionatore d aria 4 Elimina l acqua accumulata nel telaio consulta la sezione Rimuovere l acqua accumulata per ulteriori dettagli 5 Controlla se ci siano danni o meno al supporto per finestre 6...

Page 59: ... da te Se il condizionatore funziona in condizioni non normali può verificarsi un malfunzionamento scosse elettriche o rischio di incendio Precauzioni di installazione AVVERTENZA Osserva tutti i codici e le ordinanze applicabili Non usare cavi di alimentazione danneggiati o non standard Fa attenzione durante l installazione e la manutenzione Evita qualsiasi utilizzo non corretto per prevenire scos...

Page 60: ... bocca di scarico centrale NOTA ū L acqua può essere svuotata automaticamente in uno scarico sul pavimento collegando un tubo di diametro interno di 13 mm non incluso 1 Rimuovi il tappo di scarico continuo ruotandolo in senso antiorario quindi rimuovi il tappo di gomma dal beccuccio 2 Inserisci un tubo di diametro interno di 13 mm non incluso nel connettore dello scarico ATTENZIONE ū Quando su usa...

Page 61: ...Requisiti attitudinali per il personale di manutenzione le riparazioni devono essere eseguite solo da specialisti 1 Qualsiasi persona che è coinvolta nella manodopera o nell apertura di in un circuito refrigerante dovrebbe essere munita di un certificato valido emesso da un autorità di valutazione accreditata nel settore che certifichi la loro competenza nella gestione sicura dei refrigeranti in c...

Page 62: ...che iniziali di sicurezza attesteranno che Tutti i condensatori siano scaricati ciò sarà eseguito in maniera sicura in modo da evitare la possibilità di scintille Non ci sono componenti elettrici scoperti e fili esposti durante la carica il recupero o lo spurgo del sistema Non c è continuità nel collegamento alla terra Riparazioni a componenti sigillati Durante le riparazioni a componenti sigillat...

Page 63: ...ante rigenerato La disponibilità di corrente elettrica è essenziale prima di iniziare questa procedura a Acquisisci familiarità con l apparecchio e il suo utilizzo b Isola il sistema elettricamente c Prima di tentare la procedura assicurati che ū siano disponibili attrezzi di gestione meccanica per lavorare sui cilindri del refrigerante se necessario ū tutte le attrezzature protettive personali si...

Page 64: ... totale sicurezza Specifiche tecniche Modello UL C09EA W Alimentazione 220 240 V AC 50 Hz Classe di efficienza energetica A Consumo energetico in funzionamento W 1000 Consumo energetico in stand by W 0 5 Capacità di raffreddamento W 2600 Livello di rumore in Alta dB A 64 Flusso d aria alto medio basso m h 260 240 220 Intervallo delle temperatura di esercizio C 16 30 Dimensione della stanza m 12 18...

Page 65: ...ację i przechowywanie urządzenia w pomieszczeniu o powierzchni większej niż 11 m Opisywane urządzenie należy przechowywać w pomieszczeniu w którym nie są wykorzystywane w sposób ciągły urządzenia stanowiące źródła zapłonu np urządzenie z otwartym ogniem pracujące urządze nie gazowe lub działający grzejnik elektryczny Urządzenie należy przechowywać w dobrze wentylowanym pomieszcze niu którego wielk...

Page 66: ...h przedmiotów nad klimatyzatorem Nie wolno próbować naprawiać ani demontować klimatyzatora samo dzielnie Nie wolno umieszczać jakichkolwiek przedmiotów w klimatyzatorze Należy upewnić się że wewnątrz kanału powietrznego nie znajdują się obce substancje W przypadku przedostania się obcych substancji do kanału należy skontaktować się ze sprzedawcą urządzenia aby zapobiec wystąpieniu zagrożeń Nie wol...

Page 67: ...warunkach gwarancji przejdź do strony www sharpconsumer com support lub skontaktuj się ze sprzedawcą urządzenia Deklaracje zgodności są dostępne na stronie www sharpconsumer com documents of conformity Zawartość opakowania UWAGA ū Sprawdź czy akcesoria są dostępne przed instalacją Patrz rysunek 6 na stronie 2 1 Złącze 1 2 Rura odprowadzająca ciepło 1 3 Zacisk tylny 1 4 Zaczep przewodu zasilającego...

Page 68: ...ch odstępach Po ustawieniu czasu opóźnienia ponownie naciśnij przycisk TIMER aby zatwierdzić ustawienie Po ustawieniu WŁĄCZNIKA CZASOWEGO urządzenie uruchomi się po upływie ustawionego czasu W trybie WYŁĄCZNIKA CZASOWEGO po ustawieniu timera wskazanie timera zostanie zastąpione wskazaniem temperatury po upływie pięciu sekund Aby anulować ustawienia timera należy ponownie nacisnąć przycisk TIMER Ot...

Page 69: ...ądanego wskazania czasu Następnie naciśnij przycisk TIMER aby zatwierdzić ustawienie Symbole T OFF i H przestaną pulsować Jeśli urządzenie jest wyłączone naciśnij ten przycisk aby ustawić WŁĄCZNIK CZASOWY Symbole T ON i H zaczną pulsować W ciągu pięciu sekund naciśnij przycisk lub aby ustawić czas WŁĄCZNIKA CZASOWEGO Naciśnięcie jeden raz przycisku lub spowoduje zwiększenie lub zmniejszenie wskaza...

Page 70: ...ania Sprawdź czy wloty i wyloty powietrza nie zostały zablokowane Sprawdź czy wtyczka przewodu zasilającego i gniazdko elektryczne są w dobrym stanie Sprawdź czy filtr jest czysty Sprawdź czy baterie zostały zainstalowane w pilocie zdalnego stero wania Sprawdź czy złącze wspornik okienny i rura odprowadzająca ciepło zostały starannie zainstalowane Sprawdź czy rura odprowadzająca ciepło nie jest us...

Page 71: ...t zbyt wysokah wyłącz urządzenie Następnie uruchom urządzenie jeśli temperatura pomieszczenia spadnie poniżej 35 C 2 Sprawdź czy ewaporator i skraplacz nie zostały zablokowane jakimi kolwiek przedmiotami jeśli tak usuń przedmioty wyłącz urządzenie i uruchom je ponownie 3 Jeśli usterki nie można usunąć skontaktuj się z autoryzowanym serwisem H8 1 Opróżnij wodę z obudowy 2 Jeśli kod błędu H8 nadal s...

Page 72: ...ydajność nie zaleca się odprowadzania kondensatu w trybie chłodzenia Zalecane jest wykorzystanie środkowego otworu spustowego do odpro wadzania kondensatu w trybie osuszania Aby odprowadzić kondensat przez dolny otwór spustowy gdy na wyświetlaczu pojawi się kod błędu H8 Sposób odprowadzania kondensatu 1 Odprowadź kondensat przez dolny otwór spustowy Wyłącz zasilanie urządzenia i odłącz wtyczkę prz...

Page 73: ...rę odprowadzającą ciepło można zainstalować zgodnie z wymaganiami użytkownika Należy unikać sposobu instalacji przedstawionego poniżej ponieważ mogłoby to doprowadzić do nierównomiernego odprowadzania ciepłego powietrza Długość rury odprowadzającej ciepło wynosi mniej niż jeden metr Zaleca się stosowanie rury o jak najkrótszej długości Rurę odprowadzającą ciepło należy zainstalować jak najbardziej...

Page 74: ...szczelniony lub sam w sobie bezpieczny Dostępność gaśnicy W przypadku wykonywania jakichkolwiek prac przy urządzeniach chłod niczych lub powiązanych z nimi elementach wymagających użycia palnika należy mieć pod ręką odpowiedni sprzęt gaśniczy Gaśnica proszkowa lub CO2 powinna znajdować się w pobliżu miejsca napełniania układu czynnikiem chłodniczym Brak źródeł zapłonu Żadna z osób wykonujących pra...

Page 75: ...ych ich czułość może być niewystarczająca lub mogą wymagać ponownej kalibracji Sprzęt do wykrywania wycieków należy kalibrować w obszarze wolnym od czynnika chłodniczego Należy upewnić się że detektor nie stanowi potencjalnego źródła zapłonu oraz jest odpowiedni do zastosowa nego czynnika chłodniczego Sprzęt do wykrywania wycieków powinien być ustawiony na wartość procentową LFL czynnika chłodnicz...

Page 76: ...godne z dobrymi praktykami aby cały czynnik chłodniczy został bezpiecznie odzyskany Podczas przenoszenia czynnika chłodniczego do butli należy upewnić się że stosowane są wyłącznie odpowiednie butle do odzyskiwania czynnika chłodniczego Upewnij się że dostępna jest odpowiednia ilość butli do przechowywania czynnika odzyskanego z całego systemu Wszystkie użyte butle powinny być przeznaczone do odzy...

Page 77: ... 11 m2 O eletrodoméstico não deve ser armazenado numa divisão com fontes de ignição em constante funcionamento por exemplo chamas acesas um eletrodoméstico a gás em funcionamento ou um aquecedor elétrico em funcionamento O eletrodoméstico deve ser armazenado numa zona bem ventilada onde o tamanho da divisão corresponda à área da divisão tal como especifica do para o funcionamento O eletrodoméstico...

Page 78: ...ésticos Não é para ser usado em zonas comerciais Deixe um espaço de pelo menos 30 cm à volta do eletrodoméstico e garanta que a superfície da base é plana e lisa Não use o ar condicionado num ambiente húmido Mantenha a entrada e saída de ar limpas e desobstruídas Durante o funcionamento feche as portas e janelas para melhorar o efeito de arrefecimento Coloque o eletrodoméstico numa superfície lisa...

Page 79: ...s 5 Filtro 6 Junta 7 Tubo de descarga de calor 8 Presilha de trás 9 Cabo de alimentação 10 Ganchos do cabo de alimentação 11 Porta de drenagem de baixo 12 Rodas AVISO Alguns acessórios de instalação não podem ser eliminados Painel de controlo Veja as imagens 3 na página 1 1 Indicador da velocidade da ventoinha 2 Botão 3 Painel do mostrador 4 Botão ventoinha 5 Botão dormir 6 Indicador de dormir 7 B...

Page 80: ...rador apresentar 10 horas os botões e irão definir intervalos de 1 hora Depois de definir a duração carregue novamente no botão do temporizador para confirmar a definição Quando o temporizador de ligar estiver definido a unidade começará a funcionar assim que o tempo tiver passado Quando o temporizador de desligar estiver definido depois de definir o temporizador o mostrador do temporizador será s...

Page 81: ...em 0 5 ho ras Mantenha o botão ou durante 2 segundos a hora irá mudar rapidamente Solte o botão quando chegar à hora desejada Depois carregue no botão TIMER para a confirmar A indicação T OFF e o ícone H deixarão de piscar Com a unidade desligada carregue neste botão para definir o temporizador de ligar A indicação T ON e o ícone H irão piscar Em 5s carregue no botão ou para acertar a hora do temp...

Page 82: ...mpe o filtro e a estrutura exterior 3 Remova o pó e outra sujidade no ar condicionado 4 Elimine a água acumulada no chassis veja a secção Remover a água recolhida para mais detalhes 5 Verifique se o suporte da janela está ou não danificado 6 Se sim contacte o revendedor Armazenamento prolongado Se não usar o ar condicionado durante um período prolongado faça a manutenção seguindo os seguintes pass...

Page 83: ... de alimentação danificado ou não convencional Tenha cuidado durante a instalação e manutenção Proíba operações incor retas para evitar choques elétricos fatalidades e outros acidentes Seleção do local de instalação Requisitos básicos A instalação da unidade nos seguintes locais pode provocar anomalias Se for inevitável consulte o revendedor local para obter conselho 1 Locais com fontes de calor f...

Page 84: ... interior de 13 mm não incluída 1 Retire a tampa de drenagem contínua girando a no sentido contrário aos ponteiros do relógio e depois remova o tampão de borracha do bico 2 Insira uma mangueira com diâmetro interior de 13 mm não incluída no conector de drenagem ATENÇÃO ū Quando usar a opção de drenagem contínua do furo do meio coloque a unidade numa superfície nivelada e certifique se de que a man...

Page 85: ...al do especialista Requisito de aptidão para pessoal de manutenção as reparações apenas devem ser feitas por especia listas 1 Qualquer pessoa implicada no trabalho ou em mexer num circuito re frigerante deve possuir um certificado válido atual de uma autoridade certificadora reconhecida na indústria que autoriza a sua competência para lidar com refrigerantes de forma segura de acordo com uma espec...

Page 86: ...artes estarem avisadas As verificações de segurança iniciais devem incluir Que os condensadores são descarregados isto deve ser feito de modo seguro para evitar a possibilidade de ignição Que nenhumas peças elétricas ativas e ligações elétricas estejam expos tas enquanto se carregar recuperar ou purgar o sistema Que haja continuidade na ligação à terra Reparações de peças seladas Durante a reparaç...

Page 87: ... cilindros refrigerantes ū todo o equipamento de proteção pessoal está disponível e a ser usado corretamente ū o processo de recuperação é supervisionado o tempo todo por uma pessoa competente ū o equipamento de recuperação e os cilindros estão em conformidade com os padrões adequados d Bombeie o sistema refrigerante se possível e Se não for possível um aspirador faça um colector para que o refrig...

Page 88: ...nsumo energético em standby espera W 0 5 Capacidade de arrefecimento W 2600 Nível de ruído Alto dB A 64 Fluxo de ar Alto Médio Baixo m h 260 240 220 Alcance daTemperatura de Funcionamento C 16 30 Tamanho da divisão m 12 18 Tamanho L x P x A em mm 287 x 326 x 705 Peso kg 24 5 Refrigerante R290 As especificações técnicas estão sujeitas a alterações sem aviso prévio ...

Page 89: ...PT ...

Page 90: ...88 ...

Page 91: ......

Page 92: ...www sharpconsumer eu Sharp Consumer Electronics Poland sp z o o Ostaszewo 57B 87 148 Łysomice Poland Made in China SDA MAN 0198 ...

Reviews: