


41
MAKING COPIES
I
I
I
I
I
I
I
I
INSERTS
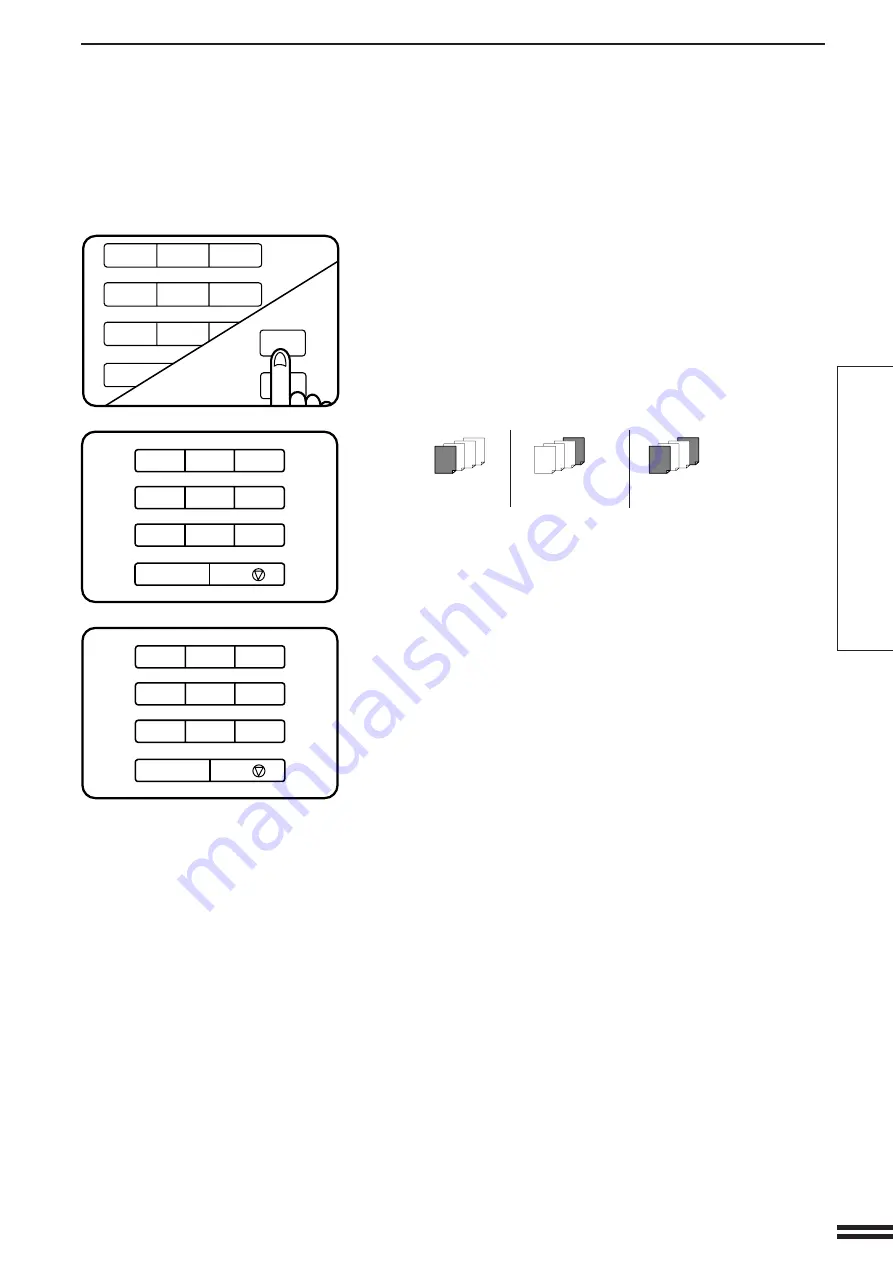
Enter the number of originals using the 10-key pad and
then press the PROGRAM key. If the number of
originals is not known, press only the PROGRAM key.
●
If only the PROGRAM key is pressed, the number of originals
will be counted. When counting is completed, reset the
originals in the RADF tray.
●
The following message will appear.
USE 10-KEY PAD TO SELECT COVER
PLACEMENT.
FRONT BACK FRONT+BACK
: PUSH 1 : PUSH 2 : PUSH 3
Select cover placement by pressing key 1, 2, or 3 on
the 10-key pad.
●
If FRONT or FRONT+BACK is selected, the message “
ON FRONT COVER? USE 10-KEY PAD TO SELECT. YES:
PUSH 1 NO: PUSH 2
” will appear.
Select YES or NO by pressing key 1 or 2 on the 10-key
pad.
●
The message “
PRINT ON THE CHAPTER PAGES? USE 10-
KEY PAD TO SELECT. YES: PUSH 1 NO: PUSH 2
” will
appear.
Follow the steps for insert sheet placement.
●
To place insert sheets with printing in the 1-sided copy mode,
go to step 6 on page 29.
●
To place insert sheets without printing in the 1-sided copy
mode, go to step 6 on page 32.
●
To place insert sheets with printing in the 2-sided copy mode,
go to step 7 on page 35.
●
To place insert sheets without printing in the 2-sided copy
mode, go to step 7 on page 38.
●
When different types of paper are to be used for cover stock
and insert sheets, load insert sheets into tray 2 or tray 3 and
cover stock into the bypass tray. If the same paper stock is to
be used for cover stock and insert sheets, load the stock into
the bypass tray. In both cases, cover stock and insert sheets
must be the same size as the copy paper being used for
copying the document.
Inserts
5
4
7
8
AUDIT
CLEAR
1
2
3
5
6
0 /
PROGRAM
CLEAR ALL
P
CA
<M088>
6
7
8
4
7
8
9
AUDIT
CLEAR
1
2
3
5
6
CLEAR/STOP
0 /
C /
4
7
8
9
AUDIT
CLEAR
1
2
3
5
6
CLEAR/STOP
0 /
C /
<M091>
http://www.usersmanualguide.com/


