background image

21

CONVENIENT FUNCTIONS

Use the KITCHEN TIMER as a minute timer or to 
monitor the standing time for cooked/defrosted 
food.

NOTES:

•  You can enter any time up to 99 minutes, 90 

seconds.

•  The KITCHEN TIMER function cannot be used 

whilst the oven is in use.

•  To cancel the KITCHEN TIMER simply press 

the 

STOP/CLEAR

 key and the display will 

return to the time of day, if set.

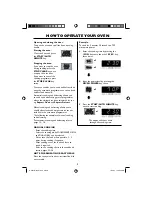
4.  KITCHEN TIMER

Example:  

To set the timer for 5 minutes. 

1.

  Enter the desired time by pressing the 

1 MIN.

 key 5 times.

2.

 Press 

the 

KITCHEN TIMER

 key once to 

start the timer.

The display will count down.  When the display
reaches zero, the audible signal will sound.

x1

x5

R-67STM (SUK).indd   Sec2:21

R-67STM (SUK).indd   Sec2:21

7/25/07   10:59:12 AM

7/25/07   10:59:12 AM

Summary of Contents for R-67STM

Page 1: ...800W IEC 60705 OPERATION MANUAL with COOKBOOK R 67STM MICROWAVE OVEN with TOP BOTTOM GRILLS R 67STM SUK indd 1 R 67STM SUK indd 1 7 25 07 10 59 02 AM 7 25 07 10 59 02 AM ...

Page 2: ... By disposing of this product correctly you will help ensure that the waste undergoes the necessary treatment recovery and recycling and thus prevent potential negative effects on the environment and human health which could otherwise arise due to inappropriate waste handling 2 In other Countries outside the EU If you wish to discard this product please contact your local authorities and ask for t...

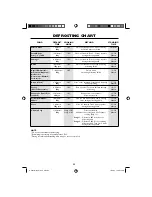
Page 3: ...WEIGHT CONTAINER INSTRUCTION COOKING INSTRUCTION COOKING TIME POWER LEVEL STANDING TIME Frozen Ready Meals non stirrable e g Lasagne 400g Flan dish on turntable Place the ready meal in a heat resistant flan dish on the turntable Stage1 1 minute on 100 Stage2 15 minutes on 50 2 Minutes Chilled Ready Meals non stirrable e g Lasagne 400g Flan dish on turntable Place the ready meal in a heat resistant...

Page 4: ...change each time you start the oven This does not affect cooking performance When you order accessories please quote both the PART NAME and MODEL NUMBER to your dealer or SHARP approved service facility The model number is located at the bottom of the control panel ACCESSORIES Check to make sure the following accessories are provided 14 Turntable 15 Rack Place the turntable on to the turntable mot...

Page 5: ... COOK 5 EXPRESS DEFROST 6 WEIGHT 7 LESS MORE 8 START AUTO MINUTE 9 AUTO COOK 10 PIZZA 11 STOP CLEAR 12 CLOCK SET 13 KITCHENTIMER 14 DUAL GRILL 15 GRILL 16 MICRO POWER 1 2 4 5 3 6 8 7 9 10 11 12 13 14 15 16 R 67STM SUK indd Sec2 3 R 67STM SUK indd Sec2 3 7 25 07 10 59 04 AM 7 25 07 10 59 04 AM ...

Page 6: ...ble to use the oven in a safe way and understands the hazards of improper use When the appliance is operated in the GRILL DUAL GRILL PIZZA EXPRESS COOK and AUTO COOK modes children should only use the oven under adult supervision due to the temperature generated Accessible parts may become hot during use Young children should be kept away WARNING Liquids and other foods must not be heated in seale...

Page 7: ...Do not connect other appliances to the same socket using an adaptor plug If the power supply cord is damaged it must be replaced by a Sharp approved service facility or 18cm INSTALLATION a similarly qualified person to avoid a hazard When removing the plug from the socket always grip the plug never the cord as this may damage the power supply cord and the connections inside the plug If the plug fi...

Page 8: ...ich cause them to vibrate This creates heat by friction in the same way your hands get warm when you rub them together The outer areas of the food are heated by the microwave energy then the heat moves to the centre by conduction as it does in conventional cooking It is important to turn rearrange or stir food to ensure even heating Once cooking is complete the oven automatically stops producing m...

Page 9: ...ou press the MICRO POWER key to the desired setting Check the power level To check the microwave power level during cooking press the MICRO POWER key As long as your finger is pressing the MICRO POWER key the power level will be displayed The oven continues to count down although the display will show the power level MICRO POWER KEY Power Level Press the MICRO POWER key Percentage HIGH x 1 100P ME...

Page 10: ...ing process press the CLOCK SET key and the time of day will remain on the display as long as you keep your finger on the key This does not affect the cooking process If the clock is set when cooking is complete the display will show the correct time of day If the clock has not been set the display will only show when cooking is complete If the electrical power supply to your microwave oven is int...

Page 11: ...cook defrost foods and weights which are not included in the automatic programmes The following are examples of manual cooking and defrosting For automatic cooking and defrosting refer to pages 13 18 Example To cook for 2 minutes 30 seconds on 70P microwave power 1 Enter the cooking time by pressing the 1 MIN key twice then the 10 SEC key three times 2 Input the power level by pressing the MICRO P...

Page 12: ...will reappear on the display if the clock has been set If you want to know the power level during cooking press the MICRO POWER key As long as your finger is touching the key the power level will be displayed MANUAL DEFROSTING Enter the defrosting time and use microwave power levels 10P or 30P to defrost refer to page 7 Stir or turn the food where possible 2 3 times during defrosting After defrost...

Page 13: ... can be placed either directly onto the rack or into a flan dish heat resistant plate on the rack The grills required can be selected as follows Cooking Mode Press GRILL key GRILL 1 Top Grill Once GRILL 2 Bottom Grill Twice GRILL 3 Top and Bottom Grill 3 Times NOTE When new the very first time the grills are used smoke and odour will be given off To avoid this happening when food is being cooked h...

Page 14: ...ey until the desired power level is shown on the display Microwave power levels 10P 30P 50P and 70P can be selected NOTES It is not necessary to preheat the grill When browning foods in a deep container place on the turntable Use the rack for dual grill cooking refer to the cooking charts on page 36 in the cookbook section Follow the recommended dual grilling times and procedures in the charts on ...

Page 15: ...ed menu key twice CHLL will appear on the display NOTES You can enter the weight by holding down or pressing the WEIGHT keys until the desired weight is displayed If the DOWN WEIGHT key is pressed the display will count down from the highest weight range each time the key is pressed If the UP WEIGHT key is pressed the display will count up from the lowest weight range each time the key is pressed ...

Page 16: ... not possible to use the LESS key This menu is only suitable for whole poultry For frozen poultry When cooking frozen poultry with giblets remove the giblets at first or second turn over Roast Beef Lamb x1 Frozen x2 Chilled 0 5kg 1 5kg Place meat in a flan dish on the turntable Turn meat over when the audible signal sounds After cooking leave meat to stand wrapped in aluminium foil for 10 minutes ...

Page 17: ...continue cooking press the START AUTO MINUTE key The final food temperature will vary according to the initial food temperature Check food is thoroughly heated after cooking If necessary you can extend the cooking time manually PIZZA and EXPRESS COOK menus use a combination of microwave power and grill Before freezing foods ensure food is fresh and of good quality If necessary shield small areas o...

Page 18: ... from the highest weight range each time the key is pressed If the UP WEIGHT key is pressed the display will count up from the lowest weight range each time the key is pressed You can enter the weight by holding down or pressing the WEIGHT keys until the desired weight is displayed You can select the menu by holding down or pressing the AUTO COOK key until the desired menu is displayed Example To ...

Page 19: ...ES For stirrable foods including food in bags stir or manipulate contents when the audible signal sounds It is not possible to use the LESS key AC 2 Chilled Ready Meals Stirrable E g spaghetti bolognese beef stew 0 30kg 0 60kg AC 3 Frozen Crispy Coated Foods E g fish fingers chicken nuggets 0 10kg 0 40kg Place the food on the turntable After cooking leave to stand for 2 minutes before serving AC 4...

Page 20: ... 05kg for example 0 34kg to 0 35kg You are restricted to cook the weight given in the charts To cook weights or foods not included in this chart cook manually For converting to lbs oz refer to the conversion chart page 31 IMPORTANT NOTE FOR READY MEALS These menus are suitable for savoury microwave ready meals only These menus are not suitable for non stirrable ready meals e g lasagne cottage pie ...

Page 21: ...to input the power level Example To cook for 5 minutes on 70P microwave power Stage 1 6 minutes on Grill 1 Stage 2 3 minutes on Dual Grill 1 10P microwave power Stage 3 1 Enter the cooking time by pressing the 1 MIN key 5 times 2 Input the power level by pressing the MICRO POWER key twice STAGE 1 STAGE 3 3 Enter the cooking time by pressing the 1 MIN key 6 times STAGE 2 4 Select Grill 1 by pressin...

Page 22: ...decrease in multiples of 1 minute The overall time can be extended to a maximum of 99 minutes NOTES If you select MORE the display will show PLUS If you select LESS the display will show LESS Some menus do not have the LESS function and if you select LESS and then press START AUTO MINUTE key Err will be displayed To cancel LESS MORE press the same key again To change MORE to LESS press the LESS ke...

Page 23: ...l the KITCHENTIMER simply press the STOP CLEAR key and the display will return to the time of day if set 4 KITCHENTIMER Example To set the timer for 5 minutes 1 Enter the desired time by pressing the 1 MIN key 5 times 2 Press the KITCHENTIMER key once to start the timer The display will count down When the display reaches zero the audible signal will sound x1 x5 R 67STM SUK indd Sec2 21 R 67STM SU...

Page 24: ...ter than conventional cooking It is therefore essential that certain techniques are followed to ensure good results Many of the following techniques are similar to those used in conventional cooking WARNING Follow instructions in the SHARP operation manual at all times If you exceed recommended cooking times and use power levels that are too high food may overheat burn and in extreme circumstances...

Page 25: ...uch as roasts and casseroles The number of microwaves in your oven remains the same regardless of how much food is being cooked The cooking time must be increased as the amount of food placed in the oven increases e g four potatoes will take longer to cook than two Small foods and small pieces cook faster than large ones as microwaves can penetrate from all sides to the centre For even cooking mak...

Page 26: ... It is not recommended to use metal cookware when using microwave power as it will arc which can lead to fire Care must be taken as some containers warp melt or discolour at high temperatures Should not touch the food and must be pierced to let the steam escape Must be pierced to let steam escape Ensure bags are suitable for microwave use Do not use plastic or metal ties as they may melt or catch ...

Page 27: ... This will ensure that all parts of the food defrosts evenly Foods may be stuck together when removed from the freezer It is important to separate foods as soon as it is possible during defrosting e g bacon rashers chicken fillets Some areas of food being defrosted may become warm To prevent them becoming warmer and starting to cook these areas can be shielded with small pieces of foil which refle...

Page 28: ...e poultry is thoroughly reheated before serving Cover with vented microwave cling film or a suitable lid and reheat on 50P Stir frequently to ensure even reheating NOTE Ensure the food is thoroughly reheated before serving Follow the advice and guidelines below to ensure food is thoroughly reheated before serving To achieve the best results when reheating select a suitable microwave power level ap...

Page 29: ... the build up of grease and food debris The accessories are dishwasher safe Keep the waveguide cover and accessories clean at all times If you leave grease or fat in the cavity or accessories it may overheat cause arcing smoke or even catch fire when next using the oven Clean the oven at regular intervals and remove any food deposits Failure to maintain the oven in a clean condition could lead to ...

Page 30: ...e following page NOTES Safety powerdowns If you cook food for more than the standard time see chart opposite using the same cooking mode the oven s safety mechanisms automatically activate The microwave power level will be reduced or the grill heating element will turn on and off The door seal stops microwave leakage during oven operation but does not form an airtight seal It is normal to see drop...

Page 31: ...or arcing from within the cavity when cooking Arcing will occur when a metallic object comes into close proximity to the oven cavity during cooking This may possibly roughen the surface of the cavity but would not otherwise damage the oven Arcing potatoes Ensure all eyes are removed from the potatoes and that they have been pierced place directly onto the turntable or in a heat resistant flan dish...

Page 32: ...our oven must be connected to a single phase 230 240V 50Hz alternating current supply If you do not make the proper electrical connections you might damage the oven or injure yourself Neither SHARP nor the supplier will be liable if this happens If you are unable to resolve a problem using the checks covered on the last few pages do not attempt to service this microwave oven yourself Contact the d...

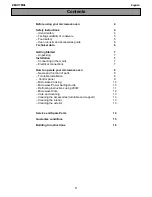
Page 33: ...37 RECIPES 38 45 COOKERY NOTES Weight all meat and poultry prior to defrosting and cooking as labelled weights are only approximate Where dishes are covered use vented microwave cling film unless otherwise stated Where dishes are lined use greaseproof paper unless otherwise stated Note that all preparation times and serving quantities are approximate All ingredients are given in both metric and im...

Page 34: ...ir during defrosting Shield 15 20 Minutes Bread sliced 6 Minutes 400g 30P Place on the turntable Separate and rearrange during defrosting 5 10 Minutes Pastry Puff or Shortcrust 8 Minutes 450g 10P Place on a plate Turn over half way through defrosting 10 15 Minutes Savoury or Sweet Pies cooked 22 Minutes 800g pie 10P Remove from foil container Place in a flan dish 15 30 Minutes Fish Fillets Steaks ...

Page 35: ...0g 100P Cut into quarters Add 60ml 4 tbsp water Cover Stir halfway through cooking 4 Minutes Swede Turnips fresh 8 Minutes 225g 100P Dice Add 45ml 3 tbsp water Cover dish Stir halfway through cooking 2 Minutes Broccoli Carrots Cauliflower Courgette Leeks Cabbage Spinach Green beans Peas frozen 6 Minutes 225g 100P Place in dish Add 15ml 1 tbsp water Cover dish Stir halfway through cooking 2 Minutes...

Page 36: ...NG METHOD STANDING TIME MODE TIME 6 7 Minutes for 425g can 1 minute for 125g slice 1 Min 30 Secs for 175g pudding 2 Min 30 Secs for 454g pudding 40 50 seconds for 2 rolls croissants 45 Seconds for 2 sausage rolls 1 Min 30 Secs for 4 sausage rolls 2 Minutes for 6 sausage rolls 4 Minutes for 175g quiche 8 Minutes for 400g quiche 12 Minutes for 600g quiche 4 Minutes for 150g pie 9 Minutes for 600g pi...

Page 37: ...dd cheese on each piece Then cook on TOP BOTTOM GRILL for 3 minutes Tea Cakes Ambient 5 Minutes 2 tea cakes TOP BOTTOM GRILLS Slice in half Place directly onto the turntable Turn over after 4 minutes Muffins Ambient 5 Minutes 2 muffins TOP BOTTOM GRILLS Slice in half Place directly onto the turntable Turn over after 4 minutes Crumpets Ambient 4 Minutes 30 Secs 4 crumpets TOP BOTTOM GRILLS Place bo...

Page 38: ...s per 450g 50P Place skin side down in a flandish on the rack Calculate the cooking time Use sequence cooking Page 19 Stage 1 Cook on 50P apart from the last 6 minutes Stage 2 Cook on DUAL GRILL 50P for the last 6 minutes of cooking time Stand for 2 minutes after cooking Pork Chops chilled 18 Minutes per 450g Stage 1 DUAL GRILL 50P Stage 2 DUAL GRILL 30P Place in a flan dish on the rack Calculate ...

Page 39: ...d powder salt and pepper to taste 450g cooked potatoes sliced 95g double gloucester cheese grated 2 eggs medium 110ml 4 fl oz single cream 1 Mix all ingredients together in a bowl except potatoes cheese eggs and cream 2 Place half of this mixture in the bottom of a oval Pyrex dish 25cm diameter x 5cm 3 Layer half the potatoes on top and sprinkle with half the cheese 4 Repeat with the remaining mix...

Page 40: ...hin goujons Coat with the mustard mixture then with the onions 4 Place the goujons into a 25cm 10 flan dish put on the rack 5 Cook on DUAL GRILL 50P for 9 minutes turn over after 5 minutes CRISPY CHICKEN GOUJONS Serves 6 50g butter 3 cloves garlic crushed 250g mushrooms quartered 1 Place the butter and garlic into a medium sized pyrex dish and cook on 100P for 1 minute 2 Stir in the mushrooms and ...

Page 41: ...0 60ml 2 4 tbsp milk salt and pepper to taste 600g fish fillets e g fresh cod 300ml 1 2 pint white sauce see page 44 10ml 2 tsp fresh dill 1 Place the potatoes in a bowl and add the water Cover and cook on 100P for 20 minutes Mash with margarine milk and seasoning 2 Place fish in a flan dish in a single layer cover and cook on 70P for 8 minutes Flake the fish and mix into the sauce Add the dill an...

Page 42: ...flour until well coated 3 Put all of the remaining ingredients except cornflour into a 2 5l casserole dish add the steak and stir well 4 Cover with a lid and cook on 50P for 40 minutes then stir in the cornflour and cook on 50P for a further 10 minutes BEEF CASSEROLE Serves 4 2 tbsp 30ml vegetable oil 150g onion finely chopped 100g celery finely chopped 2 cloves garlic crushed 75g smoked streaky b...

Page 43: ... juice 3 tbsp sweet chilli sauce 600ml 1 pint hot beef stock salt and pepper BEEF RISOTTO 1 Mix together all of the ingredients into a 2 5l casserole dish 2 Cook on 70 for 30 minutes stir twice during cooking Serves 4 50g onion sliced 50g mushroom chopped 50g green pepper sliced 50g red pepper sliced 50g sweetcorn 250g turkey breast sliced into thin strips 200g Aborio Risotto Rice 1 tsp lemon juic...

Page 44: ... tbsp wholegrain mustard 2 5 ml 1 2 tsp dried tarragon 30ml 2 tbsp tomato purée 150ml 1 4 pint chicken stock 15ml 1 tbsp cornflour blended with water salt and pepper to taste 1 Mix all the ingredients except the chicken together in a 2 5 litre approx 4 pint casserole dish 2 Add the chicken and turn over to coat with the sauce 3 Cook on 70P for 25 minutes Turn the chicken over and re arrange in the...

Page 45: ...nto 3cm cubes SPICY POTATOES 1 Place the oil paprika Tabasco sauce cumin fennel seeds garlic ginger and sugar into a bowl season well and mix 2 Add the potatoes and coat with the spices 3 Arrange in a single layer in a 25cm 10 flan dish 4 Place on the turntable and cook on DUAL GRILL 50P for 10 minutes turn the potatoes over cook on DUAL GRILL 50P for another 10 minutes turn the potatoes over agai...

Page 46: ... flour and whisk in the milk 3 Cook on 100P for 5 minutes stir halfway through cooking Season to taste WHITE SAUCE CHEESE SAUCE Stir in 75g grated cheese and 5ml 1 tsp mustard powder at Stage 2 Serve with vegetables fish or meat ONION SAUCE Stir 225g cooked onion finely chopped into the finished sauce Heat on 100P for 2 3 minutes before serving Serve with vegetables SWEET WHITE SAUCE Omit salt and...

Page 47: ...aten 100g demerara sugar 2 5ml 1 2 tsp grated nutmeg 175g mixed dried fruit 50g walnut chopped 8 slices thick white sliced bread buttered 25g demerara sugar to sprinkle 25g margarine to grease the dish BREAD BUTTER PUDDING 1 Grease a 2 5l casserole dish with margarine 2 Mix milk cream eggs sugar and nutmeg in a bowl 3 In a separate bowl mix the dried fruit and walnut 4 Cut the bread into quarters ...

Page 48: ...ts or damage caused by accident misuse fair wear and tear neglect tampering with the product or repair other than by a Service Facility appointed by Sharp The product is intended for private domestic use only The guarantee will not apply if the product is used in the course of a business trade or profession The guarantee does not cover Glass ceramic turntables as they can be damaged by handling cl...

Page 49: ...cal photocopying recording translating or other means without prior permission from SHARP Electronics U K Ltd The illustrations technical information and data contained in this publication are to our best knowledge correct at the time of going to print The right to change specifications at any time without notice is reserved as part of our policy of continuous development and improvement Internal ...

Page 50: ...n U K U K 08705 274277 office hours Ireland 01 676 0648 office hours Website http www sharp co uk support PRINTED IN THAILAND TINSEB143WRRZ K71 R 67STM SUK indd Sec3 48 R 67STM SUK indd Sec3 48 7 25 07 10 59 16 AM 7 25 07 10 59 16 AM ...

Reviews: