4
INSTALLATION
Inspect the Oven:
• Check the oven carefully for damage
before and regularly after installation.
• Make sure the door closes properly,
that it is not misaligned or warped.
• Check the hinges and door safety
latches are not broken or loose.
• Ensure the door seal and sealing
surfaces are not damaged.
• Inspect the oven interior and door for
dents.
Important:
If any damage is apparent, do not operate
the oven in any way. Contact your dealer
or an authorised Service Technician
appointed by SHARP. (see p. 50)
1. Remove all packing materials including the
feature sticker. Do not remove the plastic film from
the inside of the oven window as this protects it
from dirt.
2. Place oven on a secure, level surface, strong
enough to take the oven weight, plus the heaviest
item likely to be cooked in the oven.
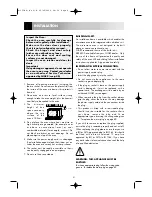
3. The minimum
height of free
space necessary
above the top
sur face of the
oven is 19.5cm.
4. Do not place the oven where heat, moisture or
high humidity are generated, (for example, near
or above a conventional oven) or near
combustible materials (for example, curtains). Do
not block or obstruct air vent openings. Do not
place objects on top of the oven.
5. Make sure the power supply cord is undamaged
(See Installation opposite) and that it does not run
under the oven or over any hot or sharp surfaces.
6. The socket must be readily accessible so that it
can be easily unplugged in an emergency.
7. Do not use the oven outdoors.
BUILDING-IN-KIT.
An installation frame is available which enables the
microwave oven to be integrated within a kitchen unit.
The microwave oven is not designed to be built
above or near a conventional oven.
SHARP recommend the use of the build in kit,
EBR-4500, available from your SHARP dealer. Only
the use of this frame will guarantee the quality and
safety of the oven. When building, follow installation
instructions supplied for A type models carefully.
IMPORTANT! ELECTRICAL CONNECTION.
• Do not allow water to come into contact with the
power supply cord or plug.
• Insert the plug properly into the socket.
• Do not connect other appliances to the same
socket using an adaptor plug.
• If the plug or socket is loose or the power supply
cord is damaged, it must be replaced with a
special cord. The exchange must be made by an
authorised SHARP service agent.
• When removing the plug from the socket always
grip the plug, never the cord as this may damage
the power supply cord and the connections inside
the plug.
• This product is fitted with a re-wireable plug.
Should it not be suitable for the socket outlet in
your home, remove the plug and fit an
appropriate type, observing the wiring code given
in `To replace the mains plug’ on page 49.
If you wish to remove or replace the plug supplied,
ensure the plug is removed properly and not cut off.
When replacing the plug please ensure that you use
a BSI or ASTA approved plug to BS1363, this should
be fitted with a brown coloured 13 amp fuse
approved by BSI or ASTA to BS1362. If you have
any doubt about electrical connection seek the help
of a qualified electrician.
WARNING: THIS APPLIANCE MUST BE
EARTHED
To wire an appropriate plug, follow the wiring code
given in `To replace the mains plug’ on page 49.
19.5cm
R-353M O/M & C/B 05/02/2000 08:50 Page 4


