background image

  A-1

Appendixes

The appendixes contain additional information on the use and care of your computer.

Maintenance and Care

This appendix provides you with information on how to maintain the computer in
excellent working condition.

Cleaning the Computer

Cabinet

Apply a small amount of mild cleaning solution to a dry, lint-free cloth and wipe the
cabinet with the cloth.


Do not use alcohol, benzene, thinner or other strong chemical agents
that may damage the cabinet.


Never clean the computer while it is powered on.

Screen

The surface of the screen may become smeared and accumulate dust during use.
Avoid touching the screen with your fingers when using the system. Gently wipe the
surface of the screen with a soft cloth that has been dipped in a mild detergent
solution and squeezed dry.

IR Port

Dust on the IR port will interfere with data transfer. Wipe the port clean with a soft,
dry cloth.

Glide Pad

Wipe the glide pad with a soft, dry cloth.

Traveling with the Computer

Summary of Contents for PC-A100 Series

Page 1: ... the equipment off and on the user is encouraged to try to correct the interference by one or more of the following measures Reorient or relocate the receiving antenna Increase the distance between the equipment and receiver Connect the equipment into an outlet on a circuit different from that to which the receiver is connected Consult the dealer or an experienced radio TV technician for help A sh...

Page 2: ...in advance that temporary discontinuance of service may be required But if advance notice isn t practical the telephone company will notify the customer as soon as possible Also you will be advised of your right to file a complaint with the FCC if you believe it necessary The telephone company may make changes in its facilities equipment operations or procedures that could affect the operation of ...

Page 3: ...er provided may not be a 900 number or any other number for which charges exceed local or long distance transmission charges To program this information refer to the manual of the communication software CAUTION DISCONNECT TELEPHONE LINES BEFORE ACCESSING THE MODEM CARD Copyright It is the intent of Sharp that this product be used in full compliance with the copyright laws of the United States and ...

Page 4: ...uipment should be made by an authorized Canadian maintenance facility designated by the supplier Any repairs or alterations made by the user to this equipment or equipment malfunctions may give the telecommunications company cause to request the user to disconnect the equipment Users should ensure for their own protection that the electrical ground connections of the power utility telephone lines ...

Page 5: ...LIGNES TELEPHONIQUES AVANT D ENLEVER CE COUVRICLE Product Information and Customer Assistance For Product Information and Customer Assistance Call 1 905 890 2100 Toronto Area 1 800 56 SHARP Outside Toronto Sharp Electronics of Canada Ltd 335 Britannia Road East Mississauga Ontario L4Z 1W9 Canada ...

Page 6: ...tails can be found on the warranty card inserted with the documentation Copyright Copyright may exist in material you wish to record Copying or broadcasting such material without permission of the relevant licensees or owners of the copyright is prohibited by law SHARP is not in a position to authorise the copying or broadcasting of copyright materials and nothing in this OPERATION MANUAL should b...

Page 7: ...and to any subsequent statutory enactments and orders IMPORTANT The wires in this mains lead are coloured in accordance with the following code BLUE Neutral BROWN Live As the colours of the wires in the mains lead of this apparatus may not correspond with the coloured markings identifying the terminals in your plug proceed as follows The wire which is coloured BLUE must be connected to the termina...

Page 8: ...elle direttive 89 336 EEC e 73 23 EEC come emendata dalla direttiva 93 68 EEC Η εγκατασταση αυτη ανταποκρινεται στιζ απαιτησειζ των οδηγιων τηζ Ευρωπαïκηζ Ενωσηζ 89 336 EOK κατ 73 23 EOK óπωζ οι κανονισµοι αυτοι συµπληρωθηκαν απó την οδηγια 93 68 EOK Este equipamento obedece às exigências das directivas 89 336 CEE e 73 23 CEE na sua versão corrigida pela directiva 93 68 CEE Este aparato satisface ...

Page 9: ... VORSICHT UM DIE STROMZUFUHR VOLLSTÄNDIG ZU UNTERBRECHEN DEN NETZSTECKER HERAUSZIEHEN UND DIE BATTERIE ÈNTFERNEN ATTENTION POUR UN ARRET TOTAL DU SYSTEME DECONNECTEZ LA PRISE DE COURANT SECTEUR ET LA BATTERIE VARNING FÖR TOTAL ELEKTRISK URKOPPLING KOPPLA UR KONTAKTEN OCH TA UR BATTERIET PRECAUCION PARA UNA COMPLETA DESCONEXION ELECTRICA DESENCHUFE LA CLAVIJA DE LA RED Y LA BATERIA ...

Page 10: ...eam etc Do not move the computer from a cold place to a warm place A temperature difference of more than 10 C 18 F will cause condensation inside the unit which may damage the data Do not block or cover slots or openings on the cabinet to protect the computer from over heating Do not smoke near your computer Usage Never push any objects of any kind into cabinet openings They may touch dangerous vo...

Page 11: ...s the battery terminals as it could heat up and explode Do not allow liquids to come in contact with the battery pack Avoid dropping the pack or other violent shock Do not solder anything to the battery terminals Charging Charge the battery pack only with the AC adapter included with your computer Discharging Do not use the battery pack for any purpose other than powering the computer Storage Stor...

Page 12: ...ocations Never touch uninsulated telephone wires or terminals unless the telephone line has been disconnected at the network interface Use caution when installing or modifying telephone lines Avoid using the telephone during a lightning storm There may be a remote risk of electric shock from lightning Do not use the telephone to report a gas leak in the vicinity of the leak ...

Page 13: ... other causes SHARP assumes no responsibility directly or indirectly for financial losses or claims from third persons resulting from the use of this product and any of its functions such as stolen credit card numbers the loss of or alteration of stored data etc Edition 1st Edition September 1998 Copyright 1998 SHARP Corporation This document contains or refers to proprietary information which is ...

Page 14: ...re reference please record the following information in the spaces provided below Model Number Serial Number Date of purchase Dealer s Name Place of purchase Password The serial number is printed on a sticker located on the bottom of the computer ...

Page 15: ...sed simultaneously the key labels are separated by a plus sign Restart your computer by pressing Ctrl Alt Delete When necessary important key combinations are shown in graphics Sample Entries are shown in upper cases of different typeface In the following case press the Enter key after you type the command C DIR A Enter Words Texts on Screen such as window titles or possible parameters are italici...

Page 16: ...e of Contents xvi Overview of Computer xviii Quick Setup Turning Power On 1 1 Setting up Windows 98 1 3 Shutting Down the System 1 4 Basic Operations Choosing Power Source 2 1 Resetting the System 2 3 Using Glide Pad 2 4 Using Keyboard 2 6 Using External Floppy Disk Drive Unit 2 7 Battery and Power Management Standard Battery Pack 3 1 Optional External Battery Pack 3 5 Power Management 3 8 Periphe...

Page 17: ...1 Built in Modem 5 3 Security Features Passwords 6 1 Security Slot 6 4 Setup Utility Running the Setup Utility 7 1 Main menu 7 3 Advanced menu 7 4 Security menu 7 5 Power menu 7 6 Exit menu 7 7 Appendixes Maintenance and Care A 1 Specifications A 3 Troubleshooting Troubleshooting T 1 Index Index Index 1 ...

Page 18: ...xviii Overview of Computer Each number after an arrow indicates the page referring to the part Actual appearance of your computer may be slightly different depending on the model Front ...

Page 19: ...xix Right Left ...

Page 20: ...xx Rear Bottom ...

Page 21: ...ry protection sheet on the bottom of the computer If you do not remove the sheet you cannot turn on the computer 2 Plug the AC adapter cable into the computer s AC adapter jack 3 Plug the AC power cord into the AC adapter Always use the AC adapter included with the computer Using other AC adapters may damage the computer Always hold the AC power cord by its plug when removing it from the wall outl...

Page 22: ...ewing position 7 Slide the power switch to the rear and release it When you turn on the computer the power indicator turns green the computer goes through a self test to detect any problems and Windows 98 starts When using the computer for the first time a dialog box called the Windows 98 Setup Wizard appears to guide you through the Windows 98 setup See the next page ...

Page 23: ...ing Windows 98 setup If you turn off you cannot set up Windows 98 later Properties Dialog Box in Windows In the instructions in this manual you will often see the expression XXX Properties dialog box A dialog box is a window containing text boxes check boxes buttons etc with which you can send commands to Windows 98 or other application programs To open the properties dialog boxes click the Start ...

Page 24: ...r switch Data may be lost or damaged Do not turn off or reset the computer while the hard disk indicator or the indicator on the external floppy disk drive unit or optional external CD ROM drive are lit Doing so may damage or even wipe out the data To protect the screen always close the screen cover while the computer is off Before turning it back on wait at least 5 seconds after turning off the c...

Page 25: ...nternal standard battery in the computer You can use an optional external battery pack adding to the standard battery See Chapter 3 for battery information About the Power Indicators The following indicators show the power status of your computer Indicator Light Meaning Battery Power On green Fully charged On orange Being charged Blinking orange In abnormal state On and blinking red Almost complet...

Page 26: ...e from 100 to 240 volts so that you can use the computer with the appropriate plug adapter The AC power cord included with the computer is appropriate for the voltage used in the area in which you purchased your computer If you attempt to connect the computer to a wall outlet other than in this area check the voltage of the outlet and use an AC power cord appropriate for the outlet Consult local s...

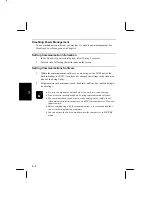
Page 27: ...puter Resetting may cause data loss Use the software reset only if the normal Windows 98 Shut Down does not work because of software malfunction Although resetting will not damage the system you may lose the data you are processing Power Switch You can turn off the computer with the power switch if you encounter hardware or software problems which lock up the system In this case slide and hold the...

Page 28: ... glide pad to operate incorrectly You cannot use the glide pad when a mouse is connected Using the Glide Pad Take a moment to become familiar with how the glide pad works Place Your Fingertip Place your left or right hand next to the glide pad resting your wrist naturally in a relaxed manner Place your thumb or finger on the glide pad Move Your Fingertip The rectangular pad of the glide pad acts l...

Page 29: ... object moves together with the pointer 4 Release the button when the object reaches its destination Scroll You can scroll through information in a list or in a document by using the glide pad Place your finger on the right part of the glide pad and move it back and forth This procedure works only in the limited applications Changing the Configuration In the Mouse Properties dialog box you can cha...

Page 30: ...ys When pressed together with the Fn key function keys set specific system parameters This combination is sometimes referred to as hot keys Switches the display output between the LCD screen and external monitor if connected See the Display section in Chapter 4 for details Decreases the LCD screen brightness Increases the LCD screen brightness Turns the screen backlight on and off Puts the compute...

Page 31: ...g External Floppy Disk Drive Unit Turn off the computer before connecting the external floppy disk drive unit otherwise the floppy disk drive unit may not be recognized Do not place the floppy disk drive unit on its side or upside down Do not press on the floppy disk drive unit It may damage the drive or cause malfunction Do not place the AC adapter on the floppy disk drive It may cause the drive ...

Page 32: ...Do not open the shutter and touch the disk inside otherwise you will not be able to read or write data to the disk Do not place floppy disks near magnets or heat source in direct sunlight or in a dusty place etc Never subject a disk to sudden shocks or extreme vibration Do not drop bend or place heavy objects on a disk Do not spill liquid onto a disk Inserting and Removing a Floppy Disk Inserting ...

Page 33: ...disk will pop out slightly Remove it and store it properly Formatting a Floppy Disk 1 Make sure the floppy disk is not write protected and insert it into the floppy disk drive 2 Double click My Computer on the desktop 3 Click 3 Floppy A From the File menu select Format 4 From the capacity drop down list select 1 44MB or 720KB 5 Click Start to start formatting When you format a floppy disk all data...

Page 34: ...st as per the procedure on page 3 3 Turn off your computer when you are not using it The duration a battery charge will last will depend on the computer usage Applications which heavily use the peripherals like the external floppy disk drive unit or the optional external CD ROM drive will experience shorter power duration When the battery is not charged your computer may not operate properly Conne...

Page 35: ...d to AC power When the battery is fully charged the battery indicator turns off The battery power remaining is an approximate figure The remaining operating time expected may be different from the actual remaining time depending on the use of the computer If the actual remaining power in your battery is less than what the battery indicator lights suggest you should initialize the battery pack as p...

Page 36: ... Charging the Battery Pack 1 Connect the AC adapter to the computer While the battery is being charged the battery power indicator is orange and the battery indicator turns on 2 When the battery is fully charged the battery power indicator turns green and the battery indicator turns off Charging time may vary according to the status of the computer When the battery is hot for example after long us...

Page 37: ... let the battery fully charge Do not connect the computer to wall outlet while discharging the battery The initialization will be cancelled You can initialize the standard battery alone only if the optional external battery pack is disconnected When the external battery pack is connected both the standard and the external battery will be initialized together Changing the Battery Pack The capacity ...

Page 38: ... the optional battery by matching the projections on either of the battery side to the notched parts of the computer Make sure that the battery connector lines up with the external battery port of the computer If you hear the clicking sound the external battery pack is correctly connected While the external battery pack is connected do not carry the computer by holding the computer only Firmly hol...

Page 39: ...e lost Remove the optional battery by pressing the buttons on each end of the battery and sliding the battery off the computer Close the cover of the external battery port after the external battery pack is removed Checking the Battery Level You can check the battery level of the external battery pack in the same way as the standard battery pack with the battery indicator Press the button on the r...

Page 40: ...ng 20 When the computer is turned off or in the suspend to disk mode it will take about 5 hours and 30 minutes to charge both the standard and external battery packs from empty to full When the computer is turned on it will take about 7 hours and 30 minutes The charging time depends on the power you are consuming Initializing External Battery Pack The procedure for initializing an external battery...

Page 41: ...vailable refer to Chapter 5 When Windows CD Auto Play is functioning Stopping Power Supply to the Hard Disk Setting in Windows 98 1 In the Power Management Properties dialog box select Power Schemes tab 2 Set Turn off hard disks to an appropriate value and click OK Setting in the Setup Utility In the Power menu set Power Management Function to Enabled and set Hard Disk Power Down after to an appro...

Page 42: ...ard disk which is called suspend to disk partition and turns off the computer Your system enters and resumes from the suspend to disk mode per the conditions mentioned below In the suspend to disk mode the Power indicator turns off Before suspending the system Finish communications printing and playing music or video Entering the Suspend modes Your computer enters a suspend mode in each of the fol...

Page 43: ...restores the exact state as it was when entering the suspend mode If the computer enters the suspend mode due to low battery power however you have to connect the computer to AC power first Suspend to Disk is useful when you want to turn off the computer and reopen the same windows after turning it on If your battery becomes completely discharged during Suspend to RAM you will lose unsaved data an...

Page 44: ...g or resuming from a suspend mode Disabling Power Management In Windows 98 1 In the Power Management Properties dialog box select Power Schemes tab 2 Set System Standby Turn off monitor and Turn off harddisks to Never and click OK In the Setup Utility 1 In the Power menu set Power Management Function to Enabled 2 Set Hard Disk Power Down after Video Power Down after and Auto Suspend to Disabled 3 ...

Page 45: ...or the details refer to the section explaining each device and contact your dealer Be sure to turn off the computer and the peripheral device before connecting them except when connecting USB devices and PC cards Some devices have to be turned on after the computer is turned on Some devices require that you install drivers before use Connecting Peripheral Device 1 Turn off the computer and the per...

Page 46: ...4 2 4 ...

Page 47: ...er disable the USB port Disabling the USB port in the Setup Utility may cause some PC cards to malfunction Inserting PC Card 1 Raise the PC card eject button and push it in The protection card pops out 2 Remove the protection card from the PC card slot 3 Insert the card into the slot with the label face up until it locks into place You do not have to power down the computer to insert remove PC car...

Page 48: ...ep In this case install the PC card driver by following the instructions on the screen Ejecting PC Card Some PC cards may become hot after long use Be sure to use the procedure below when ejecting a PC card Otherwise the system may not work properly 1 In the PC Card Properties dialog box click on the icon of the PC card you want to eject 2 Click Stop 3 When the message prompts you to eject the car...

Page 49: ...4 5 4 Connecting Optional External CD ROM Drive You can connect the optional external CD ROM drive using the PC card slot ...

Page 50: ...owered on This may cause the computer to operate improperly Using a PS 2 Mouse You have only to connect the mouse to the keyboard mouse port of your computer or the external floppy disk drive unit You cannot use the glide pad when a PS 2 mouse is connected Using a Serial Mouse Connect the serial mouse to the RS 232C serial port of the external floppy disk drive unit When starting the system enter ...

Page 51: ... connected 1 In the Display Properties dialog box select Settings then Advanced 2 Select Monitor tab and click Change 3 Click Next 4 Select Display a list of all the drivers in a specific location so you can select the driver you want then click Next 5 Select Show all hardware 6 Select the manufacturer and the model and click Next twice 7 Close the dialog box following the instructions on the scre...

Page 52: ...x 600 256 64K 16M 1 1024 x 768 2 256 64K 1 The number of colors in this mode is made using a Dithering algorithm on the internal LCD only 2 Only 800x600 dots are displayed on the internal LCD Move the cursor to show the remainder of the 1024x768 dots You cannot switch to a display resolution and number of colors that are not available In the Color Palette High Color 16 bit means 65 536 64K colors ...

Page 53: ...se the built in speakers Turn on off 3D sound 1 Click the icon of the 3D sound indicator on the taskbar 2 Check uncheck 3D effect Connecting Microphone You can input sound using an external microphone connected to the microphone jack When using an external microphone you cannot use the built in microphone USB Device Your computer has a new interface called Universal Serial Bus USB With a USB conne...

Page 54: ... and click Next 5 Select the manufacturer and the printer and click Next If you cannot find the model name of your printer you have to install the printer driver included with your printer See your printer manual for details 6 Select LPT1 and click Next 7 Make sure the printer name is correct and click Next 8 Decide whether to print a test page and click Finish Before printing a test page make sur...

Page 55: ...4 11 4 ...

Page 56: ...d the Target Device 1 Put your computer on a flat surface 2 Place the target device so that its IR port is in line with that of your computer 3 Adjust the distance between the IR ports to be less than 20 inches 50 cm When using a Sharp electronic organizer make sure the two IR ports are within 12 inches 30 5cm Setting for Infrared Communication 1 In the Advanced menu of the Setup Utility make sure...

Page 57: ...g off the IR communication For IrDA communication your computer is continuously emitting infrared rays to search for other IR devices If necessary you can temporally disable this emission 1 From the Start menu select Settings Control Panel 2 Double click the SHARP IR icon 3 Turn off the infrared communication and click OK Communicating with Windows 98 Personal Computer To communicate with a person...

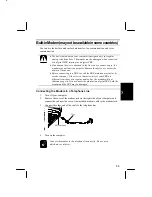
Page 58: ...e connecting to a PBX consult the PBX maintenance staff or its service company If the electric characteristics of your PBX are different from those of a regular analog line the modem will not function properly If you connect the modem to a digital PBX both the modem and the PBX may be damaged Connecting the Modem to a Telephone Line 1 Turn off your computer 2 Remove the cover of the modem jack on ...

Page 59: ...m to COM1 if you have not changed the settings in the Advanced menu of the Setup Utility 2 Set parameters such as modem speed baud rate and line type pulse dialing or tone dialing See also the manual or online help of the software you are using Do not enter a suspend mode while using communication software The communication speed may vary depending on the traffic local telecommunications infrastru...

Page 60: ...forget and write it down and save it in a secure place Otherwise you will have to contact your dealer for assistance If you enter a wrong password three times the message System Disabled appears Slide the power switch to turn off the computer turn it on again and enter the correct password Supervisor Password and User Password Two types of passwords limit the access at different levels To set the ...

Page 61: ...et Supervisor Password or Set User Password and press Enter 2 Type your password up to eight characters and press Enter 3 Type the same password again and press Enter 4 When the confirmation message appears press Enter 5 Press Esc and select Exit Saving Changes 6 Press Enter twice The system restarts and asks the password you have set If you use the computer personally We recommend that you set th...

Page 62: ...ts Preventing Infection of Computer Viruses You can protect against some viruses by limiting writing to the hard disk To limit writing to the hard disk set the item Fixed disk boot sector to Write Protect in the Security menu of the Setup Utility You cannot prevent infection of all types of viruses with the above operation Even if a warning message appears the system may not be infected in some ca...

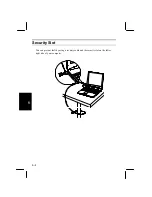
Page 63: ...6 6 4 Security Slot You can prevent theft by using a security cable and the security slot on the left or right side of your computer ...

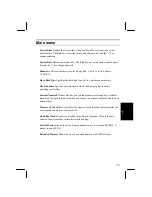
Page 64: ...lled CMOS RAM which the system reads every time you turn on the computer Contents of the Setup Utility The Setup Utility consists of five menu pages as follows Main Basic system configuration Advanced Device interface configuration I O ports sound settings Security Password settings Power Power management battery saving settings Exit Exit the Setup Utility or return to the default values Entering ...

Page 65: ...enu to another Moves the cursor from one item to another in a menu Space bar Increases the numeric value or changes an item to the next value Decreases the numeric value or changes an item to the previous value Enters the Exit menu When a sub menu is open this key closes the sub menu Replaces the settings on the current menu with their default values date and time are not changed Saves the setting...

Page 66: ...ifies the sequence in which the boot program looks for operating system files Internal Numlock Defines whether you can input numerals through keys with blue legends on the built in keyboard when you connect an external keyboard and lock its numeral keys Memory Cache Enables or disables the memory cache function that accelerates the access speed to data previously accessed QuickBoot Mode Enables or...

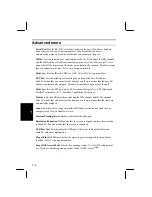
Page 67: ...ns that you cannot use the port Mode Specifies the LPT port mode Bi directional Output Only EPP Enhanced Parallel Port mode or ECP Extended Capabilities Port mode Modem Sets the built in modem selecting the IRQ channel and the I O channel Enabled means that you can select the items yourself Auto means that the items are automatically assigned Sound Sets the built in sound controller MIDI and Joyst...

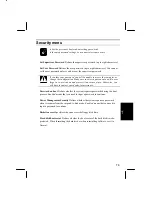
Page 68: ...l never forget or write it down and protect it in a secure place Otherwise you will have to contact your dealer for assistance Password on boot Defines whether the system requires passwords during the boot process Enabled means that you need to input a password to continue Power Management Security Defines whether the system requires a password when it resumes from the suspend to disk mode Enabled...

Page 69: ...ch the power supply for the hard disk stops automatically Video Power Down after Defines the duration of non access to the screen after which the power supply for the screen stops automatically Suspend Mode Defines which mode the system enters when the system is suspended Auto Suspend Defines whether the system enters a suspend mode when you do not operate the computer for the specified length of ...

Page 70: ...tery Battery 2 refers to the optional external battery pack Exit menu Exit Saving Changes Saves the settings you have changed and exits the Setup Utility Exit Discarding Changes Exits the Setup Utility without saving the settings you have changed Load Setup Defaults Returns the values of all items to default To exit select one of the above items Discard Changes Returns the values of all items to t...

Page 71: ...ol benzene thinner or other strong chemical agents that may damage the cabinet Never clean the computer while it is powered on Screen The surface of the screen may become smeared and accumulate dust during use Avoid touching the screen with your fingers when using the system Gently wipe the surface of the screen with a soft cloth that has been dipped in a mild detergent solution and squeezed dry I...

Page 72: ... extra copy of your backup data Do not travel with an external floppy disk drive unit or optional CD ROM drive connected Do not travel with the computer powered on This may result in loss of data and or damage to the hard disk drive Disconnect the AC adapter from the computer Fully charge the standard battery pack and bring the AC adapter and the AC power cord Avoid sudden shocks or extreme vibrat...

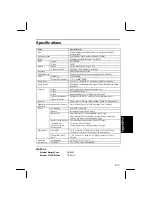
Page 73: ...n external floppy disk drive Parallel port RS 232C serial port keyboard mouse port Infrared IR port IrDA 115Kbps 1Mbps 4Mbps SHARP ASK 9600bps Modem may not be available in some countries Data 56Kbps receive 33 6Kbps send Fax 14 4Kbps Power AC adapter 100 240V 50 60 Hz Battery Rechargeable lithium ion battery Battery life Approximately 2 5 hours standard battery only Approximately 8 5 hours when e...

Page 74: ...A 4 ...
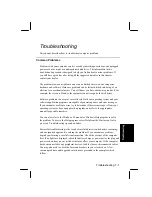
Page 75: ...s are capable of generating errors and error messages If you encounter a software error try to determine if the error message is from your operating system or from an application program and refer to the appropriate manual for possible remedies You can also refer to the Windows 98 manual or Windows Help program to solve the problem To access the Help program select Help from the Start menu It also...

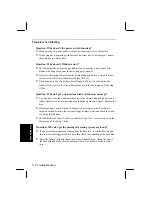
Page 76: ...n menu of the Setup Utility Question Why do I get a non system disk or disk error message You may have inserted a non bootable disk in the external floppy disk drive unit either a defective disk or one without an installed operating system Remove the disk If this message is issued when you attempt to boot from your hard disk drive insert a bootable disk into the external floppy disk drive unit and...

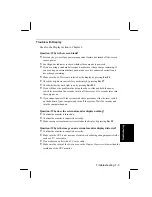
Page 77: ...ying the above slide and hold the power switch for more than five seconds to turn off the system Five seconds later turn the computer on If you cannot power off the system with above procedure slide the reset switch on the bottom of your computer and turn off the system Wait five seconds and turn the computer back on Question Why does the external monitor display nothing Confirm the monitor is tur...

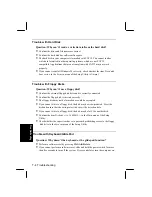
Page 78: ... drive unit is correctly connected Confirm the floppy disk is inserted correctly The floppy disk may not be formatted or could be corrupted If you cannot write to a floppy disk the disk may be write protected Eject the disk and ensure that the write protect tab covers the detection hole If you cannot write to a floppy disk the disk may be full Use another disk Confirm the item Diskette A is 1 44MB...

Page 79: ...connected correctly to the computer if peripheral devices are connected to the external floppy disk drive Confirm drivers necessary for operating ports on the devices are installed There may not be a free IRQ Interrupt Free up an IRQ from a built in device Question Why can t I print Make sure the printer is turned on Check whether the external floppy disk drive and the printer are connected correc...

Page 80: ...o more than 20 inches 50 cm apart without any obstacles Confirm that IR communication is not turned off in the Sharp IR dialog box Confirm the item Mode of IR Port is set to IrDA in the Advanced menu of the Setup Utility Turn off power management both in the Windows and the Setup Utility Do not use the IR port under intense fluorescent light or near cellular phones Question Why can t I communicate...

Page 81: ...up Utility Question Why can t I produce sound Check the volume control on the right side of your computer Click the speaker symbol on the taskbar and check the Windows volume control Question Why can t I use a hardware device Make sure the hardware device is not crossed out with an X mark using the following procedure 1 In the System Properties dialog box select Device Manager 2 Select the device ...

Page 82: ...solution and number of colors 4 8 switching 4 7 E external battery pack connecting 3 5 removing 3 6 external floppy disk drive unit connecting 2 7 removing 2 8 F floppy disk formatting 2 9 handling 2 8 inserting and removing 2 8 G glide pad 2 4 changing the configuration 2 5 using 2 4 I indicator battery power 2 1 power 2 1 infrared communication 5 1 communicating in Windows 98 5 2 positioning and...

Page 83: ...resetting 2 3 RS 232C device 4 10 S security slot 6 4 setting up Windows 98 1 3 Setup Utility Advanced menu 7 4 entering and exiting 7 1 Exit menu 7 7 Main menu 7 3 Power menu 7 6 running 7 1 Security menu 7 5 using 7 2 shutting down the system 1 4 supervisor password 6 1 suspend modes 3 9 entering 3 9 Suspend to disk mode 3 9 resuming from 3 10 Suspend to RAM mode 3 9 resuming from 3 10 T turning...

Reviews: