SM
<P=001>
(Continued)
CD
DISC-1
DISC-2
DISC-3
MD
ON/STAND-BY
VOLUME
TUNER
(BAND)
MODE ON/OFF
CD PLAY
1
2
3
CD MD DIGITAL EDIT
NAME /
TOC EDIT
TIMER /
DELETE DISPLAY
ENTER
TRACK
START
TUNING
CURSOR
REC
1 2 3
SURROUND
3D
2
1
6
4,5
3
2
■
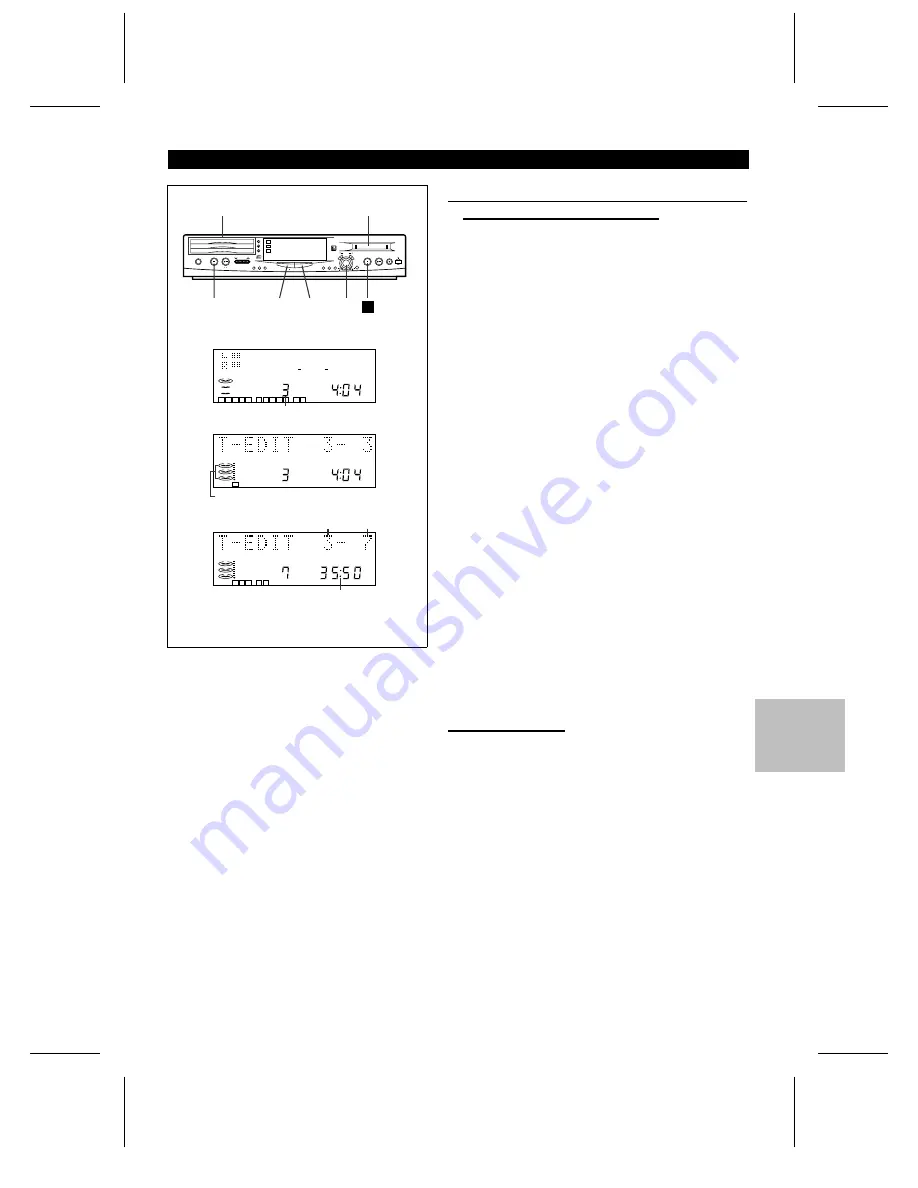
Recording desired tracks from a compact disc
onto a MiniDisc (Track Editing)
1
Press the CD
■
button.
2
Load a compact disc and a recordable MiniDisc.
3
Select the track to start recording by turning the jog dial
●
The selected track number appears.
4
Press the TRACK button.
●
To record a single track, skip to step 6.
5
Select the last track to record by pressing the TRACK button.
6
Press the START button.
●
Recording will start from the tracks selected in disc 1, disc 2
and disc 3, in that order. After recording, the CD and the MD
will stop automatically.
0dB
OVER
12
4
REMAIN
1 2 3 4 5
6 7 8 9 10
11 12
1
2
3
TOTAL
3
1
2
3
TOTAL
3 4 5
6 7
1
2
3
3
4
5
To cancel the track edit operation:
Press the CD
■
button before pressing the START button.
To stop recording:
Press the MD
■
button.
●
After the track numbers have been written on the MiniDisc,
playback and recording will stop.
It is not possible to pause recording.
■
APMS recording
1
Select tracks for APMS playback. (Page 16)
2
Load a recordable MiniDisc.
3
Press the START button.
●
APMS playback will start, and recording will start automat-
ically.
●
Programmed tracks will be recorded in order. After the unit
has finished recording the last track, recording will stop auto-
matically.
To stop recording:
Press the MD
■
button.
Track number at which recording starts
The red frames of disc 1 - disc 3
will light up.
Starting track Ending track
Total playing time from the third track
to the seventh track
MD-ZV30H TINSZ0217AWZZ
E-21


