LL-T17A4-H/B
CONNECTION, ADJUSTMENT, OPERATION, AND FUNCTIONS
2 – 1
CHAPTER 2. CONNECTION, ADJUSTMENT, OPERATION, AND FUNCTIONS
1. CONNECTION
Caution:
• When connecting, ensure that both the monitor and computer are switched off.
• Be careful not to overly bend the cable or add extension cords as this could lead to a malfunction.
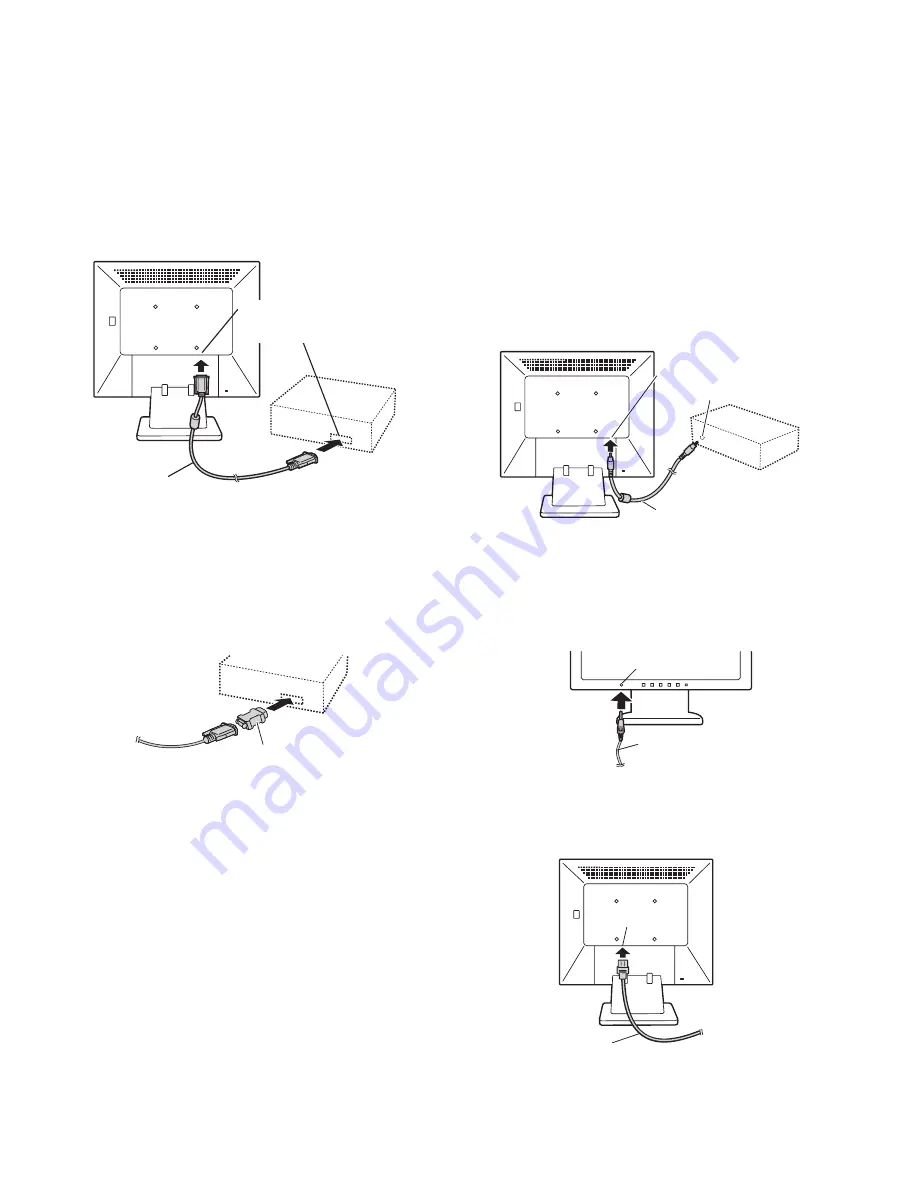
1-1. Connecting the monitor to a computer
• Paying attention to connector direction, firmly insert the signal cable
vertically into the connector, and then tighten the screws at both
sides.
If connecting to a D-sub 15 pin 2 row Apple Power Macintosh, attach a
Macintosh conversion adapter (commercially available) to the analog
signal cable.
Note: If connecting to the Sun Ultra series, a conversion adapter (com-
mercially available) may be required.
■
Connect the accessory audio cable
When the accessory audio cable is connected to the audio output termi-
nal of the computer, the sound of the connected computer is output
from the monitor speakers. You can also use the headphone jack of the
display.
1-2. Connection of headphones
(commercially available)
Headphones (commercially available) can be connected.
Note: When the headphones are connected, no sound can be heard
from the monitor speakers.
1-3. Connecting the monitor to a power source.
Analog signal cab le
Analog RGB terminal
(Mini D-sub 15 pin, 3 row)
Macintosh conversion adapter
Audio input terminal
Audio output terminal
Audio cable
Headphones
Headphone ter minal
AC outlet
Power cord
Power terminal
Summary of Contents for LL-T17A4-B
Page 11: ...LL T17A4 H B BLOCK DIAGRAM 4 1 CHAPTER 4 BLOCK DIAGRAM LCD MONITOR ...
Page 23: ...LL T17A4 H B PWB LAYOUT 7 1 CHAPTER 7 PWB LAYOUT 1 MAIN PWB A side B side ...
Page 24: ...LL T17A4 H B PWB LAYOUT 7 2 2 POWER SUPPLY PWB A side B side ...
Page 28: ... 2 1 Exteriors TP000292 204 205 5 7 101 102 103 302 301 303 03 6 201 4 202 2 1 104 104 ...
Page 31: ... 5 MEMO ...


