background image

25

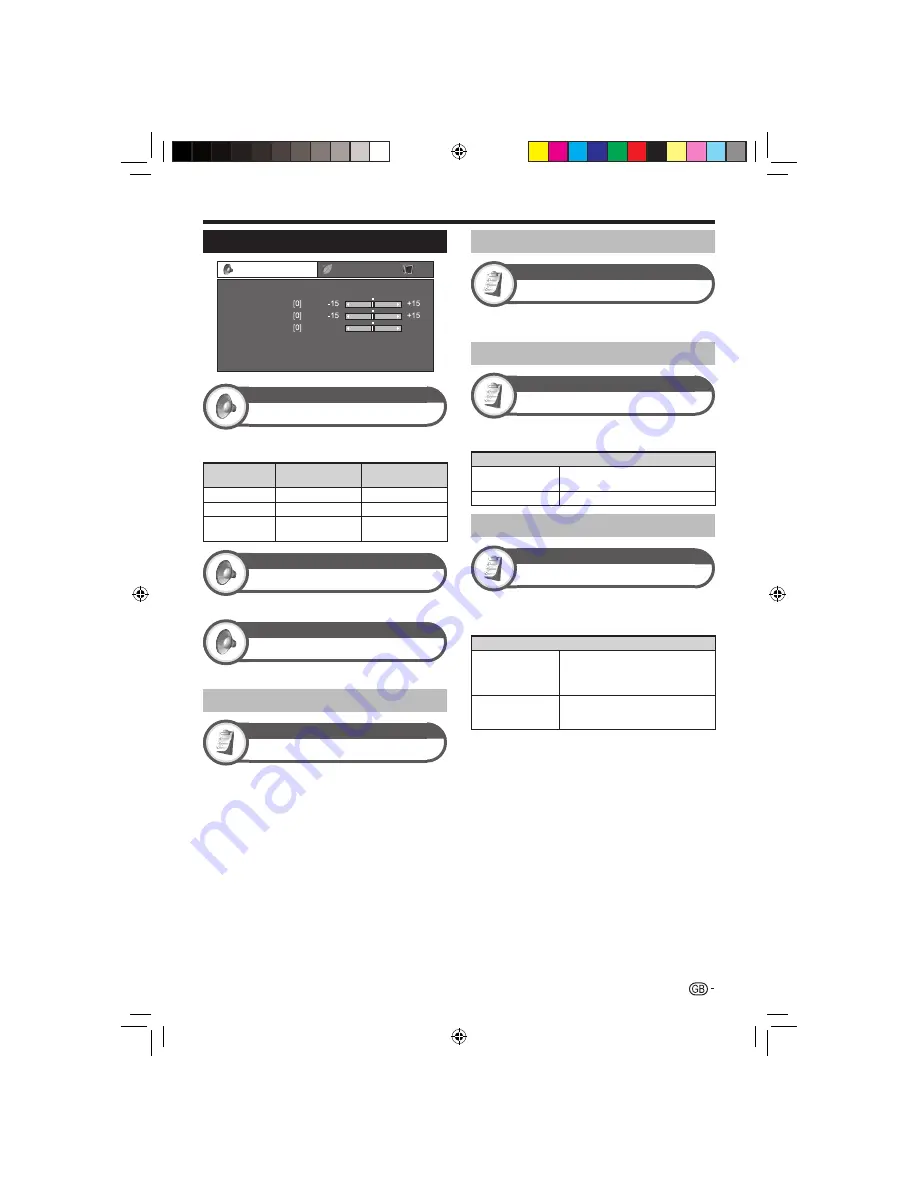
Audio settings

Audio

Treble

[Off]

Bass
Balance
Surround
Bass enhancer
Reset

DYNAMIC

L30

R30

Audio

Audio adjustment

You can adjust the sound quality to your preference with 
the following settings.

Selectable 

items

c

 (Cursor)

d

 (Cursor)

Treble

For weaker treble

For stronger treble

Bass

For weaker bass

For stronger bass

Balance

Decrease audio from 
the right speaker

Decrease audio from 
the left speaker

Audio

Surround

This function allows you to enjoy realistic live sound.

Audio

Bass enhancer

This function allows you to enjoy bass-enhanced sound.

Automatic volume adjustment

Option

Auto volume

Different sound sources sometimes do not have the 
same volume level, such as a programme and its 
commercial breaks. This function reduces this problem 
by equalizing levels.

Emphasising dialogue

Option

Clear voice

This function emphasises speech against background 
noise for greater clarity.

Outputting audio only

Option

Audio only

When listening to music from a music programme, you 
can set the TV off and enjoy audio only.

Item

Off

Both screen images and audio are 
output.

On

Audio is output without a screen image.

Setting audio input

Option

PC audio select

When using the EXT 4 terminal or HDMI 2 terminal, you 
must select which terminal uses the AUDIO (R/L) jack for 
analogue audio input.

Item

HDMI 2

When connecting devices (including a 
PC) with DVI/HDMI cable to the HDMI 
2 terminal and inputting analogue audio 
signals from the AUDIO (R/L) jack.

EXT 4 (RGB)

When connecting a PC to the EXT 4 
terminal, and inputting analogue audio 
signals from the AUDIO (R/L) jack.

NOTE

You must set this to “EXT 4 (RGB)” when connecting devices 
(including a PC) with an HDMI-certified cable to the HDMI 2 
terminal. If “HDMI 2” is set, there will be no sound output.

Basic adjustment

LC-LE700E_GB3.indd   25

LC-LE700E_GB3.indd   25

2009/07/13   19:11:38

2009/07/13   19:11:38

Summary of Contents for LC-32LE700E

Page 1: ...bH Sonninstraße 3 D 20097 Hamburg SHARP CORPORATION http www sharp eu com Printed in Poland Wydrukowano w Polsce Készült Lengyelországban Vytištěno v Polsku Vytlačené v Poľsku Надруковано в Польщі Trükitud Poolas Iespiests Polijā Išspausdinta Lenkijoje Τυπώθηκε στην Πολωνία Polonya da basılmıştır TINS E283WJZZ 09P07 PL NG POLSKI MAGYAR ČESKY SLOVENSKY УКРАЇНСЬКА EESTI PIN LC 32LE700E LC 40LE700E L...

Page 2: ...lue must be connected to the plug terminal which is marked N or coloured black The wire which is coloured brown must be connected to the plug terminal which is marked L or coloured red Ensure that neither the brown nor the blue wire is connected to the earth terminal in your three pin plug Before replacing the plug cover make sure that If the new fitted plug contains a fuse its value is the same a...

Page 3: ...EPG 13 Useful settings for using EPG 13 Selecting a programme using EPG 14 Teletext 15 Using the MHEG 5 application UK only 15 Connecting external devices 16 Video connections 16 Audio connections 18 AQUOS LINK 19 Controlling HDMI devices using AQUOS LINK 19 AQUOS LINK connection 19 AQUOS LINK setup 20 Operating an AQUOS LINK device 21 Menu operation 22 What is the MENU 22 Basic adjustment 23 Pict...

Page 4: ...ct is dropped or impact applied If the LCD panel is broken be careful not to be injured by broken glass Heat sources Keep the product away from heat sources such as radiators heaters stoves and other heat generating products including amplifiers To prevent fire never place any type of candle or naked flames on the top or near the TV set To prevent fire or shock hazard do not place the AC cord unde...

Page 5: ...ideo setting Page 24 a b c d Cursor Select a desired item on the setting screen Execute a command within the MENU screen ATV DTV Display the programme list when no other MENU screen is running 0 Q W Exit the MENU screen R G Y B Colour buttons The coloured buttons are correspondingly used to select the coloured items on the screen e g EPG MHEG 5 teletext b INPUT SOURCE Select an input source Page 1...

Page 6: ... EXT 3 COMPONENT AUDIO terminals EXT 1 RGB terminal EXT 2 AV terminal OUTPUT AUDIO terminals WARNING Excessive sound pressure from earphones and headphones can cause hearing loss Do not set the volume at a high level Hearing experts advise against extended listening at high volume levels 1 2 3 4 5 6 7 8 9 10 11 12 13 14 15 16 17 18 19 When the MAIN POWER switch is turned off a the amount of electr...

Page 7: ...6 52 inch models C D Attach the supporting post for the stand unit onto the base using the four screws with the screw driver as shown Supporting post 32 inch models Use Screws B in the table in step 1 40 46 52 inch models Use Screws D in the table in step 1 1 2 Inserting the stand Insert the stand into the openings on the bottom of the TV hold the stand so it will not drop from the edge of the bas...

Page 8: ... period of time remove the batteries from it When replacing the batteries use zinc carbon batteries instead of alkaline ones Note on disposing batteries The batteries provided contain no harmful materials such as cadmium lead or mercury Regulations concerning used batteries stipulate that batteries may no longer be thrown out with the household rubbish Deposit any used batteries free of charge int...

Page 9: ...left side of the TV Page 4 Turn on the power using a on the TV Page 12 Run the initial auto installation Page 9 Language setting Home Store setting HOME STORE Country setting Austria Finland Greece Channel search setting Digital search Analogue search Start searching channels Watch TV Congratulations Now you can watch TV If necessary adjust the antenna to attain maximum signal reception Page 11 Co...

Page 10: ...ect Antenna setup DIGITAL and then press Press a b to select Supply voltage and then press Press c d to select On and then press 1 2 3 4 5 Mounting the TV on a wall This TV should be mounted on a wall only with the wall mount bracket and attachment available from SHARP Page 45 The use of other wall mount brackets may result in an unstable installation and may cause serious injuries Mounting the LC...

Page 11: ... Starting channel search Digital search Analogue search Press c d to select Digital search or Analogue search and then press To watch both analogue broadcasts and digital broadcasts you should perform the channel search setting for each format If you want to search for more broadcasts execute Additional search from the Programme setup menu Pages 27_29 NOTE If you turn off the power on the TV while...

Page 12: ...Specifies how you search channels Channel Extracts all of information from a channel quick but needs corresponding TV stations Frequency Checks every frequency in range slow Start frequency From 47 0_858 0 MHz Network ID Specifies the network Set this to register only the specified network ID without registering any special services None 0_65535 Symbol rate 1 The symbol rates are specified by the ...

Page 13: ...trength Frequency Symbol rate QAM modulation Channel strength Current Max Quality Position and align the antenna so that the maximum possible values for Signal strength and Quality are obtained NOTE The values of Signal strength and Quality indicate when to check the appropriate alignment of the antenna E 4 Inserting the CA card into the CI module In order to receive coded digital stations a commo...

Page 14: ... 2 E E Selecting an external video source Once the connection is made press b to display the INPUT SOURCE screen and then press b or a b to switch over to the appropriate external source with EXT 2 INPUT SOURCE TV EXT 1 EXT 3 Selecting a sound mode DTV mode If multi sound modes are received each time you press 2 the mode switches as follows Audio ENG STEREO L R L R LR CH A CH B CH AB Audio ENG CH ...

Page 15: ...aptured while the TV is in standby mode After setting to Yes it may take some time to turn off the power using the remote control unit due to the process of the data capture NOTE If the MAIN POWER switch or the power button on the TV are switched off the EPG data will not be captured Display range setup The Display range setup allows you to select three types of time spans for display on the scree...

Page 16: ... information Press a b c d to select the programme you want to check Press R and then press to tune to the selected programme Search a programme in a category Press G Press a b to select the desired genre and then press Press a b to select a programme you want to watch and then press Refer to page 13 for the genre setting 4 1 2 3 News Current affairs Movie Drama Show Game show Sports Children s Yo...

Page 17: ... selected signal type is RGB Page 34 1 2 Buttons for teletext operations Buttons Description r s Increase or decrease the page number Colour R G Y B Select a group or block of pages displayed in the coloured brackets at the bottom of the screen by pressing the corresponding colour R G Y B on the remote control unit Numeric buttons 0_9 Directly select any page from 100 to 899 by using the 0_9 numer...

Page 18: ...mm stereo minijack cable DVI HDMI cable DVI HDMI conversion Using a DVI HDMI cable the digital video signals of a DVD can also be played via the compatible HDMI connection The sound must be fed in additionally When connecting a DVI HDMI cable to the HDMI terminal the image may not come in clearly Both HDMI and DVI use the same HDCP copy protection method When using the HDMI 2 terminal You must set...

Page 19: ... player recorder TV standby When the TV enters standby mode the connected audiovisual equipment e g VCR DVD player recorder enters standby mode as well WYSIWYR When the remote control unit of the connected VCR has the WYSIWYR button you can automatically start recording by pressing the WYSIWYR button Preset download Automatically transfers the channel preset information from the tuner on the TV to...

Page 20: ... speakers as shown below Connecting an amplifier with digital analogue audio inputs DIGITAL AUDIO IN AUX1 IN L R Optical audio cable for digital audio input Audio cable for analogue audio input After connecting Digital audio output setting After connecting an amplifier with digital audio input and external speakers as shown you should set an audio output format compatible with the programme you ar...

Page 21: ...g the button NOTE When you use AQUOS LINK make sure to use a certified HDMI cable Point the remote control unit toward the TV not to the connected HDMI device Video noise may occur depending on the type of HDMI cable used Make sure to use a certified HDMI cable Up to three HDMI recording devices one AV amplifier and two players can be connected using this system These operations affect the HDMI de...

Page 22: ...s Off Selecting recorder Here you can select a recorder for the recording from several connected recorders NOTE If you have connected the AQUOS AUDIO speaker system between the TV and an AQUOS recorder the external source s indication changes e g from HDMI 1 to HDMI 1 Sub Selecting channel key This function allows you to select the channel of the connected HDMI device using the TV s remote control...

Page 23: ...CEC compatible external device player recorder decoder etc using the Setup menu function Press a b to select Setup menu and then press NOTE If a connected device does not have this function or the device is in a status where the menu cannot be displayed recording entering standby etc this function may not be available Top menu Title list This section explains how to play back a title in the AQUOS ...

Page 24: ...product is embedded with LC Font technology which was developed by SHARP Corporation for clearly displaying easy to read characters on LCD screens NOTE MENU options differ in the selected input modes but the operating procedures are the same Items with 4 cannot be selected for various reasons The MENU screen will disappear if left unattended for several seconds Operation without a remote control u...

Page 25: ...Tint Skin tones become purplish Skin tones become greenish Sharpness For less sharpness For more sharpness Picture Advanced This TV provides various advanced functions for optimising the picture quality C M S hue Colour temp C M S saturation C M S value 100 Hz Gamma adjustment Film mode Active contrast DNR 3D Y C Monochrome Range of OPC R Y G C B M C M S hue This function adjusts the hue of a sele...

Page 26: ... preferences The adjustment range of the OPC sensor can be set to a maximum of e 16 and a minimum of f 16 NOTE This function is available only when the OPC setting is set to On or On Display The maximum setting cannot be set to a smaller number than the minimum setting The minimum setting cannot be set to a bigger number than the maximum setting The maximum and minimum settings cannot be set to th...

Page 27: ...nction emphasises speech against background noise for greater clarity Outputting audio only Option Audio only When listening to music from a music programme you can set the TV off and enjoy audio only Item Off Both screen images and audio are output On Audio is output without a screen image Setting audio input Option PC audio select When using the EXT 4 terminal or HDMI 2 terminal you must select ...

Page 28: ... save status icons appear in the Picture menu and channel information windows as shown below E EXAMPLE Picture OPC Off Backlight Contrast DYNAMIC When OPC is set to On or On Display an Energy save status icon appears to the left of OPC in the Picture menu When OPC is set to Off an Energy save status icon appears to the left of Backlight in the Picture menu EXAMPLE STEREO Subtitle New information E...

Page 29: ...lecting the service you want to search either Terrestrial or Cable refer to Digital broadcast setting on pages 9_10 The Digital search has a Reset function This function allows you to reset all setting values Analogue search The TV searches for sorts and stores all the receivable TV stations Refer to Analogue broadcast setting on page 10 1 2 3 E E Programme setup Setup Programme setup You can reco...

Page 30: ... Press a b to select the service whose item position you want to move and then press Press a b to move it to the desired position and then press Repeat steps 1 and 2 until all desired service items are sorted 1 2 3 E 1 2 Cable setting Additional search Use this menu to add new services automatically after auto installation has been completed Follow steps 1 to 4 in Searching for cable broadcasts on...

Page 31: ...rs or less If a channel name is less than five characters select END to set the channel name E E 1 2 Skip Channels with Skip set to On are passed over when using r s even if selected while watching the image from the TV Decoder When connecting a decoder to the TV you need to select EXT 1 or EXT 2 NOTE The factory preset value is Off Lock You can block the viewing of any channel NOTE See Child lock...

Page 32: ...armful NOTE Universal viewing and Parental approval pref are ratings used exclusively in France Refer to page 48 for details about ratings 1 2 Other basic adjustments Option Key lock This function allows you to lock the buttons on the TV or remote control unit in order to prohibit children from changing the channel or volume Item Off Unlocks the buttons RC control lock Locks all buttons on the rem...

Page 33: ...For 16 9 letterbox pictures Bars may appear on the top and bottom with some programmes Cinema 14 9 For 14 9 letterbox pictures Bars may appear on the top and bottom with some programmes Item for HD High Definition signals Full Displays with an overscan image Crops all sides of screen Underscan Displays with an underscan image only when receiving a 720p signal Displays with the High Definition imag...

Page 34: ... OSD language from the Setup menu Select from among 23 languages Refer to the OSD language column in the specification table for the selectable languages Pages 43_44 Digital setup Subtitle Set up to two preferred subtitle languages including subtitles for the hearing impaired to display if subtitles are available Selectable items 1st language 2nd language For hearing impaired E E E Switching subti...

Page 35: ...y the time information will appear in the upper right corner of the screen by pressing E 1 2 3 4 Time and title display Option Time display Time display This function allows you to display the clock time in the lower right corner of the screen Item On Displays the clock time On half hourly Displays the clock time in 30 minute increments Off Hides the clock time Time format You can select the time ...

Page 36: ...nnot change labels if the input source is TV or USB 1 2 3 4 Skipping specified inputs Setup Input skip This setting allows you to skip the SCART HDMI or RGB input on the input source selection operation EXT 1 SCART EXT 2 SCART EXT 4 RGB HDMI 1 HDMI 2 HDMI 3 HDMI 4 Yes No Colour system settings Option Colour system You can change the colour system to one that is compatible with the image on the scr...

Page 37: ...d your files and then press NOTE You do not need to select the drive in step 2 when there is only one drive in the connected USB device 16 is the maximum number of drives that can be displayed 1 2 Photo mode Viewing thumbnails Buttons for thumbnail operations Buttons Description When selecting the folder icon with the 6 mark Go back to the parent directory When selecting a folder icon Enter this d...

Page 38: ...w continues until you press 6 The slide show speed is approximately 10 seconds per photo E E Music mode File name Time Playing Buttons for music mode Buttons Description When selecting the folder icon with the 6 mark Go back to the parent directory When selecting a folder icon Enter this directory When selecting a music file Play music a b Cursor Select a desired item c Cursor Page up d Cursor Pag...

Page 39: ...TV Displaying a PC image on the screen Selecting the picture size You can select the picture size Press f The WIDE MODE menu displays Press f or a b to select a desired item EXAMPLE Normal Full Item Full An image fully fills the screen Cinema For letterbox pictures Bars may appear on the top and bottom with some programmes Normal Keeps the original aspect ratio in a full screen display Dot by Dot ...

Page 40: ... desired position Item H Pos Centres the image by moving it to the left or right V Pos Centres the image by moving it up or down Clock Adjusts when the image flickers with vertical stripes Phase Adjusts when characters have low contrast or when the image flickers NOTE For resetting all adjustment items to the factory preset values press a b to select Reset and then press Clock and Phase in the Fin...

Page 41: ...tor The TV operates according to the received command and sends a response message to the PC Do not send multiple commands at the same time Wait until the PC receives the OK response before sending the next command Make sure to send A with the carriage return and confirm that ERR returns before operating Command format Eight ASCII codes CR C1 C2 C3 C4 P1 P2 P3 P4 Command four digits Command The te...

Page 42: ..._7 100 VOLUME V O L M _ _ VOLUME 0_60 CONTROL ITEM COMMAND PARAMETER CONTROL CONTENTS POSITION H P O S _ H POSITION AV PC V P O S _ V POSITION AV PC C L C K _ CLOCK 0_180 P H S E _ _ PHASE 0_40 WIDE MODE W I D E 0 _ _ _ TOGGLE AV W I D E 1 _ _ _ NORMAL AV W I D E 2 _ _ _ ZOOM 14 9 AV W I D E 3 _ _ _ PANORAMA AV W I D E 4 _ _ _ FULL AV W I D E 5 _ _ _ CINEMA 16 9 AV W I D E 6 _ _ _ CINEMA 14 9 AV W...

Page 43: ...eep timer menu Page 26 Is No signal off or No operation off activated Page 26 No picture Are connections to external equipment correct Pages 16_18 Is the input signal type selected correctly after connection Page 34 Is the correct input source selected Page 12 Is a non compatible signal being input Page 38 Is the picture adjustment correct Pages 23_24 Is the antenna connected properly Page 8 Is On...

Page 44: ...o not turn off the power using a on the TV Updating the software may take some time 1 2 Information Message list When new software is detected you can confirm the update information and download the software from Message list NOTE When the TV succeeds at downloading new software the message is updated in the Message list of the Information menu The software update will not be carried out if there ...

Page 45: ...le connector EXT 1 SCART AV input Y C input RGB input TV output EXT 2 SCART AV input monitor output Y C input EXT 3 COMPONENT IN Y PB CB PR CR RCA pin AUDIO R L EXT 4 15 pin mini D sub HDMI 1 EXT 5 HDMI HDMI 2 EXT 6 HDMI HDMI 3 EXT 7 HDMI HDMI 4 EXT 8 HDMI EXT 9 RCA pin AV input USB USB HDMI 2 PC AUDIO R L Ø 3 5 mm jack DIGITAL AUDIO OUTPUT Optical S PDIF digital audio output C I Common Interface ...

Page 46: ... EXT 8 HDMI EXT 9 RCA pin AV input USB USB HDMI 2 PC AUDIO R L Ø 3 5 mm jack DIGITAL AUDIO OUTPUT Optical S PDIF digital audio output C I Common Interface EN50221 R206001 OUTPUT RCA pin AUDIO R L Headphones Ø 3 5 mm jack audio output OSD language Czech Danish Dutch English Estonian Finnish French German Greek Hungarian Italian Latvian Lithuanian Norwegian Polish Portuguese Russian Slovak Slovene S...

Page 47: ...ed on the basis of the Energy Save Mode power consumption watching TV 4 hours a day 365 days a year NOTE The power consumption of On Mode varies depending on the images the TV displays Optional accessories The listed optional accessories are available for this LCD colour TV Please purchase them at your nearest shop Additional optional accessories may be available in the near future When purchasing...

Page 48: ...aties and other relevant laws This product also makes use of freely distributed software and software components whose copyrights are held by third parties These include software components covered by a GNU General Public License hereafter GPL a GNU Lesser General Public License hereafter LGPL or other license agreement Obtaining source code Some of the open source software licensors require the d...

Page 49: ...iscard this product please contact your local authorities and ask for the correct method of disposal For Switzerland Used electrical or electronic equipment can be returned free of charge to the dealer even if you don t purchase a new product Further collection facilities are listed on the homepage of www swico ch or www sens ch B Information on Disposal for Business Users 1 In the European Union ...

Page 50: ...umer Electronics Control Digital Noise Reduction DTV Digital TV DVB C Digital Video Broadcasting Cable DVB T Digital Video Broadcasting Terrestrial DVI Digital Visual Interface EPG Electronic Pogramme Guide HDCP High bandwidth Digital Content Protection HDMI High Definition Multimedia Interface MHEG Multimedia and Hypermedia Expert Group OSD On Screen Display PCM Pulse Code Modulation USB Universa...

Reviews: