Sharp LC-32LE360X Operation Manual Download Page 12


-

 10

H

 Fine sync. (PC input mode only)

Input signal

• Some input signals may have to be registered 

manually to display properly.

• The pairs of input signals (resolutions) in the list 

below are not distinguishable when received. 
In such case, you have to set the correct signal 
manually. After setting once, it will display when the 
same signal (resolution) is input again.

1280 

g

 768

1360 

g

 768

Adjusting the PC image automatically

Auto sync.

This function enables the screen to be automatically 
adjusted to its best possible condition when the 
analogue terminals of the TV and PC are connected 
with a commercially available RGB cable, etc.

NOTE 

•  Auto sync. is likely to succeed when an input PC image has 

wide vertical stripes (e.g. pattern with high contrast stripes, 
or cross-hatched). 
It may fail when an input PC image is solid (low contrast).

Adjusting the PC image manually

Ordinarily you can easily adjust the picture as 
necessary to change image position using Auto 
sync. In some cases, however, manual adjustment is 
needed to optimise the image.

Selected item

Description

H-Position

Centres the image by moving it to the left 
or right.

V-Position

Centres the image by moving it up or 
down.

Clock

Adjusts when the image fl ickers with 
vertical stripes.

Phase

Adjusts when characters have low 
contrast or when the image fl ickers.

NOTE 

•  For resetting all “Fine sync.” items to the factory preset 

values, press 

a

/

b

 to select “Reset”, press 

ENTER

, press 

a

/

b

 to select “Yes”, and then press 

ENTER

.

•  Images may not be displayed properly depending on the 

settings and/or input signals.

H

 DivX (R) VOD

Please see USB Media Player on page 15.

H

 Demo (store mode only)

When “Store mode” is set to “On”, after all the 
settings are completed, the Feature demo screen is 
displayed if there is no operation for 30 seconds.

H

 System data

USB data transfer

This function allows you to update the TV to the 
latest software using a USB device. You must 
update the software through the USB terminal.

Software update (OAD)

• This function is for automatically download the 

data for the version update software over digital 
broadcasts when the “OAD setup” is set to “On”.

• To download, follow the instructions when the 

download message appears during a digital 
broadcast.

• Once the software upgrade is done, the TV will 

automatically go to standby state with Red LED.

OAD scan

• This function is for manually download the data 

for the version update software over digital 
broadcasts.

CAUTION 

•  Do not disconnect the AC cord when the software 

upgrade is in progress, as this may cause the 
upgrade to fail. If problem arises ask a qualifi ed 
service personnel before the software upgrade period 
expires.

On-Screen Display Menu

EPG

RADIO

ATV/DTV

EPG

RADIO

ATV/DTV

GUIDE

INFO

Programme Guide

You can check the current channel list of DTV/ATV 
respectively.

1

Press 

GUIDE

 to display the programme channel 

list.

2

Press 

a

/

b

 to select your desired programme, 

and then press 

ENTER

.

3

Press 

RETURN

 or 

GUIDE

 to exit.

Info

While watching DTV you can check the extended 
programme information on the screen using 

INFO


on the remote control.

General INFO screen

• Station name
• Title
• Date
• Time for the current programme
• Video system
• Audio system
• Parental rating

NOTE 

•  If there is more information, pressing 

a

/

b

 allows you to go 

to the next page or return to the previous page.

•  You can cancel this info by pressing 

INFO

.

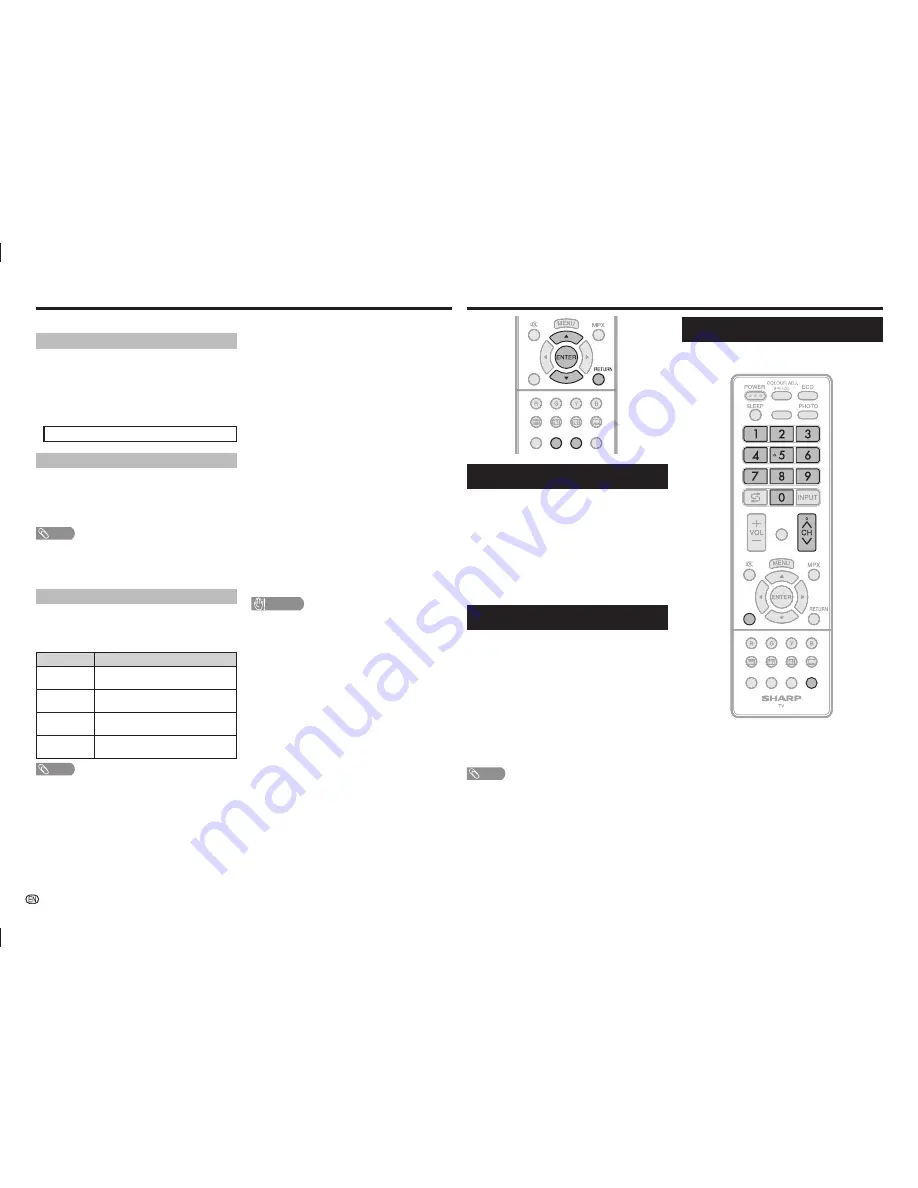
ATV/DTV/RADIO buttons

Use the following buttons on the remote control to 
operate the menu.

DISPLAY

EPG

HDMI

INFO

GUIDE

DISPLAY

EPG

HDMI

INFO

GUIDE

ATV/DTV

RADIO

ATV/DTV:

 Press to switch between ATV and DTV 

mode. After switching from ATV or DTV, radio or 
external input mode to ATV and DTV mode, the TV 
jumps to the most recently viewed ATV and DTV 
channel.

RADIO:

 Press to switch from DTV to radio mode. 

The TV will jumps to the most recently tuned radio 
channel.

When you watch the TV for the fi rst time

When the TV powers on for the fi rst time after 
purchase, perform the auto installation.

Direct Button Operation

LC-3240LE360X_EN_G268.indd   10

LC-3240LE360X_EN_G268.indd   10

8/5/2014   4:41:15 PM

8/5/2014   4:41:15 PM

Summary of Contents for LC-32LE360X

Page 1: ...MODEL LC 32LE360X LC 40LE360X LED BACKLIGHT TV OPERATION MANUAL LC 3240LE360X_EN_G268 indd i LC 3240LE360X_EN_G268 indd i 8 5 2014 4 41 00 PM 8 5 2014 4 41 00 PM ...

Page 2: ...LC 3240LE360X_EN_G268 indd ii LC 3240LE360X_EN_G268 indd ii 8 5 2014 4 41 01 PM 8 5 2014 4 41 01 PM ...

Page 3: ...se injury if the product overturns Take special care near children and pets The LCD panel is a very high technology product with 1 049 088 only for LC 32LE360X 2 073 600 only for LC 40LE360X pixels giving you fine picture details Due to the very large number of pixels occasionally a few non active pixels may appear on the screen as a fixed point of blue green or red This is within product specificati...

Page 4: ...UT DIVX VIDEO ON DEMAND This DivX Certified device must be registered in order to play purchased DivX Video on Demand VOD movies To obtain your registration code locate the DivX VOD section in your device setup menu Go to vod divx com for more information on how to complete your registration MHL the MHL Logo and Mobile High Definition Link are trademarks or registered trademarks of MHL LLC in the Un...

Page 5: ... DIGITAL AUDIO OUTPUT terminal usually outputs the same audio from the speakers The audio of the content you are viewing is output from the terminal The DIGITAL AUDIO OUTPUT terminal does not output some signals depending on devices and software The illustrations used throughout this manual are based on LC 40LE360X Antenna connection Connect antenna cable to the antenna terminal or If your outdoor...

Page 6: ...image See page 12 14 PHOTO Display your pictures directly on the TV screen See page 14 15 INPUT INPUT SOURCE Select an input source 16 CHr CHs TV input mode Select the channel CHr Increase the channel number CHs Decrease the channel number TELETEXT mode Select a page See page 12 17 MENU Display the menu screen 18 MPX Select the sound multiplex mode 19 RETURN MENU mode Return to the previous menu s...

Page 7: ... will be the default value for the AV mode setting If the AV mode is changed the TV will automatically switch back to DYNAMIC FIXED when there is no further change to TV setting for 30 minutes The confirmation screen appears only when selecting STORE Press a b to select Yes or No To change the STORE mode to HOME mode please refer to page 9 to reset the unit Press a b to select DTV ATV or DTV ATV an...

Page 8: ...se from to best match the system environment which can vary due to factors like room brightness type of programme watched or the type of image input from external equipment 1 Press MENU and the MENU screen displays 2 Press c d to select Picture and Audio 3 Press a b to select AV mode and then press ENTER Selected item Description STANDARD 1 For a highly defined image in a normally bright room MOVIE...

Page 9: ... function is on Off Outputs the normal sound NOTE If distorted bass sound is heard set to Off H Clear voice This function emphasises speech against background noise for greater clarity On Off NOTE Clear voice only work when SRS TS HD is On For resetting all Sound adjust items to the factory preset values press a b to select Reset press ENTER press a b to select Yes and then press ENTER ECO menu H ...

Page 10: ... signal contains no aspect ratio information the function will not work even if enabled H 4 3 mode DTV input mode only The 4 3 mode allows you to select between Full and Normal Selected item Description Full Wide image without side bars Normal Normal range keeping 4 3 or 16 9 aspect ratio 4 3 screen types 4 3 mode Full 4 3 mode Normal H Quick start You can reduce the TV s start up time after turni...

Page 11: ...table and constantly outputs Variable Sound via the AUDIO OUT terminal is adjusted with VOLk l on the remote control unit or the TV Sound via speakers is muted NOTE When Output volume select is set to Variable all Audio menu item cannot be adjusted H Input select For setting the signal type of external equipment Input source Selectable item INPUT6 COMPONENT VIDEO H Audio select HDMI input mode onl...

Page 12: ...e through the USB terminal Software update OAD This function is for automatically download the data for the version update software over digital broadcasts when the OAD setup is set to On To download follow the instructions when the download message appears during a digital broadcast Once the software upgrade is done the TV will automatically go to standby state with Red LED OAD scan This function...

Page 13: ...d operation differ due to the use of MHEG EPG The EPG screen and operation vary depending on the broadcasts ATV Analogue TV You can run the auto installation to set channels automatically 1 To watch the analogue TV select ATV from Auto installation in Programme setup menu See page 5 2 After setting the channels you can select a channel using CHr s or 0 9 on the remote control unit See page 4 DTV D...

Page 14: ...put source providing the Teletext programme 2 Press m to display the Teletext 3 Each time you press m the screen switches as shown below TELETEXT TELETEXT NOTE If you select a programme with no Teletext signal No Teletext available is displayed The same message displays during other modes if no Teletext signal is available New Zealand delivery model can receive MHEG data broadcasting Button functi...

Page 15: ...0 0 0 0 9 0 Response code format Normal response O K Return code 0DH Problem response communication error or incorrect command E R R Return code 0DH RS 232C commands list Commands Commands not indicated here are not guaranteed to operate CONTROL ITEM COMMAND PARAMETER CONTROL CONTENTS POWER SETTING P O W R 0 _ _ _ POWER OFF STANDBY INPUT SELECTION I T G D _ _ _ _ INPUT SWITCHING TOGGLE I T V D _ _...

Page 16: ... to stop the photo slideshows press RETURN to exit Control panel for photo music movie mode operations Press B to display the control panel below Button menu Description Photo Music Movie ENTER When selecting a folder icon Enter this directory When selecting a thumbnail Play the selected file Play Pause Rewind Each time you press rewind the speed will change 2x 4x 8x 16x Fast forward Each time you ...

Page 17: ...tes Remote control unit does not operate Is battery inserted with polarity e f aligned See page 4 Is battery worn out Replace with new battery Are you using it under strong or fluorescent lighting Is a fluorescent light shining on the remote control sensor Picture is cut off Is the image position correct See page 10 Are screen mode adjustments such as picture size made correctly See pages 7 and 10 S...

Page 18: ...tions from these values in individual units Specification may differ depending on the selected country CAUTION Installing the Liquid Crystal Television requires special skill that should only be performed by qualified service personnel Customers should not attempt to do the work themselves SHARP bears no responsibility for improper mounting or mounting that results in accident or injury Carefully re...

Page 19: ...AUDIO IN ANALOGUE RGB PC ARC RS 232C IOIOI 8 INPUT 8 1 INPUT 1 DIGITAL AUDIO OUTPUT 6 INPUT 6 7 INPUT 7 AUDIO OUT R AUDIO L R AUDIO L R AUDIO L VIDEO Y PB CB PR CR COMPONENT AV INPUT VIDEO Unit mm 100 100 477 440 739 700 4 394 8 265 6 93 86 210 485 LC 32LE360X LC 40LE360X LC 3240LE360X_EN_G268 indd 17 LC 3240LE360X_EN_G268 indd 17 8 5 2014 4 41 18 PM 8 5 2014 4 41 18 PM ...

Page 20: ...put screen display 3 If you enter 3001 using 0 9 the Child lock setting menu will be displayed 4 Enter the 4 digit number as a password using 0 9 The new password is now set DISPLAY ATV DTV DISPLAY ATV DTV The Password is NOTE As a precautionary measure make a note of your password above remove it from this manual and keep it in a familiar place Note LC 3240LE360X_EN_G268 indd 18 LC 3240LE360X_EN_...

Page 21: ... 19 Note LC 3240LE360X_EN_G268 indd 19 LC 3240LE360X_EN_G268 indd 19 8 5 2014 4 41 21 PM 8 5 2014 4 41 21 PM ...

Page 22: ... 20 Note LC 3240LE360X_EN_G268 indd 20 LC 3240LE360X_EN_G268 indd 20 8 5 2014 4 41 21 PM 8 5 2014 4 41 21 PM ...

Page 23: ... 21 Note LC 3240LE360X_EN_G268 indd 21 LC 3240LE360X_EN_G268 indd 21 8 5 2014 4 41 21 PM 8 5 2014 4 41 21 PM ...

Page 24: ...T OUR WEBSITE AT www sharp net au OR CALL SHARP CUSTOMER CARE 1300 135 022 SHARP CORPORATION OF AUSTRALIA PTY LTD SPform019 AUGUST 2011 LOCAL CALL COSTS APPLY WITHIN AUSTRALIA SHARP APPROVED SERVICE CENTRE www sharp net nz CONTACT YOUR SELLING DEALER RETAILER OR CALL Printed in Malaysia TINS G268WJZZ 14P09 MA NP loss or damage You are also entitled to have the goods repaired or replaced LC 3240LE3...

Reviews: