Sharp HT-CN300H Quick Manual Download Page 8

– 8 –

 If trouble occurs

When this product is subjected to strong external interference (mechanical shock, excessive static electricity, abnormal
supply voltage due to lightning, etc.) or if it is operated incorrectly, it may malfunction.

If such a problem occurs, do the following:

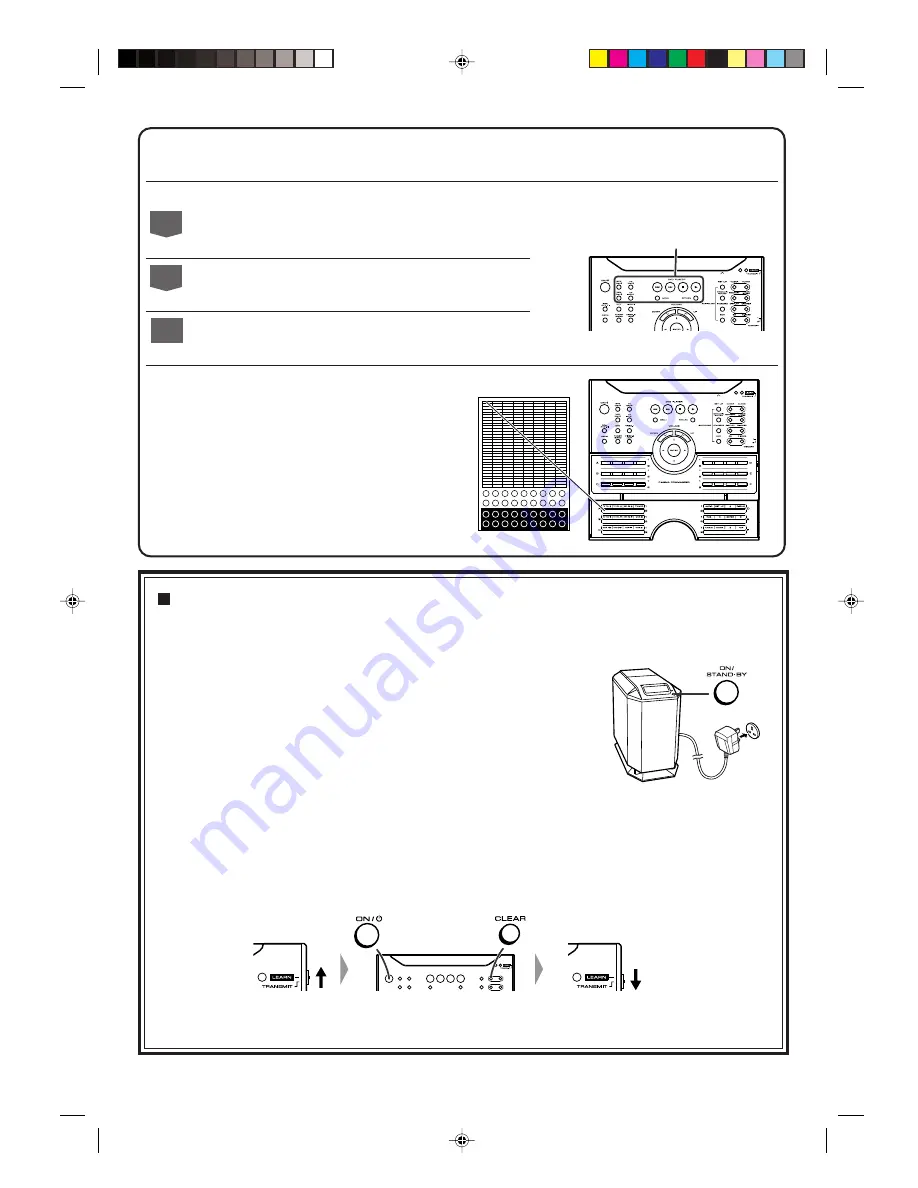
Clearing all the memory (reset): Main unit
1 Unplug the unit.
2 Whilst holding down the ON/STAND-BY button, plug in the AC power lead.

Release the ON/STAND-BY button when the “CLEAR AL” is displayed.

3 Press the ON/STAND-BY button again to turn the power on.
Caution:
This operation will erase all data stored in memory and restore various settings to the
initial status (default).

Clearing all the memory (initialisation): Remote control
1 Move the LEARN/TRANSMIT selector switch to LEARN.

The red learn indicator will light up. Though the red and green learn indicators light up alternately after approx. 15
seconds, you can go on to the next step.

2 Press the ON/

]

 (STAND-BY) and CLEAR buttons simultaneously for more than 3 seconds.

Initialisation is completed when the red and green learn indicators light up alternately and then the red learn indicator
lights up.

3 Move the LEARN/TRANSMIT selector switch to TRANSMIT.

Caution:
This operation will reset all data stored in memory to the initial status (default).

Memorising operations in the Memory 1 buttons for other equipment:
Set the MEMORY 1/2 selector switch to MEMORY 1 and perform steps 2 - 6 in "Memorising operations in the
Memory 2 buttons for other equipment".

Memorising operations in the operation buttons for other equipment:

1

Move the LEARN/TRANSMIT selector switch to LEARN.

2

Press down the desired button on the remote control for
2 seconds or more.

3

Perform steps 4 - 6 in "Memorising operations in the
Memory 2 buttons for other equipment".

6

Using the supplied labels:
Main features are already printed on the labels.
Write in other operations as you prefer.

Registrable buttons

Summary of Contents for HT-CN300H

Page 1: ...aptor for remote control 1 Labels for remote control 1 Video cable 1 Speaker cushion 20 Speaker connection lead 5 White Front left 5 m 15 Green Centre 5 m 15 Red Front right 5 m 15 Blue Surround left 15 m 45 Grey Surround right 15 m 45 I N O U T If you require any advice or assistance regarding your Sharp product please visit our web site www sharp co uk support Customers without Internet access m...

Page 2: ...ts of matching colours Front speaker right Centre speaker Front speaker left Black Red Red Black Red Green Black Red White Black Red Blue Black Red Grey Red Green White Blue Grey Main unit with subwoofer Black Red Surround speaker right Surround speaker left ...

Page 3: ...ug cover until it clicks Remote control sensor 3 Speaker layout The best surround effect will be achieved by placing each speaker at the same distance from the listening position Notes Place the TV halfway between the front speakers It is recommended that the centre speaker be placed near the television Keep the free space of at least 10 cm 4 along the side of the unit subwoofer Place the surround...

Page 4: ...oaxial digital audio cable Optical digital audio cable S video cable To S video output socket DVD player Connecting the VCR VIDEO 1 Video cable Audio cable Yellow White Left Red Right Yellow White Left Red Right L AUDIO VIDEO R IN TV Video cable supplied To video input socket SCART adaptor IN To SCART socket Video cable Audio cable Video cable Audio cable VCR To audio output sockets To video outpu...

Page 5: ...croll 1 Press the X BASS button to cancel the demonstration mode 2 Press the ON STAND BY button on the main unit or the ON STAND BY button on the remote control to turn the power on Power indicator Wall socket AC 230 V 50 Hz Connection example using a SCART adaptor To SCART socket SCART adaptor OUT To audio output sockets To video output socket Audio cable Video cable To SCART socket SCART adaptor...

Page 6: ...VD TV and VCR Memory 2 buttons No functions are stored at the factory setting Memorise the remote control signals learn function of your equipment before use Listening to the radio 1 Press the TUNER BAND button repeatedly to select the desired frequency band FM ST FM or AM 2 Press the or button to tune in to the desired station When the or button is pressed for more than 0 5 sec onds scanning will...

Page 7: ...n indicator will flash the red indicator remains lit 4 Within 10 seconds press down for more than 2 seconds the desired button on the remote control supplied with other equipment to send the signal to the marking When the signal is sent to the remote control of the unit the green indicator will go off When memorisation is completed it will light up If the signal is not memorised correctly the red ...

Page 8: ...tely after approx 15 seconds you can go on to the next step 2 Press the ON STAND BY and CLEAR buttons simultaneously for more than 3 seconds Initialisation is completed when the red and green learn indicators light up alternately and then the red learn indicator lights up 3 Move the LEARN TRANSMIT selector switch to TRANSMIT Caution This operation will reset all data stored in memory to the initia...

Reviews: