FO-4400U
FO-CS1
2 – 7
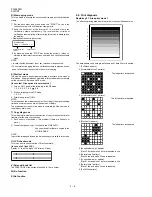
Rapid key 02: Check pattern 1
The lateral stripe 2 pattern is printed on one sheet.
(Black 2 line and white 2 line are repeated.)
Rapid key 03: Check pattern 2
The lateral stripe 2 pattern is printed on multiple pages.
Press the STOP key to end the printing.
Rapid key 04: Check pattern 3
The intermediate tone 1 is printed on one sheet.
Rapid key 05: Check pattern 4
In this mode, 1 sheet is printed as to the square frame pattern for the
skew measurement.
Rapid key 06: Paper feed aging 1
The mode is used for aging related to the printing. In this mode, the
following modes are provided.
1
Blank paper aging mode (ALL WHITE AGING)
2
Whole black print aging mode (ALL BLACK AGING)
3
5% printing aging mode (5% AGING)
4
4% printing aging mode (4% AGING)
5
Outer frame check pattern
6
4% check pattern
After selecting the paper-pass aging mode in the print diagnosis mode,
input the number of each mode above with the ten-key, and the mode
will be executed. The detailed specifications of each mode are described
as follows. Here, the operation in each mode is stopped only when the
STOP key is pressed by the operator or a printing-impossible error oc-
curs.
•
Blank paper aging mode
In the mode, printing is continued in the whole white (white paper)
printing pattern until the STOP key is pressed by the operator. (In the
printing area)
•
Whole black printing aging mode
In the mode, printing is continued in the whole black (whole black)
printing pattern until the STOP key is pressed by the operator. (In the
printing area)
•
5% aging mode
In this mode, the 5% print pattern is repeatedly printed until the [STOP]
key is pressed by the operator.
•
Outer frame pattern aging mode
In this mode, the outer frame check pattern is repeatedly printed until
the [STOP] key is pressed by the operator. For the outer frame, only
the frame showing the printing area is printed.
•
4% chart aging mode
In this mode, the 4% chart is repeatedly printed until the [STOP] key
is pressed by the operator.
Rapid key 07: Paper feed aging 2
This is a mode that is used for aging related to printing, and there are
following modes. And also as to the print interval 5 sec. – 12 hour can
be set.
1
Blank paper aging mode (ALL WHITE AGING)
2
Whole black print aging mode (ALL BLACK AGING)
3
5% printing aging mode (5% AGING)
4
4% printing aging mode (4% AGING)
5
Outer frame check pattern aging mode
6
4% check pattern aging mode
After entering this mode and selecting the paper feeding aging mode,
each mode is executed by inputting the number of the above each mode
with the numeric number keys and then inputting the print interval with
the numeric number keys. Refer to the paper feeding aging mode 1 for
each mode. Each mode stops the action only when the STOP key is
pressed by an operator or when an error for print impossible occurs.
Image printing density
Thin
←
→
Thick
1
2
3
4
5
6
7
Default value
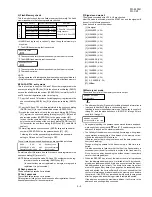
Rapid key 08: Bias adjust mode
The mode is used to adjust the printing density of the printed image.
The image printing density is adjustable in seven steps of 1 to 7.
For details, refer to the following table. (For selection, use the keys 1
through 7.)
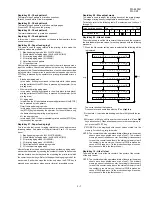
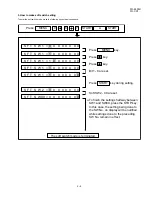
Rapid key 09: Life set mode
The mode is used to set the life counter of the printer and the counter of
the auto feeder at desired values. For setting, proceed with the following
procedure.
1
When the life counter setting mode is selected, the following will be
is displayed.
The cursor blinks at the top data.
Five counters can be selected with the "#" and " " keys.
2
In the state
1
, input a desired setting number of 6 digits with the ten-
key.
3
After input of 6 digits, shift to another counter with the "#" and " "
keys as necessary. When all necessary counters are completely in-
put, press the START key.
4
"STORED" will be displayed with the set values stored into the
memory. For checking, retry this mode.
NOTE: The counter shows the operational state of the printer (how many
sheets have been printed since start of use?). The ordinary
memory does not reset the counter. Accordingly, it is necessary
to reset this counter in addition to the ordinary memory clear if
the content in the memory on the control PWB is broken be-
cause of PWB repair, etc. (In the production stage, it is neces-
sary to execute this in the last process.)
Rapid key 10: Life all clear
The mode is used to clear the life counter of the printer of the counter
of the auto feeder.
NOTE: The counter shows the operational state of the printer (how many
sheets have been printed since start of use?). The ordinary
memory does not reset the counter. Accordingly, it is necessary
to reset this counter in addition to the ordinary memory clear if
the content in the memory on the control PWB is broken be-
cause of PWB repair, etc. (In the production stage, it is neces-
sary to execute this in the last process.)
M A C H I N E
D R U M
L
L I F E
L I F E
I F E 1
=
0 1 2 3
F E E D E R
L I F E =
=
=
L I F E 2 =
L I F E 3 =
0
key
# key
0
0
1 2 3
0
0
0
1 2 3
0
0
0
1 2 3
0
0
0
1 2 3
0
0
0
1 2 3
0
0
F E E D E R
L I F E =
0
0
1 2 3
0
Summary of Contents for FO 4400 - B/W Laser - All-in-One
Page 125: ...FO 4400U FO CS1 Control PWB parts layout Top side 6 16 ...
Page 126: ...FO 4400U FO CS1 Control PWB parts layout Bottom side 6 17 ...
Page 128: ...FO 4400U FO CS1 LIU PWB parts layout Top side 6 19 ...
Page 129: ...FO 4400U FO CS1 LIU PWB parts layout Bottom side 6 20 ...
Page 132: ...FO 4400U FO CS1 Printer PWB parts layout Top side 6 23 ...
Page 133: ...FO 4400U FO CS1 Printer PWB parts layout Bottom side 6 24 ...
Page 143: ...FO 4400U FO CS1 M E M O 6 34 ...


