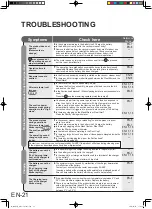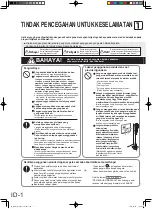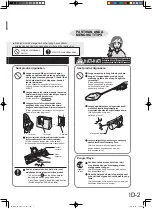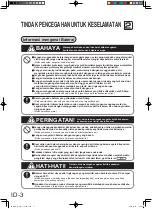
EN-6
EN-17
Rotary brush cover
EN-16
EN-4
Removal
CAUTION
Wheel
Rotary brush cover
Release lever
Belt
Gear
MAINTENANCE
Suction head, vacuum cleaner body,
Enclosed nozzles and contacts
(terminals) of charging section
Suction head (Rotary brush)
Vacuum cleaner body, Enclosed nozzles and
contacts (terminals) of charging section
When lint, rubber band, hair or pet hair and the like is attached.
Removing the dirt
Roller
Switch
Napped cushion
Remove dirt that became attached to
fine parts with a pair of scissor or a pair
of tweezers with thin tips.
Cut along the slot of the Rotary brush for
removal.
(Do not cut the tips of the bristles of the brush.)
Remove the dust attached to the
Suction head with a Duster Nozzle
and cut off the hair and lint
entangled in the section and then
wipe with wrung cloth.
Stop using the product when the section
becomes worn, check and contact
your nearest service center approved by
SHARP.
When heavily dirtied
Vacuum cleaner body
Wipe with cloth moistened with some water
or thinned neutral detergent. Do not use any
paint thinner or benzene product. [Risk of
deterioration or discoloration]
Enclosed nozzles
Release
button
When using the product in the
Handy state
Wash with water
or thinned neutral
detergent.
The vacuum cleaner body,
charger and battery cannot
be washed with water.
Dry the parts after washing
with water.
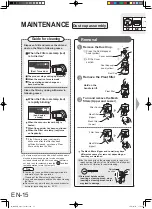
Press Release button to remove
respective parts.
Remove the Rotary brush cover by sliding the
Release lever to the "OPEN" position.
The Suction head cannot be washed with water in its entirety.
When heavily dirtied
Wash with water
Remove the belt from the gear while lifting up the
Rotary brush and remove the Rotary brush.
After removing the Rotary brush and washing it with water,
remove water and moisture properly and sufficiently dry in
a ventilated location before re-installing.
Rotary brush
Remove
the belt
Click!
EN-4
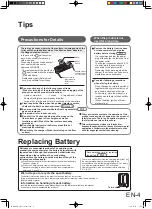
Tips for making the battery last
Charge the battery every time the product is used,
regardless of how long it was used.
When the product is not used for a long time
Recommended Time for replacing the battery
About 1,100 times of charge/discharge
◆
The battery lasts longer when charged before the charge level
becomes low.
Leaving a discharged battery without charging will lead to the
deterioration of the battery.
According to tests conducted based on Sharp's standard
for repeatedly charging and charge/discharge a battery.
The life of a battery can vary depending on the conditions
of use and the environment.
*2
*1
EN-7
Lamps notify status of the vacuum cleaner body
Filter care lamp
(red)
Battery level indicator
lamp (green) *1
Indicated State/ Explanation
Lamp State
Filter care lamp (red)
Battery level indicator
lamp (green)
Turned
on *2
Fast
blinking
Turned on
Blinking
Fast
blinking
The filter of the Dust cup assembly is dirty.
Clean the filter by rinsing with water.
There is sufficient charge remaining in the battery.
The charge remaining in the battery is low.
The filter of the Dust cup assembly is clogged with dust.
The vacuum cleaner body is overheating.
Leave the product in a cool place for a while.
Operating the product without allowing it to cool leads to the
overheating protection circuit of the vacuum cleaner body triggering,
which disables the product for some time.
The charge remaining in the battery is quite low.
(There is no charge remaining in the battery.)
Charge the battery.
Empty the dust cup and clean the filter.
The Battery level indicator lamp is turned on in following situations. (The lamp is not turned on when there
is no charge left in the battery.)
The lamp may also turn on when the Suction head is clogged even when the filter is not dirty.
In such instances, press the and then restart operation to turn the lamp off.
About 5 seconds after the battery is reinstalled on the vacuum cleaner body.
While using the product for cleaning
About 5 seconds after pressing the and stopping the operation of the product.
EN-13, 14
EN-15, 16
EN-11, 12
Duster Nozzle
(1 piece)
Crevice Nozzle
(1 piece)
(1 piece)
2-flat-pin adapter
Use the adapter if your
outlet is for 2-flat-pin plug
Enclosed Nozzles
Plug Adapter
EN-5
Accessories
EN-4, 7
EN-15, 16
EN-7
EN-7
EN-18
CAUTION
Terminal
Rotary brush cover
Gear
Slot
Slot
Tab
Warning
[Risk of electrocution or injury.]
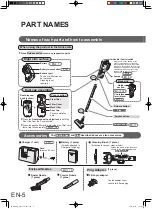
PART NAMES
Names of each part and how to assemble
When using the product in the Stick state
Right side surface
Dust cup assembly
Press Release button to remove respective parts.
Battery
Exhaust port
Dust disposal
hook (yellow)
Dust Cup
Cord
(Approx. 80 cm)
Charger (1 unit)
Battery (1 piece)
Cleaning Brush (1 piece)
(Already attached to
Charger at shipping)
(Attached to vacuum cleaner body)
Contacts (terminals) of charging section
Strap on
a belt
Installation is not
possible when the left
and right are reversed.
Strap the belt on the gear of the Rotary brush and
insert it into the slot.
Slide the Release lever in the direction of
the arrow.
Clip on the tab on the Rotary brush cover in the
slot.
Insert the side without a gear of the Rotary brush,
as far as it goes into the slot.
Do not apply any hot air, such as air blown by a hair dryer.
[Risk of deformation or product malfunction]
Do not use any detergent, paint thinner, benzene product
or hot water (exceeding approx. 40°C). [Risk of
deterioration or deformation]
Attach
Attach the brush in the direction
shown in the diagram after use.
Wipe off any dirt
with a dry cloth.
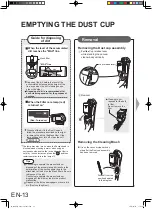
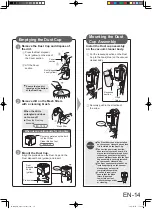
Mesh filter
Wash respective filter with water when the Filter care
lamp (red) blinks rapidly
Press the
Dust disposal hook (yellow)
to split the
Dust Cup from the Cover section.
Filter Cover
Pleat filter
Dirt accumulates
here.
Cover section
The built in filter cannot
be removed.
Cleaning is not
required.
Battery release button
The
Suction head
and
Pipe
described above are also accessories.
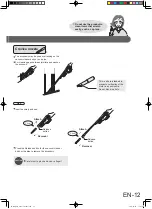
Always do the following during maintenance:
Disconnect the power cord of the Charger from the
electrical outlet.
Press the to stop the operation of the product and
remove the battery.
EN-10, 19
EN-17
EN-13
EN-6
EN-9
Suction head
Pipe
Back side
Release button
Release button
Holder
section
Lamps
Handle / Control switch
Always hold on the handle on the
vacuum cleaner body to transport
the product.Holding onto other parts
(such as a pipe of the Dust Cup) can
dislodge such parts from the vacuum
cleaner body and the product may
fall and lead to injury or product
malfunction.
Cup release
lever (black)
EC-A1RA_Eng_A4(ai sorted).indd 18
2017/07/07 11:43:21

