


61
Editing a playlist
NOTE:
It is no problem to omit the proce-
dures for confirming the scene or
adjusting start and end points.
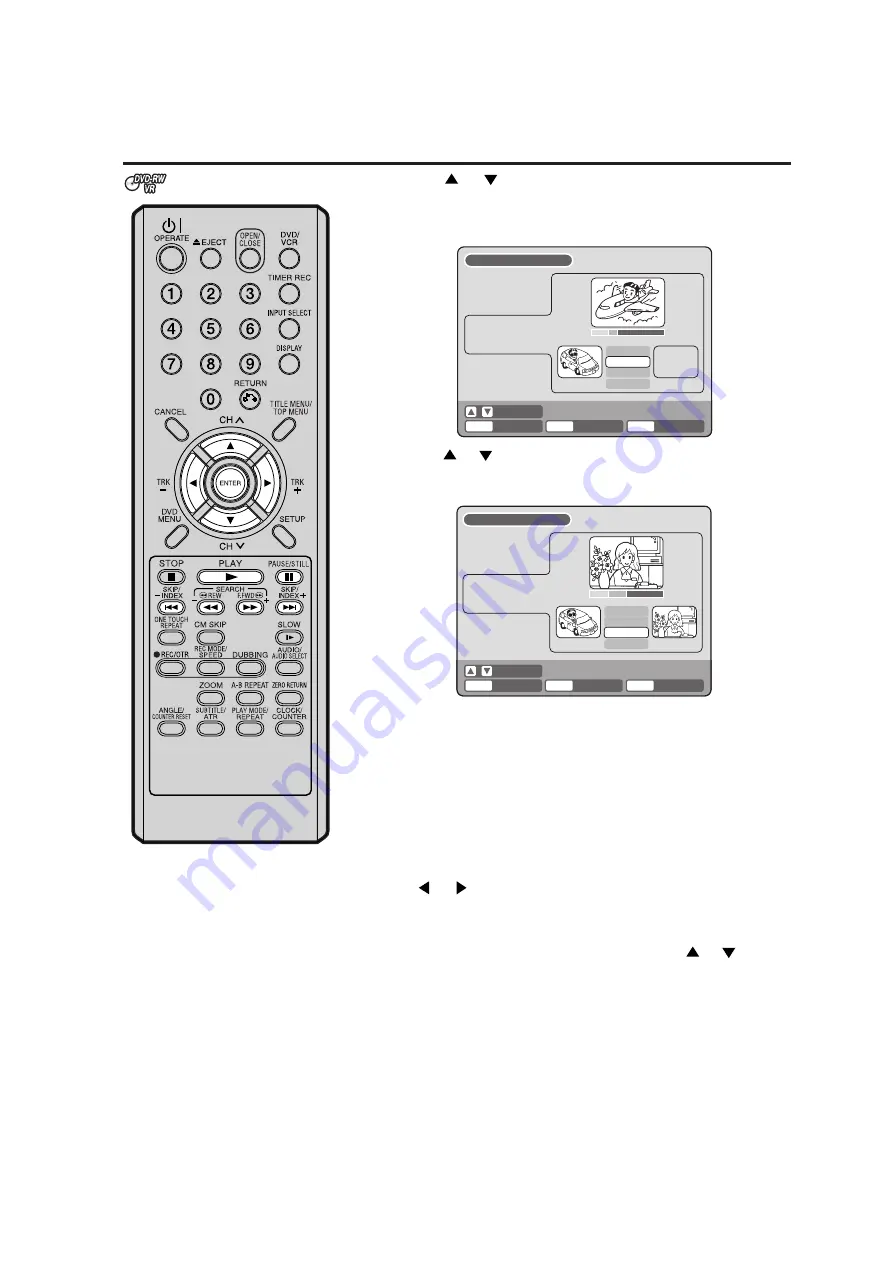
5
Press
or
to select “SET START” at the start point of the
scene that you want to erase and press
ENTER
. (To set the start
point easily, search the start point while “SET START” is selected)
The still image at the start point appears at the left small screen.
6
Press
or
to select “SET END” at the end point of the scene
you want to erase and press
ENTER
.
The still image at the end point appears at the right small screen.
7
Check the erased scenes.
• Select “Preview” and press
ENTER
. Then the video where the
scenes between the start and end points are erased is played
back.
• Each operation button (
F.FWD
,
REW
,
SKIP +, SKIP –
,
PLAY
,
PAUSE/STILL
) for playback also can be used.
8
Adjust the start and end points.
• To adjust the start point, select “Adjust start” and press
ENTER
.
You can change the start point every one frame by pressing
or
.
• To adjust the end point, select “Adjust end” and press
ENTER
.
You can change the end point in the same way as the start point.
9
If you determine the scene to be erased, press
or
to select
“Finish” and press
ENTER
.
• A chapter mark is automatically added at the location of the
erased scene.
SELECT
RETURN
ENTER
BACK
END
TITLE
MENU
ENTER
EDIT TITLE
00:11:42
00:10:20
00:11:42
Preview
Adjust start
SET END
Finish
NAME
Family
CHAPTER
2/3
LENGTH 00:11:42/00:30:17
SELECT
RETURN
ENTER
BACK
END
TITLE
MENU
ENTER
EDIT TITLE
NAME
Family
CHAPTER
2/3
LENGTH 00:15:58/00:30:17
00:15:58
00:10:20
00:15:58
Preview
Adjust start
Adjust end
Finish


