background image

E-15

HTCN410DVH 8_E1.fm

03/10/29

ENGLISH

F

S

V

I

N

P

E

E

HT-CN410DVH

System Connections

- Connections to TV, VCR, etc. -

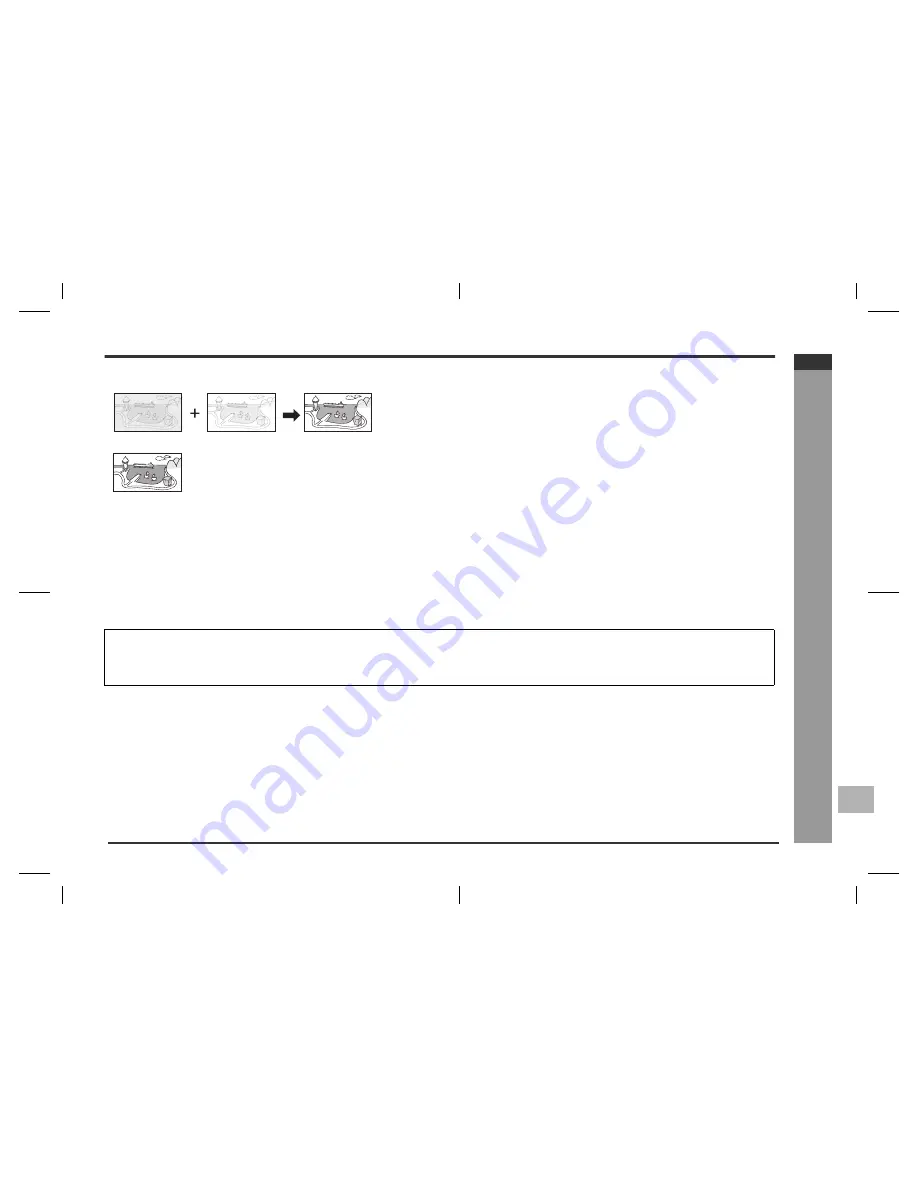
Progressive Scanning

Whilst interlaced scanning produces one frame of video in two fields, progressive scanning creates one frame in one field.
Conventional interlaced scanning constitutes one second with 30 frames (60 fields), but progressive scanning constitutes it with 60 frames from scratch.
Progressive scanning can reproduce sharper picture with high resolution for still image or other picture containing long texts or horizontal lines.
This model has compliance with 525p (progressive) system.

Notes:

Please refer to your TV instruction manual.

When you connect the DVD main unit to your TV, be sure to turn off the power and disconnect both units from the wall outlet until all the connections have been made.

Do not connect the DVD main unit to a VCR directly. The playback picture will be distorted because DVD video discs are copy protected.

Notes:

For VIDEO connection, please refer to "BASIC CONNECTIONS".
Please refer to the instruction manual of your amplifier.
When you connect the DVD main unit to your amplifier, be sure to turn off the power and disconnect both units from the wall outlet until all the connections have been made.

Interlaced scanning

Progressive scanning

Summary of Contents for CP-CN410C

Page 1: ...T DVD CINEMA EM CASA COM DVD HOME CINEMA WITH DVD MODELLO MODEL MODELO MODEL Siehe Seiten i bis xi und D 1 bis D 54 Se reporter aux pages i à xi et F 1 à F 54 Consulte las páginas i a xi y S 1 a S 54 DEUTSCH Favor consultar as páginas i a xi e P 1 a P 54 PORTUGUÊS FRANÇAIS ESPAÑOL Hänvisa till sidorna i till xi och V 1 till V 54 Leggere le pagine i a xi e I 1 a I 54 Raadpleeg de bladzijden i t m x...

Page 2: ... Tracks on some discs cannot be played in order Repeat play on the MP3 DivX menu screen Whilst a disc is playing press the REPEAT button Each time the button is pressed the repeat play mode changes in the following order TV screen Unit display If the MP3 menu screen is off the play mode is set to the one in use Folder ROOT Track 3 4 5 8 9 11 6 7 1 2 10 REPEAT ONE REPEAT ALBUM REPEAT DISC REPEAT OF...

Page 3: ...he or button Each press of the or button cycles through the zoom setting as follows 3 To shift the view and display the desired part of a zoomed image press the 8 9 or button repeatedly ZOOM 025 PCT ZOOM 050 PCT ZOOM 100 PCT ZOOM 150 PCT ZOOM 200 PCT Press the button Press the button Press the button Press the button During playback press the 8 9 or button The image rotates as shown below button 9...

Page 4: ... button for a few seconds to tune in to the desired station Manual tuning Press the or TUNING 4 or 3 button as many times as required to tune in the desired station Auto tuning When the or TUNING 4 or 3 button is pressed for 0 5 seconds or more scanning will start automatically and the tuner will stop at the first receiv able broadcast station When radio interference occurs auto scan tuning may st...

Page 5: ...nnel 1 Press 1 To select preset channel 12 Press 10 and 2 To select preset channel 22 Press 10 10 and 2 Store the stations in memory in order starting with preset channel 1 4 Press the MEMORY button to save the station to memory 5 Repeat steps 1 4 to set other stations or to change a preset station When a new station is stored in memory the station previously memorised will be erased A B REPEAT1 S...

Page 6: ...ovided by RDS Each time the DISPLAY button is pressed the display will switch as follows If the tuned station is not transmitting an RDS signal or not an RDS station NO RDS will be displayed Notes for RDS operation If any of the following events occur it does not mean that the unit is faulty If a particular station is not broadcasting properly or a station is conducting tests the RDS reception fun...

Page 7: ...arly used for specialist music of which Rhythm Blues and Reggae are examples WEATHER Weather reports and forecasts and meteorological information FINANCE Stock Market reports commerce trading etc CHILDREN For programmes targeted at a young audience primarily for entertain ment and interest rather than where the objective is to educate SOCIAL Programmes about people and things that influence them i...

Page 8: ... in the home theatre system The DIGITAL indicator will light up when the disc recorded in DIGITAL is played back Dolby Pro Logic Dolby Pro Logic Inputs from stereo recorded discs video tapes etc You can produce 2 channel stereo signals on audio CD video CD or AUX from all the speakers The Pro Logic indicator will light up when the Dolby Pro Logic surround is activated DIGITAL PL PL II Whilst a dis...

Page 9: ...AUX the information does not appear on the TV screen Dolby Pro Logic surround You can produce sound from all the speakers 2 ch stereo sound Enjoy 2 channel stereo sound Left Front Speaker Indicator Centre Speaker Indicator Right Front Speaker Indicator Left Surround Speaker Indicator Subwoofer Indicator Right Surround Speaker Indicator PRO LOGIC PL II R L RS LS C S PL II STEREO STEREO S STEREO STE...

Page 10: ...re speaker needs to be delayed for 90 cm The delay time of 1 ms corresponds to 30 cm Set the delay time to 3 MS Sound is heard as if all the speakers were equally placed 1 In Speaker delay time setting set the centre speaker to 3 MS 2 The centre speaker is closer to the listener than others In Speaker level setting adjust the centre speaker level see page 48 3 In Test tone check the sound from eac...

Page 11: ... select SPEAKER SETUP and then press the ENTER button 5 Press the 8 or 9 button to select TEST TONE 6 Press the button and use the 8 or 9 button to select ON 7 Press the ENTER button Speakers emit the test tone for 2 seconds in turn starting with the front speaker left 8 To end the test tone press the SETUP button Subwoofer Front speaker left Front speaker right Surround speaker left Surround spea...

Page 12: ...ress the STEP button Each press of the STEP button advances the frame 2 Press the button to return to the normal playback 1 Whilst a disc is playing press the SLOW button repeatedly to select the desired speed On DVD the speed changes as follows On SVCD VCD only forward play is possible and the speed changes as follows On DivX Video only forward play is possible and the speed changes as follows 2 ...

Page 13: ...an magnify images during playback To return to normal view Press the ZOOM button repeatedly to select ZOOM OFF Notes Images may become distorted when zoomed Subtitles cannot be zoomed Only zoom x 2 is available for DivX files When is displayed in the upper right corner of the TV screen press the ANGLE button repeatedly to select the desired angle number 1 Whilst a disc is playing press the ZOOM bu...

Page 14: ...ing order The repeat play mode changes as follows on DVD The repeat play mode changes as follows on SVCD VCD audio CD MP3 The repeat play mode changes as follows on JPEG DivX Video disc MP3 and JPEG are displayed when MP3 menu screen is ON see page 39 2 To return to the normal playback press the REPEAT button re peatedly to select REPEAT OFF REPEAT CHAPTER REP 1 REP 1 REPEAT CHAPTER REPEAT TITLE R...

Page 15: ... your DVD if it has a disc menu Note The procedure shown here provides only general steps The actual procedure for using the disc menu depends on the disc See the disc jacket for details 1 Whilst a disc is playing press the A B button TV screen Unit display This registers the start point A 2 Press the A B button again to enter the end point B This starts A B repeat from the start point A to the en...

Page 16: ...o language audio output During playback you can change the audio language audio output Notes On some discs the audio language cannot be changed For the audio language and audio system refer to the manual of the disc The audio language of DivX files can be switched as MP3 files However it may change like DVD Audio 1 3 Audio 2 3 Audio 3 3 depending on the record ing method Whilst a disc is playing p...

Page 17: ... AUDIO 1 VOCAL AUDIO 2 VOCAL AUDIO 1 RIGHT VOCAL MONO LEFT STEREO MONO RIGHT LEFT VOCAL MONO LEFT STEREO MONO RIGHT DVD SVCD VCD Audio CD MP3 DivX TITLE 02 05 CHAPTER 001 008 00 30 21 TITLE REMAIN 00 45 00 CHAPTER ELAPSE 00 01 23 CHAPTER REMAIN 00 03 03 SINGLE ELAPSED 00 01 16 TOTAL REMAIN 00 48 54 CHAPTER ELAPSE 00 05 21 CHAPTER REMAIN 00 02 35 SINGLE REMAIN 00 03 21 TOTAL ELAPSED 00 12 40 Total ...

Page 18: ...deo CD super video CD with P B C To interrupt playback Press the button To resume playback from the same point press the button To stop playback Press the button To stop the current operation and return to the menu Press the RETURN button To scroll the menu screen menu screen with more than 1 page Press the or button The P B C function will not work in the following conditions Repeat programmed di...

Page 19: ...discs Some discs cannot play from the specified point To play by specifying time time search Cancel the P B C playback control Notes Time search feature is disabled on some discs Time search feature is not available on MP3 and JPEG discs 1 Whilst in the stop or playback mode press the PBC MENU button to can cel the P B C mode 2 Press the button Playback starts PBC OFF Whilst in the stop or playbac...

Page 20: ...eat the above procedures from step 1 Programmed contents will be cleared when you perform the following operations Press the button twice to access programme Switch the input or remove the discs Set to the stand by mode Notes 1 Whilst stopped press the PROGRAM button TV screen Unit display 2 Enter a track number with the direct number buttons Repeat the procedure above to enter other track numbers...

Page 21: ...or a folder name and a track name Under lines asterisks and spaces may not be displayed Due to the structure of the disc information it takes longer to read an MP3 JPEG or DivX disc than a normal CD 1 Load a disc containing MP3 JPEG and DivX files The MP3 menu screen appears 2 Press the PBC MENU button 3 Press the 8 9 or button to select a folder or a track and press the ENTER or button Playback s...

Page 22: ...oes not appear when the input is not set to the disc mode Press the FUNCTION button to select DVD mode If the startup screen is blurred press the NTSC PAL button repeatedly to change the TV type 2 Press the SETUP button 3 Press the 8 or 9 button to select a menu and press the ENTER button See the list on pages 20 23 for setup menu 4 Press the 8 9 or button to change the setting and press the ENTER...

Page 23: ...CART Select S VIDEO mode if connect DVD main unit S VIDEO output socket to TV S VIDEO input socket for details see page 12 Select YPBPR mode if connect DVD main unit component video output sockets YPBPR to TV component video input sockets with Progressive scan capability for details see page 14 15 YPBPR S VIDEO ANGLE MARK ON OFF OSD LANGUAGE ENGLISH FRENCH GERMAN ITALIAN SPANISH You can select the...

Page 24: ...elects the language audible from the speakers SUBTITLE ENGLISH FRENCH SPANISH GERMAN ITALIAN OFF Selects the subtitle displayed on the TV screen DISC MENU ENGLISH FRENCH SPANISH GERMAN ITALIAN Selects the disc menu language PARENTAL 1 G 6 PG R NO PARENTAL Sets a restriction level for DVD viewing for details see page 23 Enter a 4 digit password It is set to 1234 by default PASSWORD CHANGE Change th...

Page 25: ...16 9 is displayed when playing a wide image 16 9 disc When playing a 4 3 image disc the image size depends on the setting of the connected TV If you play back a wide image 16 9 disc with this unit connected to a 4 3 TV the vertically shrunk image is displayed Indicator Setting MULTI Select this mode for the multi system TV NTSC Select this mode for the NTSC TV PAL Select this mode for the PAL TV I...

Page 26: ... the paren tal level and press the ENTER button 3 Enter a 4 digit password using the direct number buttons and press the ENTER button If this is the first time enter 1234 Indicator Setting 1 G Only DVD software intended for children can be played back 2 7 NC 17 Only DVD software intended for general use and children can be played back 8 ADULT DVD software of any grade adult general children can be...

Page 27: ...ct the TREB or BASS 10 dB to 10 dB 2 Within 3 seconds press the VOLUME or VOLUME button to adjust the level You can adjust the level at 2 dB intervals 10 dB to 10 dB The volume is muted temporarily when pressing the MUTE button on the remote control Press again to restore the volume When headphones are plugged in the sys tem will enter the stereo mode automatical ly When headphones are unplugged t...

Page 28: ...n 2 When the input is not set to the disc mode press the FUNCTION button repeatedly to display the startup screen The startup screen appears 3 Press the OPEN CLOSE button to open the disc tray 4 Place the disc on the disc tray label side up Be sure to place 8 cm 3 discs in the middle of the disc position 5 Press the OPEN CLOSE button to close the disc tray Discs supporting auto start will start to...

Page 29: ...iscs an error message will appear on the TV display and the disc will not play Notes During disc initialisation the volume cannot be adjusted Stop positions may be recorded on some discs When you play such a disc play back stops there During an operation may appear indicating that the operation is disabled by the disc To resume playback after stopping resume play You can resume playback from the p...

Page 30: ...r MP3 DivX disc sounds will break up during search This is not a mal function When search is performed during the DVD playback pictures may not be forward ed or reversed in the search speed specified in this manual depending on the disc or the scene being played The search does not operate on JPEG discs Whilst a disc is playing press the or button Use the button to skip to the next chapter track U...

Page 31: ...n TV screen Unit display 2 Within 10 seconds select the title or chapter by pressing the or button and enter the title or chapter number using the direct number buttons If the track number is 2 digits or more press 10 and enter the number Example To select chapter 1 Press 1 To select chapter 12 Press 10 and 2 To select chapter 22 Press 10 10 and 2 3 Within 10 seconds press the ENTER button TITLE 0...

Page 32: ...unctions Notes Do not allow any objects to fall into or to be placed in the bass reflex ducts Front and centre speakers are magnetically shielded 1 3 2 1 Bass Reflex Duct 2 Woofer 3 Speaker Lead 1 2 Front speaker Reproduces left and right sound stereo mode or front surround sound Centre speaker Reproduces centre surround sound Surround speaker Reproduces rear surround sound Subwoofer Reproduces ba...

Page 33: ...ection Speaker terminals on the main unit and speakers and speaker wires are distinguished by colours Connect the speaker and the unit by matching the colours For speaker installation see page 11 Front speaker right Centre speaker Surround speaker left Subwoofer Surround speaker right Front speaker left ...

Page 34: ...touch each other Do not stand or sit on the speakers You may be injured Do not short circuit the speaker wires If the power is turned on malfunction may occur When disconnecting the speaker wires unplug the AC power lead and then disconnect the speaker wires from the main unit SUB WOOFER SURROUND R R 4 OHMS 8 OHMS CENTER FRONT L L MINIMUM RATED SPEAKER IMPEDANCE Red Red Black Black 1 Connect the w...

Page 35: ...y connecting them to the unit as shown Caution Turn off all other equipment before making connections TV To video input socket To audio input sockets Video cable not supplied Audio cable not supplied Video signal Audio signal To S video input socket To audio input sockets TV S video cable commercially available Video signal Audio cable not supplied Audio signal To audio output sockets Audio cable ...

Page 36: ... Decoder or DTS Decoder To enjoy Dolby Digital or DTS Please consult your local audio video dealer To COAXIAL DIGITAL OUT socket Coaxial audio cable not supplied To digital audio input Amplifier with a coaxial digital input Front left Speaker Front right Speaker To COAXIAL DIGITAL OUT socket To digital audio input Amplifier with Dolby Digital Decoder DTS Decoder or MPEG 2 Decoder Centre Speaker Fr...

Page 37: ...e TV The VIDEO INPUT or S VIDEO OUT sockets connection is not encourage 2 You also need to connect the left and right audio cables to the AUDIO OUT sockets of DVD main unit and the Audio input sockets of the TV 3 Set the DVD main unit to the PROGRESSIVE position See page 20 AUDIO INPUT COMPONENT VIDEO INPUT L Y Green Green Blue Red White Red Blue Red PB PR R TV with progressive scan capability To ...

Page 38: ...ontal lines This model has compliance with 525p progressive system Notes Please refer to your TV instruction manual When you connect the DVD main unit to your TV be sure to turn off the power and disconnect both units from the wall outlet until all the connections have been made Do not connect the DVD main unit to a VCR directly The playback picture will be distorted because DVD video discs are co...

Page 39: ... repeatedly to select the desired audio in put Unit display For the TV select TV IN For the VCR select AUX IN Notes Change the TV input in accordance with the connected socket Do not connect other equipment VCR etc between the TV and this unit Pic tures may be distorted Refer to the operation manual of the equipment to be connected Insert the plugs fully to avoid fuzzy pictures or noise FUNCTION T...

Page 40: ...ically shielded speakers The front and centre speakers may be placed beside or near the TV as they are mag netically shielded However discolouration may occur depending on the TV type If colour variation occurs Turn off the TV with the power switch After 15 30 minutes turn the TV on again If the colour variation is still present Move the speakers further away from the TV Refer to the manual of the...

Page 41: ...nit to strong light may interfere with operation Change the lighting or the direction of the unit Keep the remote control away from moisture heat shock and vibrations Turning the power on Test of the remote control Check the remote control operation after making all the connections see pages 10 16 Point the remote control directly at the remote sensor on the unit The remote control can be used wit...

Page 42: ... the remaining sleep time Press the SLEEP button whilst the sleep timer is set The remaining sleep time is displayed for about 3 seconds Caution This unit cannot set the sleep timer of other equipment To use the sleep timer using other equipment you should also set the timer on the equipment separately 1 Play back the desired sound source 2 Press the SLEEP button To change the sleep time Press the...

Page 43: ...lead again after 15 minutes or more P 51 No images are displayed Is TV turned on P 19 Is the input of TV switched P 19 Symptom Possible cause Reference page Even though a disc has been loaded NO DISC is displayed Is the disc loaded upside down Is the disc very dirty Playback sounds are skipped Does the disc satisfy the standards Is the unit located near excessive vibrations Has condensation formed...

Page 44: ... continuously Is the unit placed near the TV or computer Is the FM aerial or AM loop aerial placed properly Move the aerial away from the AC power lead or the unit if located near P 11 The preset channel cannot be recalled Did you remove the plug from the wall socket or did a power failure occur P 42 Set the channel again Symptom Possible cause Reference page The remote control does not operate pr...

Page 45: ...mber of the DVD is not the number on the back of the unit or ALL TV screen Meaning The disc is not loaded The disc is scratched or dirty and cannot be recognised The disc is loaded up side down The region number of the DVD is not the number on the back of the unit or ALL TITLE CHP A B REPEAT1 SLEEP PROG PRESET TRK KHz MHz TITLE CHP A B REPEAT1 SLEEP PROG PRESET TRK KHz MHz 3 NO DISC WRONG CODE Per...

Page 46: ...xial type 1 Video output terminals S video output S terminal 1 Video output RCA type 1 Component video output PR PB Y Audio and Video output terminals SCART output SCART terminal 1 Output power Front speakers RMS 42 W 21 W 21 W 10 T H D 1 kHz Centre speaker RMS 21 W 10 T H D 1 kHz Surround speakers RMS 42 W 21 W 21 W 10 T H D 1 kHz Subwoofer RMS 45 W 10 T H D 100 Hz Signal system PAL NTSC colour S...

Page 47: ... input power 30 W Impedance 4 ohms Dimensions Width 90 mm Height 110 mm Depth 100 mm Weight 0 45 kg each Type Full range speaker system 7 cm speaker Maximum input power 30 W Impedance 4 ohms Dimensions Width 90 mm Height 110 mm Depth 100 mm Weight 0 46 kg Type Subwoofer system 13 cm subwoofer Maximum input power 60 W Impedance 8 ohms Dimensions Width 132 mm Height 282 mm Depth 330 mm Weight 2 8 kg...

Page 48: ...HT CN410_BACK fm 05 8 3 TINSZA116AWZZ SHARP CORPORATION 92LYOM10033702 05H R MW 1 ...

Page 49: ...0502_I Informazioni per un corretto smaltimento WEEE_0502_N A Informatie over afvalverwijdering voor gebruikers particuliere huishoudens 1 In de Europese Unie Let op Deze apparatuur niet samen met het normale huisafval weggooien Afgedankte elektrische en elektronische apparatuur moet gescheiden worden ingezameld conform de wetgeving inzake de verantwoorde verwerking terugwinning en recycling van a...

Page 50: ... bolo Significa que os produtos eléctri cos e electrónicos não devem ser mis turados com o lixo doméstico comum Existe um sistema de recolhas específi co para estes pro dutos WEEE_0502_P Informação sobre Eliminação de Produtos WEEE_0502_E A Information on Disposal for Users private households 1 In the European Union Attention If you want to dispose of this equipment please do not use the ordinary ...

Page 51: ... with JPEG recording DivX Video Special note Supply of this product does not convey a license nor imply any right to distribute con tent created with this product in revenue generating broadcast systems terrestrial satellite cable and or other distribution channels revenue generating streaming ap plications via Internet intranets and or other networks other revenue generating content distribution ...

Page 52: ...between the specified points repeatedly A B repeat 32 To select a title from the top menu of the disc 32 To select a subtitle or audio language from the disc menu 32 Page Various settings To change the subtitle language 33 To change the audio language audio output 33 To change the TV type 34 To change the audio channel 34 To change the display on TV screen 34 Video CD and Super Video CD Operation ...

Page 53: ...rt on the disc surface Follow the guidelines below for maximum enjoyment from your DVD CD collection and player Do not write on either side of the disc particularly the non label side from which sig nals are read Do not mark this surface Keep your discs away from direct sunlight heat and excessive moisture Always hold the DVD CDs by the edges Fingerprints dirt or water on the DVD CDs can cause noi...

Page 54: ...gher MPEG 1 Audio Layer 3 MP3 files can be played However some of them may not be played depending on their conditions or formats 3 This unit also can recognise MP4 AV1 DIV MPG MPEG and XVID Bitrate can go up to 4 8 Mbps 4 JPEG or JPG picture discs also play on this unit However pictures may not be clear depends on resolution and recording method 5 JPEG maximum resolution limit at 2M file size If ...

Page 55: ...system Photo CD DVD ROM CD ROM DVD RAM SACD DVD Audio Discs recorded in special formats etc Chapter 1 Title 1 Title 2 Chapter 2 Chapter 3 Chapter 1 Chapter 2 Track 1 Track 2 Track 3 Track 4 Track 5 Display Description Region number playable area number DVD discs are programmed with region numbers indicating countries in which they can be played This system can play discs with region number on the ...

Page 56: ...eadphone socket 24 14 Speaker Indicators 46 Reference page 15 DVD Indicator 26 16 JPEG Indicator 26 17 P SCAN mode 15 16 21 18 Dolby Digital Signal Indicator 45 19 Play Indicator 26 20 Pause Indicator 26 21 SVCD VCD CD Indicator 26 22 MP3 Indicator 26 23 DTS Signal Indicator 45 24 Dolby Pro Logic Pro Logic Indicator 46 25 Stereo 2 ch or FM Stereo Receiving Indicator 41 45 26 Title Indicator 28 27 ...

Page 57: ...er Lead 16 2 Speaker Terminals 10 3 Audio Output Sockets 12 14 4 Audio Input Sockets TV AUX 12 5 Digital Output Socket Coaxial 13 6 Video Output Socket 12 7 Component Video Output Socket 14 8 SCART Output Socket Audio Video 16 9 AM Loop Aerial Socket 11 10 S video Output Socket 12 11 FM 75 Ohms Aerial Socket 11 7 6 9 11 2 8 4 The bottom of the unit 3 5 10 1 ...

Page 58: ...e or Tuning Down Button 27 41 19 Fast Forward or Tuning Up Button 27 41 20 Speaker Level Mode Button 24 48 21 Angle Select Button 30 22 Disc Tray Open Close Button 25 23 NTSC PAL Select Button 19 34 24 Sleep Button 49 25 Interlace and Progressive Scan Button 20 26 Title Select Button 31 27 Subtitle Select Button 33 28 Repeat Play Button 31 29 A B Repeat Button 32 30 Return Button 35 31 Enter Butto...

Page 59: ...Taste auf STAND BY eingestellt wird kann das Gerät unter Verwendung der Timer Betriebsart oder Fernbedienung in Betrieb gesetzt werden Warnung In diesem Gerät sind keine vom Benutzer wartbaren Teile vorhanden Niemals Abdeckungen entfernen außer wenn Sie dafür qualifiziert sind In diesem Gerät sind gefährliche Spannungen vorhanden Vor Ausführung von irgendwelchen Kundendienstarbeiten oder bei länge...

Page 60: ...stado na posição STAND BY o aparelho pode ser colocado em operação através do modo de programação horária ou pelo controle remoto Advertência Neste aparelho não há partes que podem ser consertadas pelo usuário Nunca retire a tampa a menos que você tenha qualificação para tal Este aparelho contém voltagens perigosas Remova sempre o cabo de alimentação da tomada antes de efetuar qualquer conserto ou...

Page 61: ... sur l appareil un récipient contenant du liquide Advertencia Para evitar incendios y descargas eléctricas no exponga el aparato a goteo o salpicadura de líquidos No deberán ponerse encima del aparato objetos que estén llenos de líquido como por ejemplo un florero Varning Utsätt inte enheten för dropp eller stänk för att förhindra brand eller elektriska stötar Inga vätskefyllda föremål såsom vaser...

Page 62: ...n keine Abdeckung entfernen und nicht Innenteile zu berühren versuchen Wartungsarbeiten dürfen nur von geschultem Fachpersonal durchgeführt werden ATTENTION Ce produit contient un dispositif laser à faible puissance Pour assurer la sécurité ne pas ôter l enveloppe ni accéder à l intérieur du produit Confier toute réparation à une personne qualifiée PRECAUCIÓN Este producto contiene un dispositivo ...

Page 63: ...rkas inte Le lettere tra parentesi contenute nel numero di modello indicano solo il colore del prodotto Il funzionamento e i dati tecnici rimangono invariati De tussen haakjes aangegeven letters van het modelnummer tonen uitsluitend de kleur van de draagbare MD recorder De bediening en werking zijn het zelfde As letras entre colchetes que se encontram no número do modelo indicam apenas a cor do pr...

Page 64: ...alnp Lunghezza d onda 785 nm 650 nm Durata di emissione continua Uscita massima del laser 0 6 mW Laser diode specificaties Materiaal AlGaAs AlGalnp Golflengte 785 nm 650 nm Stralingsduur doorlopend Laseruitgang max 0 6 mW Propriedades do diodo laser Material AlGaAs AlGalnp Comprimento de onda 785 nm 650 nm Duração da emissão contínua Saída de laser máx 0 6 mW Laser Diode Properties Material AlGaAs...

Page 65: ...van Dolby Laboratories Fabricado sob licença da Dolby Laboratories Dolby Pro Logic e o símbolo do D duplo são marcas registradas da Dolby Laboratories Manufactured under license from Dolby Laboratories Dolby Pro Logic and the double D symbol are trademarks of Dolby Laboratories DTS und DTS Digital Surround sind eingetragene Warenzeichen der Digital Theater Systems Inc DTS et DTS Digital Surround s...

Page 66: ...rivés ménages 1 Au sein de l Union européenne Attention si vous souhaitez mettre cet appareil au rebut ne le jetez pas dans une poubelle ordinaire Les appareils électriques et électroniques usagés doivent être traités séparément et conformément aux lois en vigueur en matière de traitement de récupération et de recyclage adéquats de ces appareils Suite à la mise en oeuvre de ces dispositions dans l...

Page 67: ...vor póngase en contacto con el sistema de recogida establecido o con las autoridades locales para la recogida de los productos usados 2 En otros países fuera de la Unión Europea Si desea desechar este producto por favor póngase en contacto con sus autoridades locales y pregunte por el método de eliminación correcto Atención su pro ducto está marcado con este símbolo Significa que los productos elé...

Reviews: