background image

ENGLISH

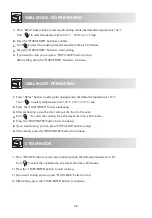
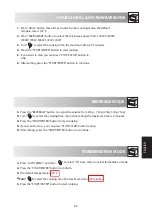
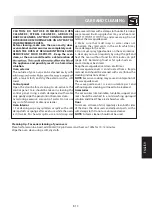
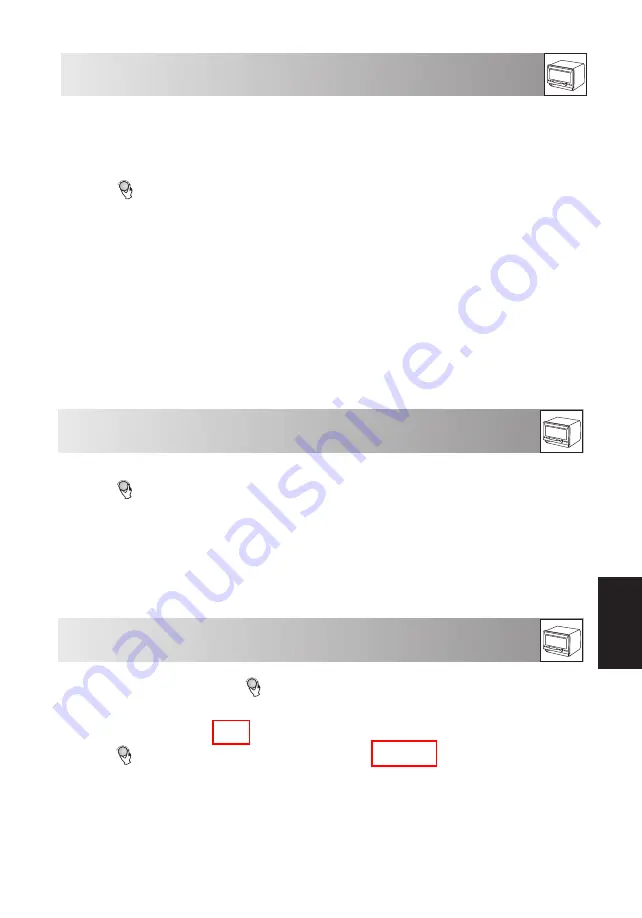
BEVERAGE MODE

Tu   r n   ”         “ to select the cooking time, 

the maximum time is 2 minutes  ????

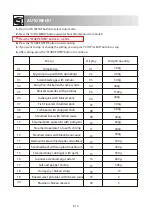
FERMENTATION MODE

1.

Press “A

UTO MENU

” and turn “           ” to select “39” Auto menu to select fermentation mode. 

The default temperature is 

°C

2.

Turn “

Turn “

            ” to select the cooking time ,the maximum time is  0 minu

tes

Press the “BEVERAGE” button  to ad jus t the v olum

  e


from


250g


750


g


(250g,


500g,


750g)


Press the “START/ENTER” button to start cooking

If you want to stop , you can press “STOP/CLEAR” button to stop. 

After setting, press the “START/ENTER” button to continue.

E-9

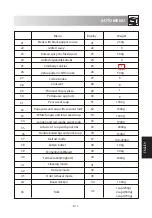
if you choose 250g 

.

1.
2.
3.
4.
5.

39 .

9

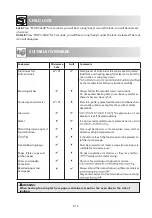
DOUBLE GRILL &


MICROWAVE

 MODE

1.

Press “

GRILL

” button three times to select combi cooking mode, the default 

tempera-ture is 150 °C

2.

Press “MICROWAVE” button to select the microwave power from 100W to 900W 
(900W, 700W, 500W, 300W, 100W)

3.

Turn”        “ to select the cooking time, the maximum time is 95 minutes

4.

Press the “START/ENTER” button to start cooking

5.

If you want to stop you can press “STOP/CLEAR” button to
stop.

6.

After setting, press the “START/ENTER” button to continue.


Press the “START/ENTER” button to confirm.

3.

4.

Press the “START/ENTER” button to start cooking

5.

Summary of Contents for AX-1250R

Page 1: ... THE MANUAL CAREFULLY BEFORE USING THE APPLIANCE AND KEEP IT PROPERLY FOR FUTURE REFERENCE IMPORTANT There may be a serious risk to health if this operation manual is not followed or if the oven is modified so that it operates with the door open 4 IN 1 STEAM OVEN ...

Page 2: ......

Page 3: ...ic establishments Internal capacity is calculated by measuring maximum width depth and height Actual capacity for holding food is less DESIGN AND SRECIFICATIONS ARE SUBJECT TO CHANGE WITHOUT PRIOR NOTICE 25L 25L 19 kg CONTENTS CONTENTS 1 PRECAUTIONS 1 SPECIFICATIONS 1 OVEN AND ACCESSORIES 2 CONTROL PANEL 3 IMPORTANT SAFETY INSTRUCTIONS 4 COOKING CHART INSTALLATION BEFORE USE 7 MICROWAVE MODE 7 GRI...

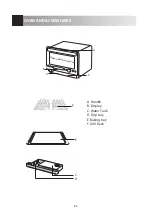
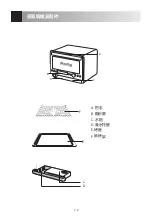
Page 4: ...E 2 OVEN AND ACCESSORIES C D A Handle B Display C Water Tank D Drip tray E Baking tray A B D C Observation window E F F Grill Rack ...

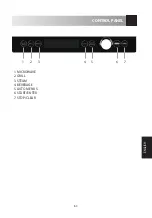
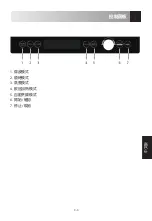
Page 5: ...CONTROL PANEL ENGLISH E 3 1 MICROWAVE 2 GRILL 3 STEAM 4 BEVERAGE 5 AUTO MENUS 6 START ENTER 7 STOP CLEAR 1 2 3 4 5 6 7 ...

Page 6: ...sils should be checked to ensure that they are suitable for use in each cooking mode 7 The oven should be cleaned regularly to prevent the air inlet and outlet from being blocked by foreign matter and dust 8 When heating food in plastic or paper containers keep an eye on the oven due to the possibility of ignition 9 If smoke is observed switch off or unplug the appliance and keep the oven door clo...

Page 7: ...erature of food 28 The oven is for household used only It must not be placed in a cabinet 29 The oven is used for heating food and beverages Drying of food or clothing and heating of warming pads slippers sponges damp cloth may lead to the risk of injury or ignition 30 After cooking and the oven has cooled remove and empty the water tank wipe oven cavity with a soft cloth or sponge Wait a few minu...

Page 8: ... power supply plug must be inserted into a single phase bipolar socket with grounding tions INSTALLATION BEFORE INSTALLATION Remove all packing materials and accessories Check the oven for any damage such as broken door Do not install if oven is damaged Do not remove the light brown Mica cover attached to the oven cavity to protect the magnetron 1 Select a flat surface that provide enough space fo...

Page 9: ...ximum cooking time is 95 minutes 3 Press the START ENTER button to start cooking 4 If you want to stop you can press STOP CLEAR button to stop 5 After setting press the START ENTER button to continue BEFORE USE WARNING Do not install the oven at a damp place or near heat producing appliance e g near a gas stove electrified area or sink The oven surface will become very hot during use Please do not...

Page 10: ...the cooking time the maximum time is 90 minutes 2 Press the START ENTER button to start cooking 3 If you want to stop you can press STOP CLEAR button to stop 4 After setting press the START ENTER button to continue STEAM MODE GRILL MODE PREHEATING 1 Press GRILL button twice to select grill cooking mode the default temperature is 150 C to select temperature from 100 C 230 C in 10 C step Turn to sel...

Page 11: ...tton to stop After setting press the START ENTER button to continue E 9 if you choose 250g 1 2 3 4 5 39 9 DOUBLE GRILL MICROWAVE MODE 1 Press GRILL button three times to select combi cooking mode the default tempera ture is 150 C 2 Press MICROWAVE button to select the microwave power from 100W to 900W 900W 700W 500W 300W 100W 3 Turn to select the cooking time the maximum time is 95 minutes 4 Press...

Page 12: ...vored shredded pork Fish head with chopped chilli Steamed bass with lemon sauce Steamed pork spare ribs with pumpkin Steamed Japanese Tofu with shrimp Steamedchickenwithredjujubeandwolfberry Steamed beef with tea plant mushroom Japanese steamed egg custard Steamed clams with black bean sauce Baked sweet potatoes with cheese sauce Brazilian chicken skewers 2 AUTO MENU Press AUTO MENU buttontoselect...

Page 13: ...ts Fermentation Soften butter Fermentation Yoghurt Cleaning mode Odor removal mode Descale mode Steak with black pepper source Grilled saury Korean spicy stir fried squid Grilled vegetable kebabs Cranberry cookies Zebra pattern chiffon cake Pear sweet soup Papaya sweet soup with coconut milk White fungus and lotus seed soup Longan and red jujube sweet soup Lotus root soup with pork ribs Double boi...

Page 14: ... taken as some containers warp melt or discolour at high temperatures lm It should not touch the food and must be pierced to let the steam escape Freezer Roasting bags Must be pierced to let steam escape Ensure bags are suitable for microwave use Paper Plates cups and kitchen paper Do not use plastic or metal ties as they may melt or re due to the metal arcing Straw and wooden Containers Only use ...

Page 15: ...moved Built up splashes may overheat and re and cause arcing Do not remove the waveguide cover 2 Make sure that mild soap or water does not penetrate the small vents in the walls which may cause damage to the oven 3 Do not use spray type cleaners on the oven interior 4 Heat up your oven regularly by using the grill and heat the oven without food for 20 minutes on grill page E 9 Remaining food or f...

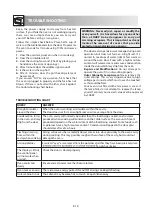
Page 16: ...ound 5 Is the water in the cup hot 6 After 3 minutes does the grill heating element become red If you answer NO to any question first check that the oven is plugged in properly and the fuse has not blown If there is no fault with either check against the troubleshooting chart below TROUBLESHOOTING CHART QUERY ANSWER Draught circulates around the door When the oven is working air circulates within ...

Page 17: ...AX 1250R B AX 1250R W 重要 四合一蒸氣焗爐 使用說明書 使用本家電前 請仔細閱讀本說明書 並妥善存放 以供未來參考 重要提示 若不遵守本說明書 或對蒸氣焗爐進行改造 令其在爐門開啟時運作 可能產生嚴重風險 中文版 ...

Page 18: ......

Page 19: ...並產生危險 型號名稱 AX 1250R B AX 1250R W 額定電壓 額定輸入功率 微波 1450W 1450W 額定輸出功率 微波 900W 900W 額定輸出功率 燒烤 額定輸出功率 蒸氣 容量 25L 25L 外部尺寸 寬 x 高 x 深 爐腔尺寸 寬 x 高 x 深 重量 19 kg 19 kg 本產品符合歐洲標準 EN55011 的要求 根據本標準 本產品被歸類為第 2 組 B 類設備 第 2 組是指用於產生電磁輻射形式的射頻能量 以進行食品熱處理的設備 B 類設備是指適用於家庭設施的設備 通過量測最大寬度 深度和高度來算出內部容量 實際容納食物的容量較小 設計同規格如有更改 恕不另行通知 x 431 x mm 468 337 x mm 38 x 7 321 203 x 431 x mm 468 337 x mm 38 x 7 321 203 1500W Max 1900W...

Page 20: ...C 2 蒸氣焗爐及配件 C D A B D C 觀察視窗 A 把手 B 顯示屏 C 水箱 D 滴水托盤 E 烤盤 E 架 F F 燒烤 ...

Page 21: ...中文版 C 3 控制面板 1 微波模式 2 燒烤模式 3 蒸煮模式 4 飲品加熱模式 5 自動烹調模式 6 開始 確認 7 停止 取消 ...

Page 22: ...神能力下降 或缺乏經驗和知識 的人員使用 除非該人員在監督和指導下可安全使用 5 確保兒童遠離本家電及其電源線 6 檢查餐具 確保適用於各種烹飪模式 7 定期清潔蒸氣焗爐 避免異物或灰塵堵塞進氣和出氣口 8 當加熱塑料或紙質容器中的食物時 留心蒸氣焗爐以防著火 9 如果冒煙 關閉蒸氣焗爐 拔出電源線 切勿打開爐門 蒸氣焗 爐中排出的蒸氣可能導致灼傷 10 烹調過度可能導致火災 11 切勿將蒸氣焗爐內腔作儲存用途 12 在放入蒸氣焗爐之前 從紙或塑膠容器 袋上取下鐵絲紮帶和金 屬把手 13 僅根據提供的安裝說明安裝或放置蒸氣焗爐 14 切勿在蒸氣焗爐中加熱帶殼雞蛋或水煮蛋 會有爆炸危險 15 本產品僅供家用 16 如果電源線受損 請勿使用本產品 請聯繫SHARP服務中心進行 維修 17 請勿在室外存放或使用本家電 ...

Page 23: ...器需小心 24 警告 使用時 可觸及部分可能很熱 兒童應遠離 25 切勿使用蒸汽清潔器 26 使用時 蒸汽爐門 外機櫃和內腔將會變熱 請勿觸摸 27 請使用烹飪溫度計測量食物溫度 28 本蒸汽爐僅供家用 切勿將蒸汽爐放在櫥櫃中 29 蒸汽爐用於加熱食物和飲料 烘乾食物或衣物以及加熱暖墊 拖鞋 海綿 濕布可能會導致受傷或著火的風險 30 烹飪完成且蒸汽爐冷卻後 取出水箱並排空水 用一塊柔軟的 布或海綿擦洗內腔 等待幾分鐘 清空滴水盤 31 清潔時 切勿將本家電浸入水或其他液體中 32 加熱飲料時 將一個茶匙放入容器中 這樣做能夠確保飲料從 內腔取出時不會突然沸騰 33 危險 觸電危險 觸摸內部組件可導致人身受傷甚至死亡 切 勿拆解本家電 34 警告 打開蒸汽爐時 不要將面部靠近 蒸汽爐中排出的蒸汽 可能導致灼傷 35 警告 觸電危險 不當使用接地可導致觸電 在本家電恰當地 安裝並接地後 才可...

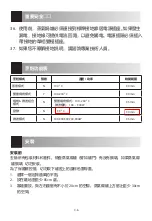
Page 24: ...飪模式 預熱 溫度 功率 時間範圍 蒸煮模式 N 100 C 90 min 雙重燒烤模式 Y 100 230 C 90 min 燒烤 微波組合 模式 N 雙重燒烤模式 100 230 C 微波模式 100 900W 95 min 發酵 N C 微波模式 N 100 300 500 700 900W 95 min 安裝前 去除所有包裝材料和配件 檢查蒸氣焗爐 譬如爐門 有沒有損壞 如果蒸氣焗 爐損壞 切勿安裝 為了保護磁控管 切勿取下爐腔上的淺棕色雲母蓋 1 選擇一個足夠通風的平面 2 放在離地面至少 85cm 處 3 靠墻擺放 與左右牆留有不小於 20cm 的空隙 蒸氣焗爐上方留出至少 30cm 的 空間 39 39 90 min ...

Page 25: ...裝在潮濕地方或產熱家電 譬如靠近煤氣爐 帶電區域或水槽 使用時 蒸氣焗爐表面會變得非常熱 切勿觸摸 1 待機狀態下 蒸氣焗爐將顯示 0 如果設備 5 分鐘未運行 蜂鳴器將鳴響 2 首次清潔同加熱 拆下所有配件 令室內通風 按下 燒烤 按鈕兩次 並將溫度設在 230 轉動 加熱 1 小時 按下 開始 確認 啟動 完成後 用一塊微濕的布擦拭爐腔 1 按下 微波 按鈕選擇微波模式 預設功率為 900W 再次按下 微波 鍵來 調節功率 900W 700W 500W 300W 100W 2 轉動 來選擇烹飪時間 最長烹飪時間為 95 分鐘 3 按下 開始 確認 按鈕 開始烹飪 4 如果想停止 可按下 停止 取消 按鈕 5 按下 開始 確認 按鈕繼續烹飪 按下 開始 確認 按鈕來確認 ...

Page 26: ... 5 如果想停止 可按下 停止 取消 按鈕 設置後 按下 開始 確認 按鈕來繼續烹飪 1 按下 燒烤 按鈕 選擇燒烤烹飪模式 預設溫度為 150 轉動 選擇溫度 範圍為 100 230 每轉一下為 10 2 按下 開始 確認 按鈕 開始預熱 3 預熱後 打開爐門 將食物放入蒸氣焗爐 4 轉動 來選擇烹飪時間 最長烹飪時間為 90 分鐘 5 按下 開始 確認 按鈕 開始烹飪 6 如果想要停止 可按下 停止 取消 按鈕 7 設置後 按下 開始 確認 按鈕來繼續烹飪 1 按下 蒸煮 按鈕選擇烹飪模式 預設溫度為 100 2 轉動 來選擇烹飪時間 最長烹飪時間為 90 分鐘 3 按下 開始 確認 按鈕 開始烹飪 4 如果想要停止 可按下 停止 取消 按鈕 5 設置後 按下 開始 確認 按鈕來繼續烹飪 ...

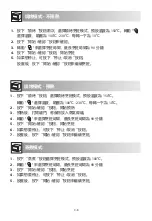
Page 27: ...95 分鐘 4 按下 開始 確認 按鈕 開始烹飪 5 如果想要停止 可按下 停止 取消 按鈕 6 設置後 按下 開始 確認 按鈕來繼續烹飪 按下 飲品 按鈕 調節飲品的容量 範圍為 250g 750g 250g 500g 750g 轉動 來選擇烹飪時間 如果選擇 250g 那麼最長烹飪時間為 2 分鐘 按下 開始 確認 按鈕 開始烹飪 如果想要停止 可按下 停止 取消 按鈕 設置後 按下 開始 確認 按鈕來繼續烹飪 1 按下 自動烹調 並轉動 選擇 39 自動菜單來選擇發酵模式 2 按下 開始 確認 按鈕來確認 3 默認溫度為 4 轉動 來選擇烹飪時間 最長烹飪時間為 分鐘 5 按下 開始 確認 按鈕 開始烹飪 燒烤 微波組合模式 1 2 3 4 5 39 90 ...

Page 28: ... 數量 01 蕃茄飯 01 300g 02 魚餃蛋 02 400g 03 蕃茄炒蛋 03 500g 04 腰果宮保雞 04 400g 05 薯仔燜排骨 05 1500g 06 茄子肉 06 400g 07 魚香肉絲 07 300g 08 剁椒魚頭 08 600g 09 檸檬汁蒸鱸魚 09 400g 10 南瓜蒸排骨 10 600g 11 日本豆腐 11 200g 12 豉汁蒸 12 500g 13 紅棗枸杞蒸雞 500g 14 茶樹菇蒸牛肉 14 450g 15 菜 15 500g 16 日式蒸蛋 16 600g 17 鹽椒蝦 17 500g 18 雞翼 18 12 19 芝士 薯 19 2 20 巴西雞串 20 5 21 黑椒牛扒 21 250g 蕃 13 按下 開始 確認 按鈕來確認 1 2 3 4 5 6 ...

Page 29: ...牛角包 28 9 29 薄脆 29 1 30 葡式蛋撻 30 9 31 31 1500g 32 椰汁木瓜糖水 32 1500g 33 銀耳蓮子糖水 33 1500g 34 龍眼紅棗糖水 34 1200g 35 排骨蓮藕湯 35 2000g 36 無花果燉豬骨湯 36 1500g 37 模式 37 100 2000g 38 軟化 油 38 100g 39 發酵 麵包 39 500g 40 發酵 酸奶 40 1000g 41 清潔模式 41 42 除垢模式 42 43 除臭模式 43 44 烤 雞 44 1200g 45 牛奶 45 1 250g 2 杯 500g 3 杯 750g 香烤 戚風 薄餅 冰糖雪梨茶 快速解凍 牛 全 1 ...

Page 30: ...商說明 切勿超過規定加熱時間 務必要小心 因為這些菜可能很熱 陶土陶瓷 瓷器 陶器 釉面陶器和骨瓷通常適用 但有金屬裝飾的除外 玻璃器具 使用精細的玻璃器皿時應小心 因為如果突然加熱 玻璃器 皿可能會破裂 金屬器具 不建議使用金屬炊具 因其會產生電弧 從而導致火災 塑膠 聚苯乙烯 例如速食容器 當某些容器在高溫下翹曲 熔化或變色時 必須注意 保鮮紙 保鮮膜不能接觸到食物 必須穿孔讓蒸氣逸出 冷凍 烘焙袋 必須穿孔令蒸氣逸出 確保袋子可用於微波加熱 紙製 盤子 杯 子和廚房用紙 不要使用塑膠或金屬紮帶 因為它們可能會因金屬 電弧 而熔化或著火 秸稈和木制容器 僅用於加溫或吸收水分 必須注意 過熱可能引起火災 再生紙和報紙 當使用此類材料時 一定要注意 因為所含金屬提取物可能 引起電弧 過熱可能引起火災 警告 在塑膠或紙質容器中加熱食物時 應注意蒸汽爐是否有著火的危險 適用爐具 ...

Page 31: ...時需小心 用蘸有水的布輕輕擦拭面板 直至 變得乾淨 切勿使用過多的水 切勿使用任何 化學或研磨性清潔劑 蒸氣焗爐內部 1 清潔時 每次使用後在蒸氣焗爐仍熱的情况 下 用柔軟的濕布或海綿擦拭飛濺物或溢出物 若有大量溢出物 請使用溫和的肥皂 並用 濕布擦拭幾次 直到清除所有殘留物 積聚 的飛濺物可能過熱並開始冒煙或著火並引起 電弧 切勿拆下波導管蓋 2 確保溫和的肥皂或水不會滲入牆壁上的小通 風口 這可能會損壞蒸氣焗爐 3 切勿在蒸氣焗爐內部使用噴霧式清潔劑 4 用燒烤模式定期加熱蒸氣焗爐 並在不放入 食物的情況下 用燒烤模式加熱 20 分鐘 第 E 9 頁 殘留的食物或飛濺的由會引起冒 煙或 臭味 保持波導管蓋清潔 波導管蓋由易碎物料製成 應小心清潔 請遵 循上述清潔說明 注意 過度浸泡可能導致波導管蓋解體 波導管蓋是易耗件 若不定期清潔 需要進行 更換 配件 轉盤 轉盤支架 機架等配件應在...

Page 32: ...象 含 水 量高的食物會釋放蒸氣 導致水在門內凝 結 從而可能從爐中滴落 維修和改造 若蒸氣焗爐運作不正常 請勿試 圖 操作 外部機櫃和燈檢查口 切勿移除外部機櫃 這 是非常危險的 因為裡面的高壓部件絕對不 能接觸 這可能造成致命危險 您的蒸氣焗爐沒有安裝燈檢修蓋 如果燈出現 故障 請勿嘗試自行更換燈 請聯系SHARP 服務中心 故障檢查表 問題 答案 氣流在門周圍循環 蒸氣焗爐工作時 空氣在腔內循環 門沒有形成氣密密封 因此空氣可能會從門中逸出 冷凝水在蒸氣焗爐中形 成 並可能從門上滴落 蒸汽爐內腔通常比正在烹調的食物要冷 因此烹調時產生的蒸氣會在較 冷的表面凝結 產生的蒸氣量取決於烹調食物的含水量 某些食物 比 如馬鈴薯 的水分含量很高 幾個小時後 門玻璃中的冷凝水應該會清除 烹飪時從空腔內閃動或 起弧 在烹飪過程中 當金屬物體靠近蒸氣焗爐腔體時 就會產生電弧 這可 能 會使腔體表面粗...

Reviews: