background image

16

TROUBLESHOOTING

If the software does not install correctly, check the following items on your computer.
To remove the software, see "Uninstalling the printer driver" in the online manual.
Troubleshooting information can also be found in the README files for each of the software programs. 
To view a README file, click the "Display Readme" button in the "Software Selection" screen.

Printer driver cannot be 
installed (Windows 2000/XP)

If the printer driver cannot be installed in 
Windows 2000/XP, follow these steps to check 
your computer's settings.

1

Click the "start" button and then click 
"Control Panel".

In Windows 2000, click the "Start" button, 
select "Settings", and then click "Control 
Panel".

2

Click "Performance and Maintenance", 
and then click "System".

In Windows 2000, double-click the 
"System" icon.

3

Click the "Hardware" tab and then click 
the "Driver Signing" button.

4

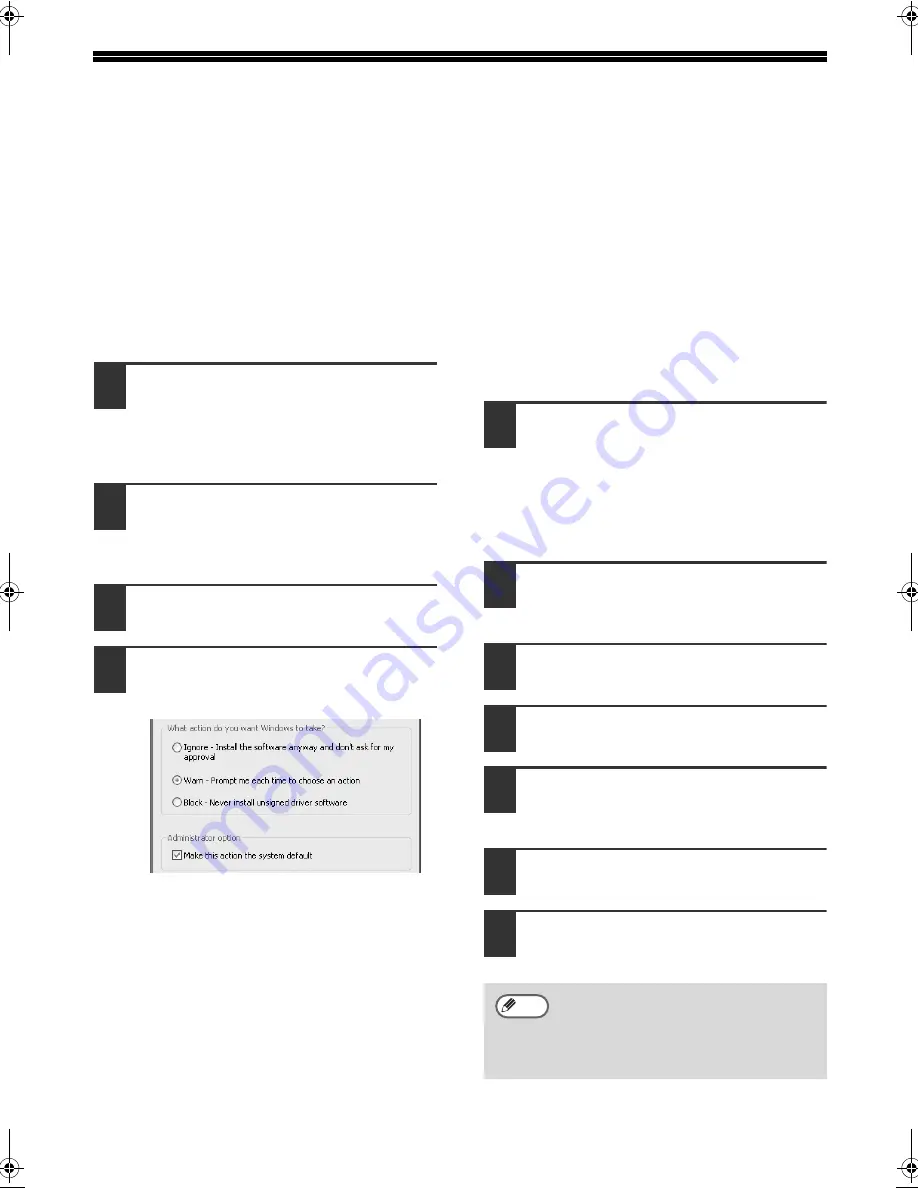
Check "What action do you want 
Windows to take?" ("File signature 
verification" in Windows 2000).

If the option "Block" has been selected, it 
will not be possible to install the printer 
driver. Select the option "Warn" and then 
install the printer driver as explained in 
"INSTALLING THE SOFTWARE".

Another printer is using the parallel 
port (when using a parallel cable)

If another printer is using the parallel port and 
printing is not possible using the machine, follow 
the steps below to change the port setting of the 
other printer driver, and make sure that the port of 
the printer driver for the machine is set to LPT1.

1

Click the "start" button, click "Control 
Panel", click "Printers and Other 
Hardware", and then click "Printers and 
Faxes".

In Windows 98/Me/NT 4.0/2000, click the 
"Start" button, select "Settings", and then 
click "Printers".

2

Click the icon of the printer driver for which 
you wish to change the port setting, and 
select "Properties" from the "File" menu.

3

Click the "Ports" tab.

In Windows 98/Me, click the "Details" tab.

4

Select "FILE:" in the "Print to the following 
port" list box, and click the "OK" button.

5

Click the "SHARP AR-XXXX" printer 
driver icon and select "Properties" 
from the "File" menu.

6

Click the "Ports" tab.

In Windows 98/Me, click the "Details" tab.

7

Select "LPT1" in the "Print to the 
following port" list box, and click the 
"OK" button.

In the event that you need to use the 
other printer, repeat the above steps to 
set the port of the machine to "FILE:", 
and change the port setting of the 
other printer back to "LPT1".

Note

!02_InstallGuide-body.fm  16 ページ  2007年2月9日 金曜日 午後1時21分

Summary of Contents for AR-5631

Page 1: ...SOFTWARE SETUP GUIDE Page INTRODUCTION ABOUT THE SOFTWARE BEFORE INSTALLATION INSTALLING THE SOFTWARE CONNECTING TO A COMPUTER CONFIGURING THE PRINTER DRIVER HOW TO USE THE ONLINE MANUAL TROUBLESHOOTING Inside cover 2 2 3 13 14 15 16 ...

Page 2: ...ainly for Windows XP With other versions of Windows some screen images may be different from those in this manual The explanations in this manual are based on the North American version of the software Versions for other countries and regions may vary slightly from the North American version Where AR XXXX appears in this manual please substitute the name of your model for XXXX This manual refers t...

Page 3: ...NT AND INSTALLATION PROCEDURE 2 INSTALLING THE SOFTWARE 3 STANDARD INSTALLATION USB only 3 CUSTOM INSTALLATION 5 INSTALLING THE PC FAX DRIVER 11 CONNECTING TO A COMPUTER 13 CONNECTING A USB CABLE 13 CONNECTING A PARALLEL CABLE 13 CONFIGURING THE PRINTER DRIVER 14 HOW TO USE THE ONLINE MANUAL 15 TROUBLESHOOTING 16 ...

Page 4: ...procedure for your operating system and type of cable as indicated below If the machine is connected by a USB cable it is recommended that you use the standard installation For users of Windows NT 4 0 The CD ROM does not include software for Windows NT 4 0 Contact your dealer or nearest authorized service representative if you want the software for Windows NT 4 0 Computer type IBM PC AT or compati...

Page 5: ...he finish screen appears click the Close button A message will appear instructing you to connect the machine to your computer Click the OK button If an error message appears follow the on screen instructions to solve the problem After the problem is solved the installation procedure will continue Depending on the problem you may have to click the Cancel button to exit the installer In this case re...

Page 6: ...the Found New Hardware Wizard dialog box Select Install the software automatically Recommended and click the Next button Follow the on screen instructions This completes the installation of the software After installation see CONFIGURING THE PRINTER DRIVER page 14 to check the printer driver settings If you are running Windows 2000 XP and a warning message appears regarding the Windows logo test o...

Page 7: ...e CD ROM into your computer s CD ROM drive 3 Click the start button click My Computer and then double click the CD ROM icon 4 Double click the Setup icon 5 The SOFTWARE LICENSE window will appear Make sure that you understand the contents of the license agreement and then click the Yes button 6 Read the message in the Welcome window and then click the Next button 7 Click the Custom button 8 Click ...

Page 8: ...ur computer connect the cable turn on the power of the machine and then turn on your computer Windows will detect the machine and the Plug and Play screen will appear 16 Begin installation of the printer driver SHARP AR XXXX will appear in the Found New Hardware Wizard dialog box Select Install the software automatically Recommended and click the Next button Follow the on screen instructions This ...

Page 9: ...n 5 The SOFTWARE LICENSE window will appear Make sure that you understand the contents of the license agreement and then click the Yes button 6 Read the message in the Welcome window and then click the Next button 7 Click the Custom button 8 Click the Printer Driver button Before installing the software be sure to click the Display Readme button and view the detailed information on the software 9 ...

Page 10: ...machine to your computer Click the OK button 16 Make sure that the power of the machine is turned on and then connect the USB cable page 13 Windows will detect the machine and the Plug and Play screen will appear 17 Follow the instructions in the Plug and Play screen that appears in your version of Windows to begin the installation This completes the installation of the software After installation...

Page 11: ...d then click the Yes button 6 Read the message in the Welcome window and then click the Next button 7 Click the Custom button 8 Click the Printer Driver button Before installing the software be sure to click the Display Readme button and view the detailed information on the software 9 Click the Next button If you are using Windows NT 4 0 go to step 12 For users of Windows NT 4 0 The CD ROM does no...

Page 12: ...ne to your computer Click the OK button 17 Turn off the power of the machine and your computer and connect the machine to your computer with the parallel cable page 13 After connecting the machine to your computer turn on the power of the machine and then start up your computer This completes the installation of the software After installation see CONFIGURING THE PRINTER DRIVER page 14 to check th...

Page 13: ... contents of the license agreement and then click the Yes button 6 Read the message in the Welcome window and then click the Next button 7 Click the Custom button 8 Click the PC Fax Driver button Before installing the software be sure to click the Display Readme button and view the detailed information on the software 9 Click the Next button To use the PC Fax driver Internet Explorer 4 0 or later ...

Page 14: ...ish to change the printer name enter the desired name 14 Click the Next button 15 When the installation completed screen appears click the OK button 16 Click the Close button This completes the installation of the software The port used by the printer driver is indicated by a checkmark in the Ports tab of the printer driver properties window In Windows 98 Me the port is selected in Print to the fo...

Page 15: ...able into the USB connector on the machine 2 Insert the other end of the cable into your computer s USB connector CONNECTING A PARALLEL CABLE 1 Ensure that your computer and the machine are turned off 2 Insert the cable into the parallel connector on the machine and fasten with the clasps 3 Insert the other end of the cable into your computer s parallel connector USB is available on a PC AT compat...

Page 16: ...ver icon and select Properties from the File menu If you are using Windows NT 4 0 2000 XP go to step 4 3 In Windows 98 Me click the Setup tab 4 Click the Configuration tab and set the printer configuration based on the options that have been installed Set the printer configuration properly Otherwise printing may not take place correctly 5 Click the Set Tray Status button and select the size of pap...

Page 17: ...ructions on how to solve driver or software problems 1 Insert the Software CD ROM into your computer s CD ROM drive 2 Click the start button click My Computer and then double click the CD ROM icon In Windows 98 Me NT 4 0 2000 double click My Computer and then double click the CD ROM icon 3 Double click the Manual folder double click the EnglishA folder for regions other than the U S double click t...

Page 18: ...l the printer driver as explained in INSTALLING THE SOFTWARE Another printer is using the parallel port when using a parallel cable If another printer is using the parallel port and printing is not possible using the machine follow the steps below to change the port setting of the other printer driver and make sure that the port of the printer driver for the machine is set to LPT1 1 Click the star...

Page 19: ...s available 1 Click the start button click Control Panel and then click Performance and Maintenance In Windows 98 Me 2000 click the Start button select Settings and then click Control Panel 2 Click System click the Hardware tab and click the Device Manager button Universal Serial Bus controllers will appear in the list of devices 3 Click the icon beside Universal Serial Bus controllers Two items s...

Page 20: ...S2 TINSE1680QSZZ This manual has been printed using a vegetable based soy oil ink to help protect the environment Printed on 100 post consumer recycled paper AR M256 AR M257 AR M316 AR M317 AR 5625 AR 5631 SOFTWARE SETUP GUIDE ...

Reviews: