background image


24

Disc Playback

BD/DVD Menus

This section explains how to play back a BD/DVD-VIDEO 
disc with a top menu, disc menu or pop-up menu.
The titles listed in the top menu and a disc guide (for 
options like subtitles and audio languages) are given in the 
disc menu.

Start Playback by Selecting a Title from 

the Top Menu

BD-VIDEO DVD-VIDEO

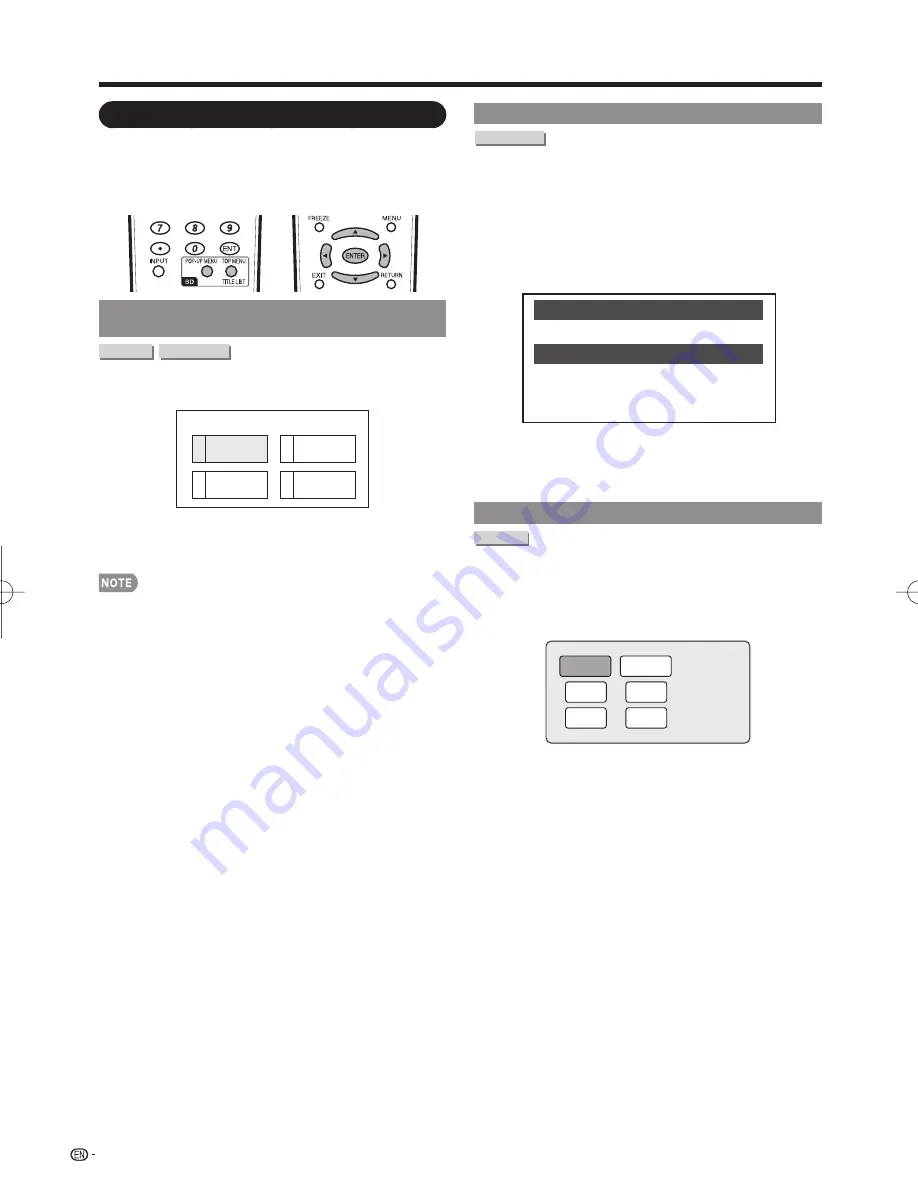
1

 Press 

TOP MENU/TITLE LIST

.

The top menu screen is displayed.

2

3

4

Latin

Rock

Classic

1

Jazz

T O P   M E N U

2

 Press 

a

/

b

/

c

/

d


to select the title, and then press 

ENTER

.

The selected title is played back.

The procedure explained on this page is the basic operation 
procedure. Procedures vary depending on the BD/DVD-
VIDEO disc, so you may need to follow the instructions 
in the BD/DVD-VIDEO disc manual or the instructions 
displayed on the screen.
A top menu is not displayed for a DVD-RW/R (Video format) 
if it has not been fi nalized.

Top menu

With some BD/DVD discs, the top menu may be referred to 
as the “Title Menu”. Use 

TOP MENU/TITLE LIST

 on the 

remote control when the instructions refer to “Title Menu”.
If no top menu is available, the 

TOP MENU/TITLE LIST


button will have no effect.

Using the Disc Menu

DVD-VIDEO

Example:


Select “SUBTITLE LANGUAGE”.

Press 

TOP MENU

.

The disc menu screen is displayed.

2

 Press 

a

/

b

 to select “SUBTITLE LANGUAGE”, 

and then press 

ENTER

.

The screen for selecting the subtitle language is 
displayed.

MENU

1   AUDIO LANGUAGE

3   AUDIO

2   SUBTITLE LANGUAGE

3

 Press 

a

/

b

 to select the subtitle language, and 

then press 

ENTER

.

4

 Press 

TOP MENU

 to exit.

Using the Pop-up Menu

BD-VIDEO

1

 Press 

POP-UP MENU

 during playback.

The pop-up menu screen is displayed.
The menu contents displayed vary depending on the 
disc. For details on how to see and operate the pop-up 
menu, refer to the manual for the disc.

Pop-up menu

Previous page

Next page

2

 Press 

a

/

b

/

c

/

d

 to select the desired item, and 

then press 

ENTER

.

3

 Press 

POP-UP MENU

 to exit.

The pop-up menu will automatically disappear for some 
discs.


LC-46BD80UN̲E.indb   24

LC-46BD80UN̲E.indb   24

2009/04/23   15:46:40

2009/04/23   15:46:40

Summary of Contents for Aquos LC 46BD80UN

Page 1: ...mencer à utiliser l appareil IMPORTANTE Lea este manual de operación antes de comenzar a operar el equipo LC 46BD80UN ENGLISH FRANÇAIS ESPAÑOL ENGLISH FRANÇAIS ESPAÑOL OPERATION MANUAL MODE D EMPLOI MANUAL DE OPERACIÓN LIQUID CRYSTAL TELEVISION TÉLÉVISEUR ACL TELEVISOR CON PANTALLA DE CRISTAL LÍQUIDO LC 46BD80UN OPERATION MANUAL MODE D EMPLOI MANUAL DE OPERACIÓN ...

Page 2: ......

Page 3: ... reminder is provided to call the CATV system installer s attention to Article 820 40 of the National Electrical Code that provides guidelines for proper grounding and in particular specifies that the cable ground shall be connected to the grounding system of the building as close to the point of cable entry as practical CAUTION This product satisfies FCC regulations when shielded cables and conne...

Page 4: ...ECTRONICS CORPORATION Sharp Plaza Mahwah New Jersey 07495 1163 TEL 1 800 BE SHARP For Business Customers URL http www sharpusa com CAUTION This Liquid Crystal Television is classified as a CLASS 1 LASER product The CLASS 1 LASER PRODUCT label is located on the rear cover This product contains a low power laser device To ensure continued safety do not remove any cover or attempt to gain access to t...

Page 5: ...tion 15 Power Sources This product should be operated only from the type of power source indicated on the marking label If you are not sure of the type of power supply to your home consult your product dealer or local power company For products intended to operate from battery power or other sources refer to the operating instructions 16 Overloading Do not overload wall outlets extension cords or ...

Page 6: ...eaks Heat The product should be situated away from heat sources such as radiators heat registers stoves or other products including amplifiers that produce heat The Liquid Crystal panel is a very high technology product with 2 073 600 pixels giving you fine picture details Occasionally a few non active pixels may appear on the screen as a fixed point of blue green or red Please note that this does...

Page 7: ...le watching a program especially on a larger than life flat panel display Care should be taken to place or install the display where it cannot be pushed pulled over or knocked down Care should be taken to route all cords and cables connected to the flat panel display so that they cannot be pulled or grabbed by curious children WALL MOUNTING IF YOU DECIDE TO WALL MOUNT YOUR FLAT PANEL DISPLAY ALWAY...

Page 8: ... openings on the bottom of the TV 2 Insert and tighten the 4 short screws into the 4 holes on the rear of the TV Supplied Accessories Always use the AC cord supplied with the TV To avoid scratching the frame or screen please use a soft lint free cloth for cleaning Approved cleaning cloths are available directly from Sharp in single 00Z LCD CLOTH or triple 00Z LCD CLOTH 3 packs Call 1 800 BE SHARP ...

Page 9: ...ld light GREEN indicating you have power to the television If the POWER indicator on the television still does not light up press TV POWER on the remote control to turn the power on IMPORTANT IF THE UNIT DOES NOT POWER ON UNPLUG THE TELEVISION FROM THE OUTLET AND REPEAT THE INSTALLATION STEPS IF YOU STILL ENCOUNTER NO POWER PLEASE CONTACT US AT 1 800 BE SHARP Attach your antenna to the back of the...

Page 10: ... terminal 75 ohm or or F type connector should be finger tightened only CAUTION Improper use of batteries can result in chemical leakage or explosion Be sure to follow the instructions below Do not mix batteries of different types Different types of batteries have different characteristics Do not mix old and new batteries Mixing old and new batteries can shorten the life of new batteries or cause ...

Page 11: ...vanced Picture Setting 32 Audio Menu 33 Surround 33 Bass Enhancer 33 Power Control Menu 34 Power Saving 34 Blu ray disc Ecology 34 No Signal Off 34 No Operation Off 34 Contents Setup Menu 35 EZ Setup 35 CH Setup 35 Antenna Setup DIGITAL 35 Input Skip 35 Input Label 35 Auto Sync for Analog PC Input Mode Only 36 Fine Sync 36 Position 36 Language 36 Reset 36 Parental CTRL Parental Control Setting 37 ...

Page 12: ...ttons VOLk l Disc slot DISC indicator EJECT button PLAY button STOP button SKIP FWD button SKIP REV button BD STORAGE SERVICE terminal 1 2 1 For operation of buttons on the Disc Drive see pages 23 to 27 2 For operation of buttons on the TV see page 31 OPC Optical Picture Control The illustrations in this operation manual are for explanation purposes and may vary slightly from the actual operations...

Page 13: ...hared for INPUT 4 and INPUT 6 4 Antenna Cable in INPUT 1 terminals INPUT 2 terminals AUDIO OUTPUT terminals 1 See pages 13 and 14 for external equipment connection 2 The Disc Drive has an ETHERNET terminal With a future firmware update you will be able to enjoy additional contents by downloading them via the Internet For the BD VIDEO discs compatible with BD LIVE 3 See page 7 for connecting the AC...

Page 14: ...to 49 for details To enter the code registration mode you need to press FUNCTION and DISPLAY at the same time 18 LIGHT D When this button is pressed some buttons for example VOLk l and CHr s on the remote control unit will light The lighting will turn off if no operations are performed within about 5 seconds This button is used for performing operations in low light situations 19 VIEW MODE Select ...

Page 15: ...iew external source images select the input source from INPUT on the remote control unit or on the TV See page 16 CAUTION To protect equipment always turn off the TV before connecting any external equipment Please read the relevant operation manual Blu ray disc player etc carefully before making connections VCR Game console Camcorder When using S VIDEO cable INPUT 2 AUDIO L White AUDIO R Red When ...

Page 16: ...he AUDIO terminal of INPUT 6 When you input the audio signal via the AUDIO terminal with INPUT 6 set PC Audio Select to Input 6 HDMI See page 40 To enjoy the AQUOS 1080p display capability connect your Blu ray disc player or other external equipment using an HDMI certified cable and set the equipment to 1080p output Connecting a PC When connecting to a PC with an analog RGB terminal INPUT 4 Optica...

Page 17: ... batteries into the remote control unit See page 8 2 Connect the antenna cable to the TV See page 8 3 Plug in the AC cord to the AC outlet See page 7 Language Language setting Select from among 3 languages English French and Spanish 1 Press a b to select the desired language listed on the screen and then press ENTER CH Search Channel search Channel auto search makes the TV look for all channels vi...

Page 18: ...ut source using INPUT on the remote control unit or on the TV 1 Press INPUT A list of selectable sources appears 2 Press INPUT again or press a b to select the input source An image from the selected source automatically displays Each time INPUT is pressed the input source toggles If the corresponding input is not plugged in you cannot change the input Be sure to connect the equipment beforehand S...

Page 19: ...elevision Sound MTS The TV with MTS can receive mono sound stereo sound and Secondary Audio Programs SAP The SAP feature allows a TV station to broadcast other information which could be audio in another language or something completely different like weather information You can enjoy Hi Fi stereo sound or SAP broadcasts where available Stereo broadcasts View programs like live sporting events sho...

Page 20: ...s Example If a program has three services Digital CC ENG CC1 and Text1 the closed caption display will toggle in this sequence The CC button keeps a record of the last service selected in its memory If the last closed caption mode e g 1 3 ENG you selected is not available for the next program or on another channel the closed caption service that is available is automatically selected and this serv...

Page 21: ...he signal and displays an image with the same number of pixels on the screen Full Screen 720p only You can select Full Screen only when receiving a 720p signal S Stretch Smart stretch Suitable for stretching 4 3 programs to fill the screen Zoom Suitable for viewing wide screen 2 35 1 aspect ratio programs in full screen When using Dot by Dot or Full Screen it is possible to see noise or bars aroun...

Page 22: ...has not been recorded cannot be played back The following Audio CD discs cannot be played Discs containing a signal for the purpose of protecting copyrights copy control signal may not be played back with this TV This TV has been designed on the premise of playing back Audio CDs that comply with CD Compact Disc standards Blu ray Disc Blu ray disc is the ultimate next generation optical media forma...

Page 23: ...io formats DVD discs can contain up to 8 separate tracks with a different language on each The first in the list is the original track This section also details the audio format of each soundtrack Dolby Digital DTS MPEG etc Dolby Digital A sound system developed by Dolby Laboratories Inc that gives movie theater ambience to audio output when the TV is connected to a Dolby Digital processor or ampl...

Page 24: ...e there are large amounts of dust or moisture Handling Precautions If the surface is soiled wipe gently with a soft damp water only cloth When wiping discs always move the cloth from the center hole toward the outer edge Do not use record cleaning sprays benzene thinner static electricity prevention liquids or any other solvent Do not touch the surface Do not stick paper or adhesive labels to the ...

Page 25: ...d or moved while a disc is protruding from the slot the disc may fall out To reinsert a protruding disc first remove the disc fully and then load it again During loading the disc may be unable to be ejected Wait until the loading is complete and playback starts to eject the disc BD DVD VIDEO Playback BD VIDEO DVD VIDEO BD RE BD R 1 Load a disc Playback may begin automatically depending on the disc...

Page 26: ...p menu With some BD DVD discs the top menu may be referred to as the Title Menu Use TOP MENU TITLE LIST on the remote control when the instructions refer to Title Menu If no top menu is available the TOP MENU TITLE LIST button will have no effect Using the Disc Menu DVD VIDEO Example Select SUBTITLE LANGUAGE 1 Press TOP MENU The disc menu screen is displayed 2 Press a b to select SUBTITLE LANGUAGE...

Page 27: ...and video compatible with Picture in Picture can be played back with secondary audio and video simultaneously as a small video in the corner The secondary audio and video for Picture in Picture may automatically play back and be removed depending on the content Also playable areas may be restricted You can switch on off the Secondary Audio function See page 42 for details Virtual Package BD VIDEO ...

Page 28: ...ack Playback Functions BD VIDEO BD R BD RE DVD VIDEO DVD R DVD RW AUDIO CD Some operations in the following playback functions cannot be performed depending on the specifications of the disc Fast Forward Reverse Search Fast Forward Reverse functions when J or G is pressed during playback Example When J is pressed The search speed will change each time you press the button When playing back a DVD Y...

Page 29: ...ol screen is displayed 2 Press a b to select and then press ENTER 3 Press c d to select Scene Selection and then press ENTER Set Start Point displays Playback Chapter Playback Title Scene Selection Set Start Point 4 Press ENTER at the scene where you want to set the start point Set End Point displays 5 Press ENTER at the scene where you want to set the end point You can press J to fast forward to ...

Page 30: ...e Mark appears in the right bottom part of the screen when multiple angles are recorded The Angle Mark is only displayed for DVD VIDEO The settings can be changed in Blu ray disc Setup Playback Setting Angle Mark Display See page 42 Settings for audio subtitles and angle can be changed also in DISC MENU control screen See page 29 The operations of subtitles angle and audio differ according to each...

Page 31: ...es which can be selected The displayed items vary depending on the disc If you access the DISC MENU control screen during playback of a BD DVD VIDEO it may be impossible to operate the BD DVD VIDEO playback In cases like this close the DISC MENU control screen DISC MENU Which Can Be Set Shows the title number being played back You can skip to the start of the title To skip to the start of a select...

Page 32: ...ption Info Page 41 Program Title Display Page 41 Favorite CH Page 41 Game Play Time Page 41 Operation Lock Out Page 41 Demo Mode Page 41 Digital Setup Menu Audio Setup Page 46 Identification Page 46 Software Update Pages 46 47 On Screen Display Menu For TV Blu ray INPUT 1 2 3 Mode For HDMI PC IN Mode Picture Menu OPC Page 32 Backlight Page 32 Contrast Page 32 Brightness Page 32 Color Page 32 Tint ...

Page 33: ...e the setting RETURN Press to return to the previous step The bar above is an operational guide for the remote control The bar will change in accordance with each menu setting screen Example Menu Operation Buttons Using the control panel of the main unit You can also operate the menu with the control panel of the main unit Button operations on the control panel correspond to the ones on the remote...

Page 34: ...ding to the scene On Automatically adjusts the image contrast Off No adjustment Fine Motion Enhanced Use Fine Motion Enhanced to view fast action video more clearly On For obtaining a clearer image Off Normal image Fine Motion Enhanced may cause image noise If this occurs turn the function Off Picture Menu Adjusts the picture to your preference with the following picture settings Picture Contrast ...

Page 35: ...ng The minimum setting cannot be set to a bigger number than the maximum setting Depending on the brightness of the surrounding light the OPC sensor might not operate if the adjustment range is small On Screen Display Menu Audio Menu You can adjust the sound quality to your preference with the following settings Example Audio Treble Bass Balance Surround Bass Enhancer Reset Off On a15 L b15 0 0 0 ...

Page 36: ...reen and then press c d to select Power Control 2 Press a b to select a specific adjustment item and then press ENTER 3 Press a b or c d to select the desired setting and then press ENTER 4 Press MENU to exit Power Saving This function allows you to set the Power Saving level in order to decrease the power consumption and increase the backlight lifespan Standard Optimizes power reduction based upo...

Page 37: ... be deleted CH Setup If initial setup does not memorize all the channels in your region follow the instructions below to manually memorize the channels Air Cable Make sure what kind of connection is made with your TV when selecting Air or Cable CH Search Channel auto search makes the TV look for all channels viewable in the set area CH Memory You can select the channels to skip in each ANALOG Air ...

Page 38: ...he signal type The ranges can be seen on the position setting screen Position For adjusting a picture s horizontal and vertical position H Pos Centers the image by moving it to the left or right V Pos Centers the image by moving it up or down For resetting adjustments to the factory preset values press a b to select Reset and then press ENTER When connecting a PC to the HDMI terminal the image pos...

Page 39: ...ip and Status will not be selectable from the menu On Screen Display Menu Status Used to enable or disable the parental control function This function will not be selectable from the menu if you do not first configure your secret number On Enables Parental CTRL Off Disables Parental CTRL V Chip V CHIP is an electronic filtering device built into your TV This tool gives parents a great degree of co...

Page 40: ...her items 3 Press c or RETURN to register after all individual content rating items are set MPAA Voluntary movie rating system Example MPAA TV Guidelines Can English Ratings Can French Ratings PG 13 R NC 17 X NONE PG G Press a b to adjust the item to your desired position indicates the item is blocked Press MENU to exit Voluntary movie rating system only uses an age based rating TV Parental Guidel...

Page 41: ...screen G General Considered acceptable for all age groups Appropriate viewing for the entire family contains very little violence physical verbal or emotional PG Parental Guidance Intended for a general audience but may not be suitable for younger children under the age of 8 because it could contain controversial themes or issues 14 Over 14 years Could contain themes where violence is one of the d...

Page 42: ... Select the input signal type from the list below Auto COMPONENT S TERMINAL If the selected signal type is incorrect images are not displayed at all or are displayed without any color Refer to your external equipment operation manual for the signal type If you set INPUT 1 or 2 to Auto the TV will automatically select the input signal Setting INPUT 1 or 2 signal selection to Auto when other equipme...

Page 43: ...me select GAME for the AV MODE before starting the game On The elapsed time is displayed every 30 minutes when you switch to GAME mode in external input mode Off No adjustment On Screen Display Menu Operation Lock Out This function locks the operation buttons on the TV and the remote control Off No adjustment RC Control Lock All buttons on the remote control are locked Button Control Lock All butt...

Page 44: ...n can be heard easily If the audio sounds abnormal set to Normal Lower the audio volume before setting If you do not do so the speakers may emit a loud sound or excessive output may be applied to the speakers Playback Setting Parental Control This lets you set the Parental Control depending on the disc content The available Parental Control Levels are shown below The 4 digit password number needs ...

Page 45: ...ttish MG Malagasy MI Maori MK Macedonian ML Malayalam MN Mongolian MO Moldavian MR Marathi MS Malay MT Maltese MY Burmese NA Nauru NE Nepali NL Dutch NO Norwegian OC Occitan OM Afan Oromo OR Oriya PA Panjabi PL Polish PS Pashto Pushto PT Portuguese QU Quechua RM Rhaeto Romance RN Kirundi RO Romanian RU Russian RW Kinyarwanda SA Sanskrit SD Sindhi SG Sangho SH Serbo Croatian SI Singhalese SK Slovak...

Page 46: ...es all contents Erase Erases BD VIDEO data on USB memory Erase all contents on USB memory including protected contents Format Data which has been saved to the Disc Drive s internal memory game score etc will also be deleted 6 Press c d to select Yes and then press ENTER Yes No 7 Start the process The screen for the current operation will display Complete OK 8 Press ENTER Software Update This funct...

Page 47: ...sage is displayed Check the file on the USB memory device and then reinsert the USB memory device correctly OK Software update file is not detected in the USB memory device Confirm that you have transferred the file to the USB memory device and retry software update Confirm that you have inserted the USB memory device into the BD STORAGE SERVICE port There is more than one software file In the USB...

Page 48: ... secret number by using 0 9 Digital Setup Secret No a a a a 4 Digital Setup Menu This setting allows you to optimize the settings of Digital broadcasting Identification Audio Setup Software Update PCM Digital Setup Example 1 Press MENU to display the MENU screen and then press c d to select Digital Setup 2 Press a b to select a specific adjustment item and then press ENTER 3 Press a b or c d to se...

Page 49: ...Press ENTER to start updating The screen becomes dark for a while until the update screen can be displayed Please wait for the update screen to appear Do not unplug the AC cord The picture will temporarily go dark until the Software Update display appears Wait several minutes and do not unplug the AC cord OK Example 30 Now updating Do not unplug AC cord Update Version UXXXXXX2 7 When the software ...

Page 50: ...allows picture search VCR Hold down to go in reverse DVD 3 REC Starts recording VCR 4 K Pressing quickly once takes you to the start of the chapter currently playing Each time you press it you move back to the start of the previous chapter DVD 5 0 9 CBL SAT DOT SAT Press a button or buttons that corresponds to the channel that you wish to watch 6 I Starts playback VCR DVD 7 J Rapidly advances the ...

Page 51: ...NTROL CODE NUMBER Other Viewing Options VCR BRAND REMOTE CONTROL CODE NUMBER DVD BD LD BRAND REMOTE CONTROL CODE NUMBER CATV SAT BRAND Numbers marked with are SAT codes all others are CATV codes AUDIO BRAND REMOTE CONTROL CODE NUMBER ...

Page 52: ...only when AQUOS LINK is used One Touch Play While the TV is in standby mode it automatically turns on and plays back the image from the HDMI source One Touch Recording Press REC while you are viewing a broadcast received with the AQUOS LINK compatible recorder The AQUOS LINK automatically recognizes the connected HDMI device and starts recording Single remote control The AQUOS LINK automatically r...

Page 53: ...Input Location Selecting Recorder Auto Power On AQUOS LINK Control Example when connecting AQUOS LINK compatible recorder via AQUOS LINK compatible Audio system When an AQUOS LINK compatible audio system or other equipment is connected between the TV and recorder Sub is displayed INPUT5 5WD INPUT6 1 1 0 0 2 0 0 0 Input Location Selecting Recorder Auto Power On AQUOS LINK Control One Touch Recordin...

Page 54: ...ss d to start playing back a title The last played program is played back You can use the following buttons during broadcast viewing Buttons Description SOURCE POWER Turns the power of the HDMI connected devices on and off G Hold down to go in reverse I Starts playback J Hold down to fast forward H Playback stops F Sets pauses and still pictures T Pressing quickly once takes you to the start of th...

Page 55: ...S AUDIO SP and then press ENTER The sound from the TV speaker is muted and only the sound from the AQUOS LINK compatible audio system is audible You can use VOLk l and MUTE Select By AQUOS SP and then press ENTER to listen to the TV sound Manually Changing AQUOS AUDIO Speaker System s Sound Mode 1 Press OPTION to display the AQUOS LINK MENU screen 2 Press a b to select Sound mode change and then p...

Page 56: ...re the bracket to the rear of the TV Setting the TV on the Wall CAUTION This TV should be mounted on the wall only with the wall mount bracket AN 52AG4 SHARP The use of other wall mount brackets may result in an unstable installation and may cause serious injuries Installing the TV requires special skill that should only be performed by qualified service personnel Customers should not attempt to d...

Page 57: ...d near the remote control sensor Is the image position correct See page 36 Are screen mode adjustments such as picture size made correctly See page 19 Adjust the picture tone See pages 32 and 33 Is the room too bright The picture may look dark in a room that is too bright Is the sleep timer set See page 16 Check the power control settings See page 34 The unit s internal temperature has increased R...

Page 58: ...cast of the material During parts where there is no dubbed sound the TV will switch to the original soundtrack which may result in a change in language Cannot play commercially available BD VIDEO or DVD VIDEO disc If the BD VIDEO or DVD VIDEO disc contains viewing restrictions according to age level Parental Control playback may be inhibited For BD VIDEO stop playback and disable Parental Control ...

Page 59: ...D discs recorded on other equipment Discs that were not finalized on the other equipment may not play in this TV Finalize the disc in the recorder that was used to create it Discs in formats not supported by this TV such as discs recorded with a high definition digital video camera cannot be played in this TV Discs created on a computer may not play in this TV The disc is automatically ejected Mak...

Page 60: ... The ranges can be seen on the position setting screen 0 Although it can choose now it is toggle operation in inside 1 Only available when 4 3 signal is being input 5 6 Only available when 4 3 signal is being input 8 PC Available except when UXGA is being input AV Only available when 1080i p is being input 9 Only available when 720p is being input Toggle Input terminal number 1 8 0 Auto 1 VIDEO 2 ...

Page 61: ...isc Drive ETHERNET Network connector See page 11 BD STORAGE SERVICE USB 2 0 correspondence for Local storage Software Update OSD language English French Spanish Power Requirement AC 120 V 60 Hz Power Consumption 270 W 0 8 W Standby with AC 120 V Weight TV stand 52 9 lbs 24 0 kg TV only 45 2 lbs 20 5 kg Dimension 2 W g H g D TV stand 43 53 64 g 30 7 16 g 14 17 32 inch TV only 43 53 64 g 28 5 32 g 5...

Page 62: ...duct Software composition The software included in this product is comprised of various software components whose individual copyrights are held by SHARP or by third parties Software developed by SHARP and open source software The copyrights for the software components and various relevant documents included with this product that were developed or written by SHARP are owned by SHARP and are prote...

Page 63: ...shall constitute full satisfaction of all claims whether based on contract negligence strict liability or otherwise Sharp does not warrant nor shall Sharp be liable or in any way responsible for Products which have been subject to abuse including but not limited to improper voltage accident misuse negligence lack of reasonable care alteration modification tampering misuse improper operation or mai...

Page 64: ...t inch mm Dimensional Drawings 15 3 4 400 15 3 4 400 6 57 64 175 43 53 64 1113 14 17 32 369 30 7 16 773 28 5 32 715 17 21 64 440 2 9 32 58 40 19 64 1023 4 22 43 64 575 6 5 3 64 128 5 31 64 139 21 7 64 536 ...

Page 65: ...CS CORPORATION Sharp Plaza Mahwah New Jersey 07495 1163 SHARP CORPORATION Printed in Mexico Imprimé au Mexique Impreso en México TINS E296WJZZ 09P06 MX NM LC 46BD80UN OPERATION MANUAL MODE D EMPLOI MANUAL DE OPERACIÓN ...

Reviews: