


11
Film mode
Automatically detects a fi lm-based source (originally
encoded at 24/25 frames/second, depending on the
vertical frequency), analyses it then recreates each still fi lm
frame for high-defi nition picture quality. (On, Off)
Active contrast
Automatically adjusts the contrast of an image according
to the scene. (On, Off)
3D-Y/C
Provides high quality images with minimal dot crawl and
cross colour noise. (On, Off)
NOTE
• 3D-Y/C is not selectable depending on the input signal type.
• 3D-Y/C may not operate depending on the input signal type
or noisy input signal.
Monochrome
For viewing images in monochrome. (On, Off)
DNR (Digital Noise Reduction)
Reduces noise on screen and produces a clearer video
image. (Off, High, Low, Auto)
NOTE
• For resetting all Picture adjustment items to factory preset
values, press
a
/
b
to select “Reset”, press
ENTER
, press
c
/
d
to select “Yes”, and then press
ENTER
.
Audio menu
–15
–15
[
0 ]
L
[
0 ]
+15
+15
R
[
0 ]
Audio
ECO
STANDARD
Treble
Bass
Balance
Setup
[ Off ]
Surround
Reset
H
Audio adjustments
Selected item
c
button
d
button
Treble
For weaker treble
For stronger treble
Bass
For weaker bass
For stronger bass
Balance
Decrease audio from
the right speaker
Decrease audio
from the left speaker
H
Surround
When you set to “On”, you can enjoy surround sound,
the same as if you were in a movie theatre.
Selected item
Description
On
Makes it possible to enjoy natural, realistic
surround sound.
Off
Outputs the normal sound.
NOTE
• For resetting all Audio adjustment items to the factory preset
values, press
a
/
b
to select “Reset”, press
ENTER
, press
c
/
d
to select “Yes”, and then press
ENTER
.
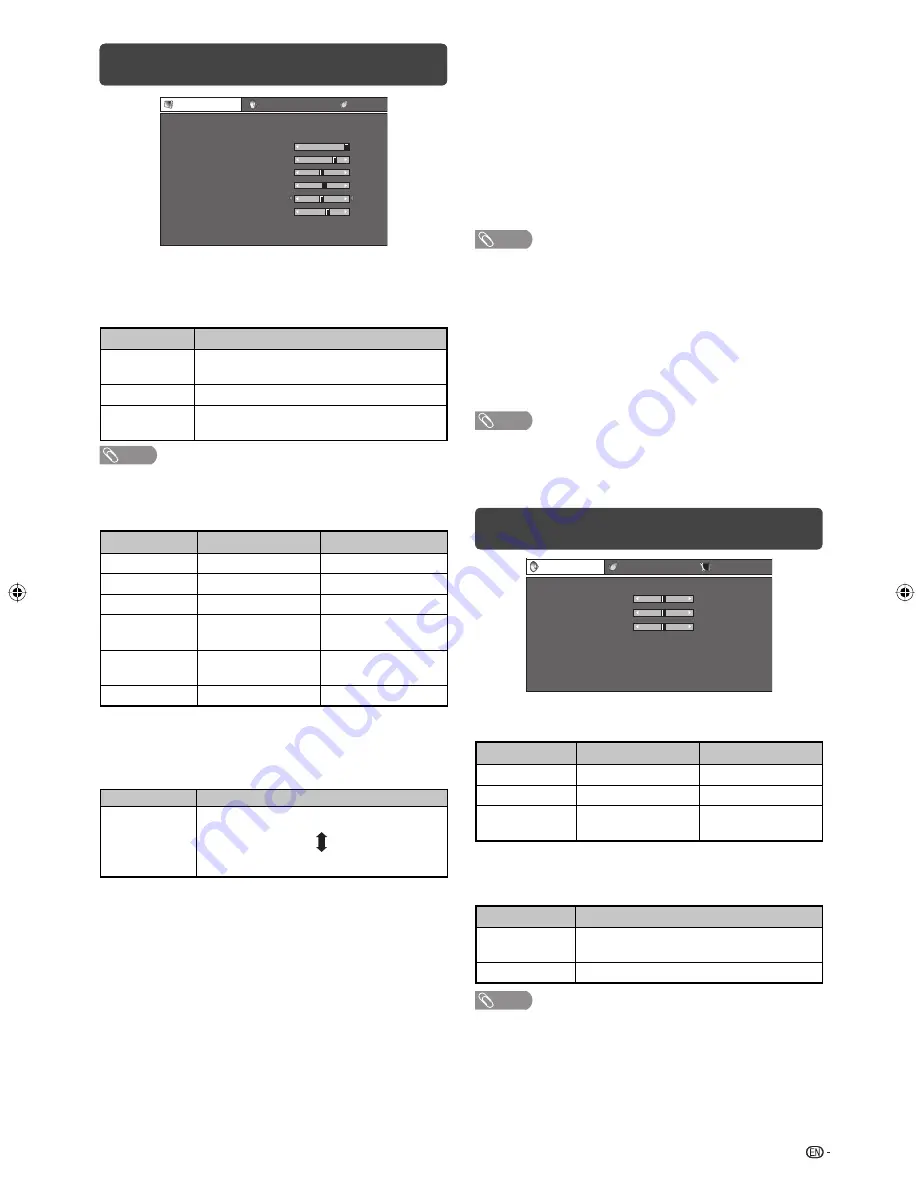
Picture menu
+16
+30
+40
+30
+30
+10
Picture
Audio
ECO
AV mode
OPC
Backlight
Contrast
Brightness
Colour
Tint
Sharpness
Advanced
Reset
[ STANDARD]
[ Off ]
0
–16
+16
+30
+
0
0
4
+
[
[
[
[
[
[
]
]
]
]
]
]
2
–30
–30
–30
–10
H
OPC (Optical Picture Control) setting
You can set the TV to automatically adjust the screen
to suitable backlight brightness according to the
lighting conditions.
Selected item
Description
On:Display
Displays the OPC effect on the screen while
adjusting the brightness of the screen.
On
Automatically adjusts.
Off
The brightness is fi xed at the value set in
“Backlight”.
NOTE
• Make sure no object obstructs the OPC sensor, which
could affect its ability to sense surrounding light.
H
Picture adjustments
Selected item
c
button
d
button
Backlight
The screen dims
The screen brightens
Contrast
For less contrast
For more contrast
Brightness
For less brightness
For more brightness
Colour
For less colour
intensity
For more colour
intensity
Tint
Skin tones become
purplish
Skin tones become
greenish
Sharpness
For less sharpness
For more sharpness
H
Advanced
Colour temp. (Colour Temperature)
Adjusts the colour temperature to give the best white
image.
Selected item
Description
High
Mid-High
Middle
Mid-Low
Low
White with bluish tone
White with reddish tone
LC40L500X_pg10-17_EN.indd 11
LC40L500X_pg10-17_EN.indd 11
18/08/10 02:23:11 PM
18/08/10 02:23:11 PM
Summary of Contents for Aquos LC-40L500X
Page 1: ...MODEL LC 40L500X LCD COLOUR TELEVISION OPERATION MANUAL ...
Page 2: ......
Page 30: ...Memo ...
Page 31: ......
Page 32: ...Printed in Malaysia TINS E711WJZZ 10P09 MA NF ...


