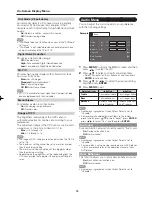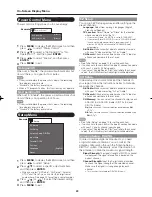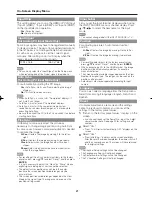
background image

6

1

2

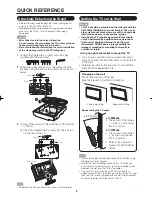
Screws

Hex key

Soft cushion

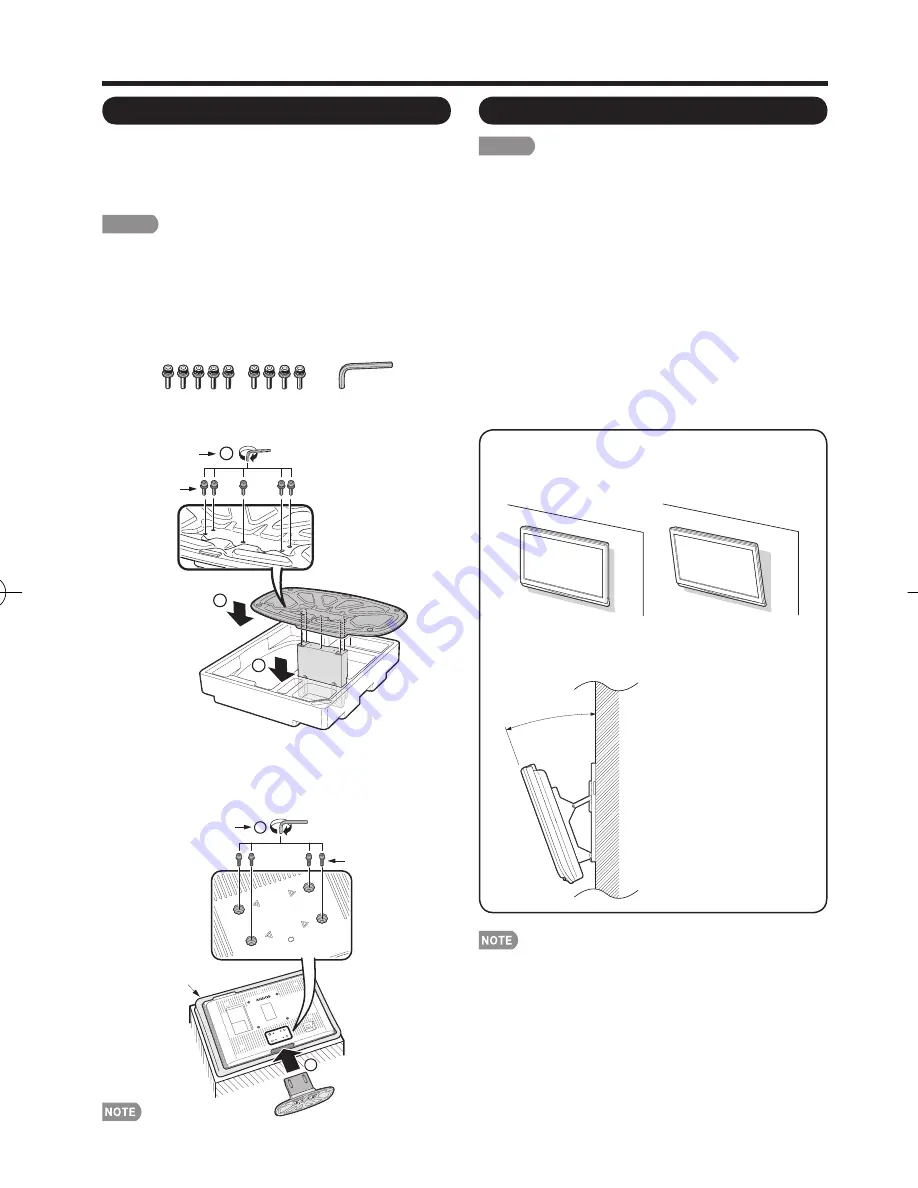
Attaching/Detaching the Stand

•  Before attaching (or detaching) the stand, unplug the AC 

cord from the AC INPUT terminal.

•  Before performing work spread cushioning over the base       

area to lay the TV on. This will prevent it from being 
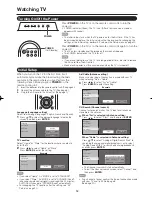
damaged.

CAUTION

• 

Attach the stand in the correct direction.

• 

Do not remove the stand from the TV unless using an 
optional wall mount bracket to mount it.

• 

Be sure to follow the instructions. Incorrect installation 
of the stand may result in the TV falling over.

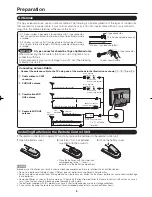
1

  Confi rm that there are 9 screws and a hex key 

supplied with the stand unit.


2

  Attach the supporting post for the stand unit onto 

the base using the box for the stand unit as shown 
below.

Setting the TV on the Wall

CAUTION

•  This TV should be mounted on the wall only with the 

AN-37AG5 (SHARP) wall mount bracket. The use of 
other wall mount brackets may result in an unstable 
installation and may cause serious injuries.

•  Installing the TV requires special skill that should 

only be performed by qualifi ed service personnel. 
Customers should not attempt to do the work 
themselves. SHARP bears no responsibility for 
improper mounting or mounting that results in 
accident or injury.

Using an optional bracket to mount the TV

•  You can ask a qualifi ed service professional about 

using an optional AN-37AG5 bracket to mount the TV 
to the wall.

•  Carefully read the instructions that come with the 

bracket before beginning work.

QUICK REFERENCE

Vertical mounting

Angular mounting

Hanging on the wall

AN-37AG5 wall mount bracket.
(See the bracket instructions for details.)

About setting the TV angle

0/5/10/15/20°

LC-32M44L

•  The center of the display: 

11

/

64

 inch (4.0 mm) under 

the “A” position.

LC-37M44L

•  The center of the display: 

1

/

4

 inch (6.0 mm) above 

the “A” position.

•  Refer to the operation 

manual of AN-37AG5 for 
details.

3


1

 Insert the stand into the openings on the bottom 

of the TV.


2

 Insert and tighten the 4 screws into the 4 holes 

on the rear of the TV.

•  To detach the stand, perform the steps in reverse order.

•  Detach the cable clamp on the rear of the TV when using 

the optional mount bracket.

•  Due to the terminal confi guration on this TV, when you 

wall-mount this model, make sure there is enough space 
between the wall and the TV for the cables.

•  To use this TV mounted on a wall, fi rst remove the 

adhesive tape at the 4 locations on the rear of the TV, and 
then use the screws supplied with the wall mount bracket 
to secure the bracket to the rear of the TV.

2

3

1

Hex key

Screws

LC-32̲37M44L̲E.indb   6

LC-32̲37M44L̲E.indb   6

2008/04/02   14:55:19

2008/04/02   14:55:19

Summary of Contents for Aquos LC-32M44L

Page 1: ...STAL TELEVISION OPERATION MANUAL ENGLISH Supplied Accessories Make sure the following accessories are provided with the product Remote control unit g1 Page 7 AA size battery g2 Page 8 AC cord g1 Page 7 Stand unit g1 Page 6 Cable clamp g1 Page 7 Operation manual g2 languages Always use the AC cord supplied with the TV ...

Page 2: ... FORCE AND UNEVEN SURFACES MAY CAUSE THE PRODUCT AND CART COMBINATION TO OVERTURN The lightning flash with arrow head symbol within an equilateral triangle is intended to alert the user to the presence of uninsulated dangerous voltage within the product s enclosure that may be of sufficient magnitude to constitute a risk of electric shock to persons The exclamation point within a triangle is inten...

Page 3: ...mation 15 Power Sources This product should be operated only from the type of power source indicated on the marking label If you are not sure of the type of power supply to your home consult your product dealer or local power company For products intended to operate from battery power or other sources refer to the operating instructions 16 Overloading Do not overload wall outlets extension cords o...

Page 4: ...opped or applied with impact Be careful not to be injured by broken glass pieces in case the panel breaks Heat The product should be situated away from heat sources such as radiators heat registers stoves or other products including amplifiers that produce heat The Liquid Crystal panel is a very high technology product with 1 049 088 pixels giving you fine picture details Occasionally a few non ac...

Page 5: ...ly on a larger than life flat panel display Care should be taken to place or install the display where it cannot be pushed pulled over or knocked down Care should be taken to route all cords and cables connected to the flat panel display so that they cannot be pulled or grabbed by curious children WALL MOUNTING IF YOU DECIDE TO WALL MOUNT YOUR FLAT PANEL DISPLAY ALWAYS Use a mount that has been re...

Page 6: ...mounting or mounting that results in accident or injury Using an optional bracket to mount the TV You can ask a qualified service professional about using an optional AN 37AG5 bracket to mount the TV to the wall Carefully read the instructions that come with the bracket before beginning work QUICK REFERENCE Vertical mounting Angular mounting Hanging on the wall AN 37AG5 wall mount bracket See the ...

Page 7: ...OS television should light GREEN indicating you have power to the AQUOS television If the POWER indicator on the AQUOS television still does not light up press POWER on the remote control to turn the power on IMPORTANT IF THE UNIT DOES NOT POWER ON UNPLUG THE AQUOS TELEVISION FROM THE OUTLET AND REPEAT THE INSTALLATION STEPS IF YOU STILL ENCOUNTER NO POWER PLEASE VISIT OUR WEBSITE AT www sharpla c...

Page 8: ... terminal 75 ohm or or F type connector should be finger tightened only CAUTION Improper use of batteries can result in chemical leakage or explosion Be sure to follow the instructions below Do not mix batteries of different types Different types of batteries have different characteristics Do not mix old and new batteries Mixing old and new batteries can shorten the life of new batteries or cause ...

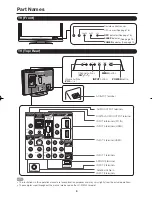
Page 9: ...ons VOLl k AC INPUT terminal DIGITAL AUDIO OUTPUT terminal INPUT 4 terminal HDMI INPUT 5 terminals HDMI INPUT 6 terminals PC IN Antenna Cable in INPUT 1 terminals INPUT 2 terminals AUDIO OUTPUT terminals SERVICE terminal INPUT 3 terminals The illustrations in this operation manual are for explanation purposes and may vary slightly from the actual operations The examples used throughout this manual...

Page 10: ...rmation 12 SLEEP Set the sleep timer See page 13 13 AV MODE Select an audio or video setting When the input source is TV INPUT 1 2 or 3 STANDARD MOVIE GAME USER DYNAMIC Fixed DYNAMIC When the input source is INPUT 4 5 or 6 STANDARD MOVIE GAME PC USER DYNAMIC Fixed DYNAMIC See page 14 14 MUTE Mute the sound See page 13 15 VOLk l Set the volume See page 13 16 CHr s Select the channel See page 13 17 ...

Page 11: ...AUDIO OUTPUT terminal in HDMI connection In this case set the audio formats of the connected equipment to PCM 32 44 1 48 kHz and 16 bits The HDMI terminals only support digital signal Refer to page 30 for a list of PC signals compatible with the TV Terminal on the TV Terminal on external equipment INPUT 1 or 2 INPUT 1 or 3 INPUT 4 or 5 DIGITAL AUDIO OUTPUT INPUT 2 Connecting a Blu ray disc player ...

Page 12: ...na cable to the TV See page 8 3 Plug in the AC cord to the AC outlet See page 7 Example Air Cable TV Location Language CH Search Air Cable Air Cable Antenna setting Make sure what kind of connection is made with your TV when selecting Air or Cable 3 Press c d to select Air or Cable Press ENTER to enter the setting Example POWER On Standby CH Search Channel search Channel auto search makes the TV l...

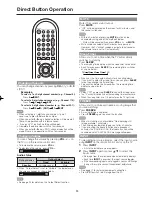
Page 13: ...e function will be canceled and a V CHIP BLOCK message will appear INPUT To view external source images select the input source using INPUT on the remote control unit or on the TV 1 Press INPUT A list of selectable sources appears 2 Press INPUT again or press a b to select the input source An image from the selected source automatically displays Each time INPUT is pressed the input source toggles ...

Page 14: ...ion AUDIO MTS SAP stereo mode The TV has a feature that allows reception of sound other than the main audio for the program This feature is called Multi channel Television Sound MTS The TV with MTS can receive mono sound stereo sound and Secondary Audio Programs SAP The SAP feature allows a TV station to broadcast other information which could be audio in another language or something completely d...

Page 15: ...ogram has three services Digital CC ENG CC1 and Text1 the closed caption display will toggle in this sequence The CC button keeps a record of the last service selected in its memory If the last closed caption mode e g 1 3ENG you selected is not available for the next program or on another channel the closed caption service that is available is automatically selected and this service appears in par...

Page 16: ...tretch mode will still show very thin black bands at the top and bottom of the screen Full Screen Displays an image faithful to the input signal in full screen S Stretch Smart stretch Suitable for stretching 4 3 programs to fill the screen Zoom Suitable for viewing wide screen 2 35 1 aspect ratio programs in full screen When using Full Screen it is possible to see noise or bars around different ou...

Page 17: ...ay 1 Press c d to select the desired item 2 Press a b to select the desired item 3 Press c d to adjust the item On Screen Display Menu Operation MENU Press to open or close the menu screen a b c d Press to select a desired item on the screen or adjust a selected item ENTER Press to go to the next step or complete the setting RETURN Press to return to the previous step Option Audio Only Input Selec...

Page 18: ...olor temperature correction High White with bluish tone Mid High Middle Mid Low Low White with reddish tone Active Contrast Automatically adjusts the image contrast according to the scene On Automatically adjusts the image contrast Off No adjustment Picture Menu Adjusts the picture to your preference with the following picture settings Picture Contrast OPC Brightness Color Tint Sharpness Advanced ...

Page 19: ...t to a bigger number than the maximum setting Depending on the brightness of the surrounding light the OPC sensor might not operate if the adjustment range is small On Screen Display Menu Audio Menu You can adjust the sound quality to your preference with the following settings Audio Treble Bass Balance Surround Bass Enhancer Reset Off On a15 L b15 0 0 0 a15 b15 R Example 1 Press MENU to display t...

Page 20: ...air broadcasts you need a digital broadcast antenna You can confirm the antenna configuration through the Antenna Setup DIGITAL screen If necessary adjust the direction of the antenna to obtain the maximum signal strength Signal Strength The signal strength of DIGITAL channel is displayed The signal information is based on the current channel Channel Strength Input the 2 digit channel number to ch...

Page 21: ... so it cannot be selected The default cursor position may not be in the center because the screen position variable ranges may be asymmetrical The screen position variable ranges depend on the View Mode or the signal type The ranges can be seen on the position setting screen Input Label Lets you set the input terminal displayed when using the INPUT SOURCE menu or channel display Press a b c d to s...

Page 22: ...degree of control over broadcasts accessed by their children It allows parents to select programs judged suitable for child viewing while blocking ones judged not suitable It does so automatically once you activate the V CHIP feature in your TV V Chip and Status will not be selectable from the menu if you do not first configure your secret number The U S has two rating systems for viewing content ...

Page 23: ...into consideration other program content like language nudity sexuality and mature themes When setting the V CHIP on the Canadian system you can choose either the Canadian English ratings or the Canadian French ratings Canadian English Ratings Example MPAA TV Guidelines Can English Ratings Can French Ratings E C C8 G PG 14 18 NONE Press a b to adjust the item to your desired position indicates the...

Page 24: ...Guidelines Can English Ratings or Can French Ratings from the Parental CTRL to reactivate BLOCK See pages 22 and 23 Switch off the TV power Performing any of the three above will activate the V CHIP BLOCK Option Menu Audio Only Output Select Caption Setup Digital Caption Info Program Title Display Favorite CH Game Play Time Operation Lock Out Fixed No Off Off Option Example 1 Press MENU to display...

Page 25: ...t number here See page 22 for setting a secret number Caption Setup This function allows you to adjust the closed caption screen appearance to suit your preference You can adjust 7 items Caption Size Font Style Foreground Color Foreground Opacity Background Color Background Opacity and Character Edge Example Selectable items available for Font Style Default The font specified by broadcasting stati...

Page 26: ...he current version of the TV software is displayed On Screen Display Menu Software Update This function allows software updates by inserting a USB memory device with the update file into the SERVICE terminal on the TV To check for the availability of a software update visit www sharpusa com If you have any questions please call 1 800 BE SHARP 800 237 4277 CAUTION Do not remove the USB memory devic...

Page 27: ...file is in the USB memory device OK 6 Press ENTER to start updating The screen becomes dark for a while until the update screen can be displayed Please wait for the update screen to appear Do not unplug the AC cord The picture will temporarily go dark until the Software Update display appears Wait several minutes and do not unplug the AC cord OK Example 30 Now updating Do not unplug AC cord Update...

Page 28: ...room that is too bright Check the input signal setting See page 21 Is the sleep timer set See page 13 Check the power control settings See page 20 The unit s internal temperature has increased Remove any objects blocking vent or clean Is connection to other components correct See page 11 Is correct input signal source selected after connection See page 25 Is the correct input selected See page 25 ...

Page 29: ...ERVICE Software update OSD language English French Spanish Power Requirement AC 110 240 V 50 60 Hz Power Consumption 140 W 0 9 W Standby 172 W 0 9 W Standby Weight TV stand 29 8 lbs 13 5 kg 35 3 lbs 16 0 kg TV only 25 4 lbs 11 5 kg 30 9 lbs 14 0 kg Dimension W g H g D TV stand 30 9 16 g 22 41 64 g 9 1 16 inch 35 19 32 g 25 3 32 g 9 1 16 inch TV only 30 9 16 g 20 19 32 g 3 45 64 inch 35 19 32 g 23 ...

Page 30: ... This Product Software composition The software included in this product is comprised of various software components whose individual copyrights are held by SHARP or by third parties Software developed by SHARP and open source software The copyrights for the software components and various relevant documents included with this product that were developed or written by SHARP are owned by SHARP and ...

Page 31: ...5 27 32 402 27 17 32 699 2 15 1 2 393 8 13 5 64 332 2 1 16 52 22 41 64 575 20 19 32 523 7 7 8 200 4 11 32 110 LC 32M44L 7 7 8 200 7 7 8 200 3 61 64 100 9 1 16 230 2 25 32 71 3 3 4 95 14 29 64 367 35 19 32 904 2 1 16 52 23 1 32 585 32 15 32 824 4 18 17 64 463 8 15 27 32 402 25 3 32 637 LC 37M44L ...

Page 32: ...32 SHARP ELECTRONICS CORPORATION Sharp Plaza Mahwah New Jersey 07495 1163 SHARP CORPORATION ...

Reviews: