


14
Child Lock
Allow you to use a PIN to protect certain settings from
being accidentally changed.
Setting the PIN
1
Press
MENU
and the MENU screen displays.
2
Press
c
/
d
to select “Setup”.
3
Press
a
/
b
to select “Child Lock”, and then press
OK
.
4
If you already set the PIN, enter it here.
5
Press
a
/
b
to select “Change PIN”, and then
press
OK
.
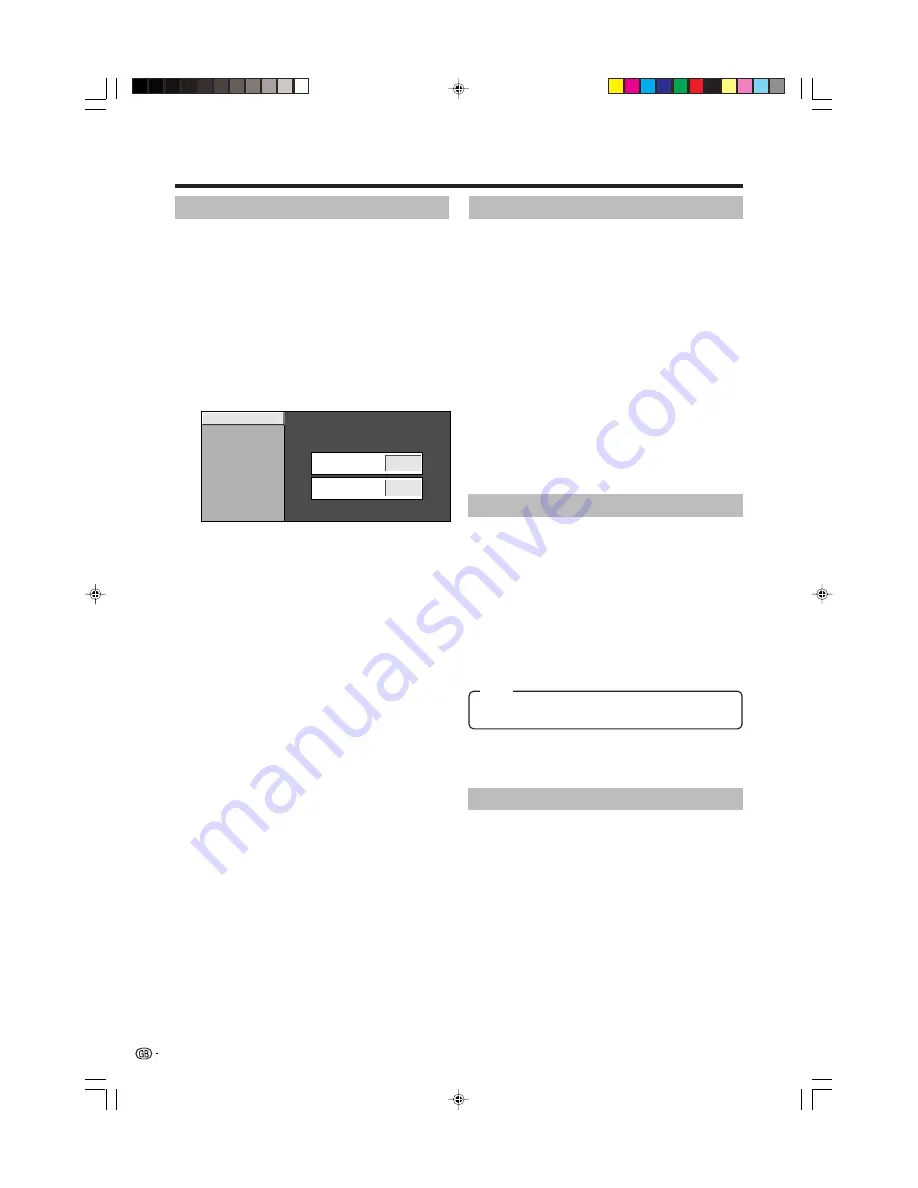
New PIN
–
–
–
Reconfirm
–
–
–
–
–
Change PIN
Cancel PIN
6
Enter the 4-digit number as a PIN using
0
–
9
.
7
Enter the same 4-digit number as in step 6 to
confirm.
• “The system PIN has been changed successfully”
displays.
NOTE
• To view a locked channel (Lock setting in Programme
Setup “Manual Adjust” is set to “On”), you must enter a
PIN. (See page 13.) When you select a locked channel, a
PIN prompt message pops up. Press
OK
to display the
PIN input window.
Cancelling the PIN
Allow you to reset your PIN.
1
Repeat steps 1 to 3 in
Setting the PIN
.
2
Enter the PIN.
3
Press
a
/
b
to select “Cancel PIN”, and then press
OK
.
4
Press
c
/
d
to select “Yes”, and then press
OK
.
NOTE
•
As a precautionary measure, make a note of your PIN
on the back of this operation manual, cut it out and
keep it in a safe place that children cannot reach. If
you lose or forget your PIN, initialise the TV to return
all settings except for the TV channel settings to factory
preset values. (See page 18.)
Menu operations
Position
For adjusting a picture’s horizontal and vertical
position.
1
Press
MENU
and the MENU screen displays.
2
Press
c
/
d
to select “Setup”.
3
Press
a
/
b
to select “Position”, and then press
OK
.
4
Press
a
/
b
to select “H-Pos.” or “V-Pos.”.
5
Press
c
/
d
to adjust the item to your desired
position.
WSS (Wide Screen Signalling)
Menu Operation: A (Page 9)
WSS allows a television to switch automatically among
the different screen formats.
NOTE
• Try to set WIDE MODE if an image does not switch to the
correct screen format. When the broadcast signal contains
no WSS information, the function will not work even if
enabled. (See page 16.)
NOTE
•
Adjustments are stored separately according to input
source.
H-Pos.:
Centres the image by moving it to the left or right.
V-Pos.:
Centres the image by moving it up or down.
Input Label
You can assign each input source a label you like.
1
Press
b
to select the desired input source.
2
Press
MENU
and the MENU screen displays.
3
Press
c
/
d
to select “Setup”.
4
Press
a
/
b
to select “Input Label”, and then press
OK
.
5
Press
a
/
b
/
c
/
d
to select each character of the
new name for the input source, and then press
OK
.
6
Repeat step 5 above until the name is fully spelt
out, and then press
OK
.
• The name can be 6 characters or less.
• If a label name is less than 6 characters, select
“END”, then press
OK
.
NOTE
• You cannot change the label if the input source is TV.
Item
LC-26P50E_GB_b
05.6.13, 8:00 AM
14


