19
Watching TV
MENU
Numeric keypad
Video
Contrast/Brightness/Tint/Sharpness/
Colour/Backlight
Advanced
Reset
Audio
When the initial setup has completed, you can enter
to smart home.
Press the to select input source icon and
press
OK
, then select ATV / DTV or the other input
sources,and then press
OK
to play the program.
Press
to input the number , it will
switch to the selected channel.
OK
/ / / /
Set the video as you desired.
You can adjust the picture to your preference.
Selected item
button
button
Contrast
For less contrast
For more contrast
Brightness
For less brightness For more brightness
Tint
Skin tones become
reddish
Skin tones become
greenish
Sharpness
For less sharpness For more sharpness
Colour
For less colour
intensity
For more colour
intensity
Backlight
The screen dims
The screen brightens
Audio only
Press to select
OK
or Cancel.Select
OK
and
screen will be turned off. Select Cancel and screen
will keep turning on.
/
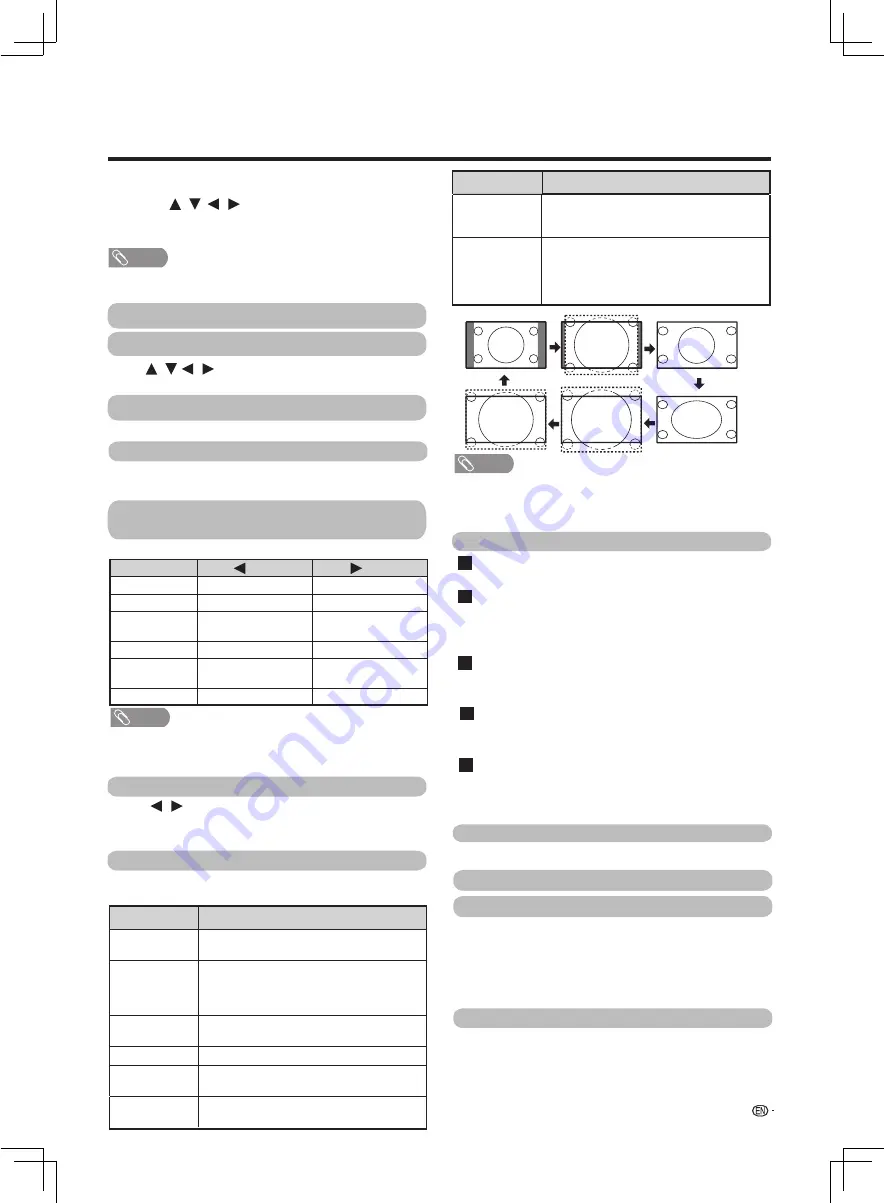
Wide mode
You can select different picture size that account for
the kind of each picture.
Gamma
setting
Colour temp. (Colour temperature)
DNR
Active contrast
Audio mode
Auto volume
Picture mode
You can select “Standard”,”Movie”,”Game”,“Comfort”,
”Sports”,”Vivid”,”Bright”,“Custom”.
Selected item
Description
Normal
For 4:3 standard pictures. A side bar appears
on each side.
Zoom 14:9
For 14:9 letterbo
x
pictures. A thin side bar
appears on each side, and you may also
see bars on the top and bottom with some
programmes.
Panorama
In this mode the picture is progressivel
y
stretched toward each side of the screen.
Full
For 16:9 squeeze pictures.
Cinema 16:9
For 16:9 letterbo
x
pictures. Bars ma
y
appear
on the top and bottom with some
programmes.
Selected item
Description
Cinema 14:9
For 14:9 letterbo
x
pictures. Bars ma
y
appear
on the top and bottom with some
programmes.
Normal
Zoom 14:9
Panorama
Cinema 14:9
Cinema 16:9
Full
NOTE
• Some picture sizes ma
y
not be displ
ayab
le depending on
the input signal.
• “Zoom 14:9” and “Cinema 14:9” are onl
y
available for the
DTV or ATV mode.
You can
adjust mid-level brightness
.
A
dj
usts the colour temperature to give the best
whit
e
image.
You can select “Low”, “Mid-Low”, “Middle”,
Reduce noise on screen and produces a clearer video.
You can select “Auto”,”Off”,”Low”, or ”High”.
Automatically adjust the contrast of an image according
to the scene.You can select from “On”, or ”Off”.
Reset all picture a
dj
ustment items to the factor
y
preset.
This function enables you to select appropriate
setting for audio and video to account for the
system environment.
You can select from “Standard”,”Movie”,”News”,
“Music”,”Custom”.
Different sound sources sometimes do not have the
same volume level, such as a programme and its
commercial breaks. The automatic volume control
(Auto volume) reduces this problem b
y
equalizing
levels.
/ /
/
Dot by Dot
Display an image with the same number of
pi
x
els on the screen (onl
y
w
hen receiving 2160p
signal).
Underscan
Display with an underscan image only when
receiving a 720p / 1080i / 1080p signal.
Display
with
the High-Definition
image
adjusted
optimally.
Noise
may
appear on the edge of the
screen with some programmes.
•
Auto search will carry out when switching to ATV or DTV
at the first time.
NOTE
“Mid-High” or “High”.
HDR gamma
setting
You can adjust HDR input pictures.The value is bigger,
pay attention to the brigthness.The value is smaller,
pay attention to the contrast.
NOTE
When “Bright” is selected for picture mode, Contrast,
Brightness, Tint, Sharpness, Colour and Backlight cannot
be adjusted.
•


