


Standard DIN45325 plug (IEC169-2)
75-ohm coaxial cable (round cable)
(not supplied)
300-ohm twin-lead
flat feeder
(not supplied)
75-ohm impedance
converter
(not supplied)
TV
Antenna in
Antenna in
VCR
To antenna in
terminal
To RF out
terminal
TV
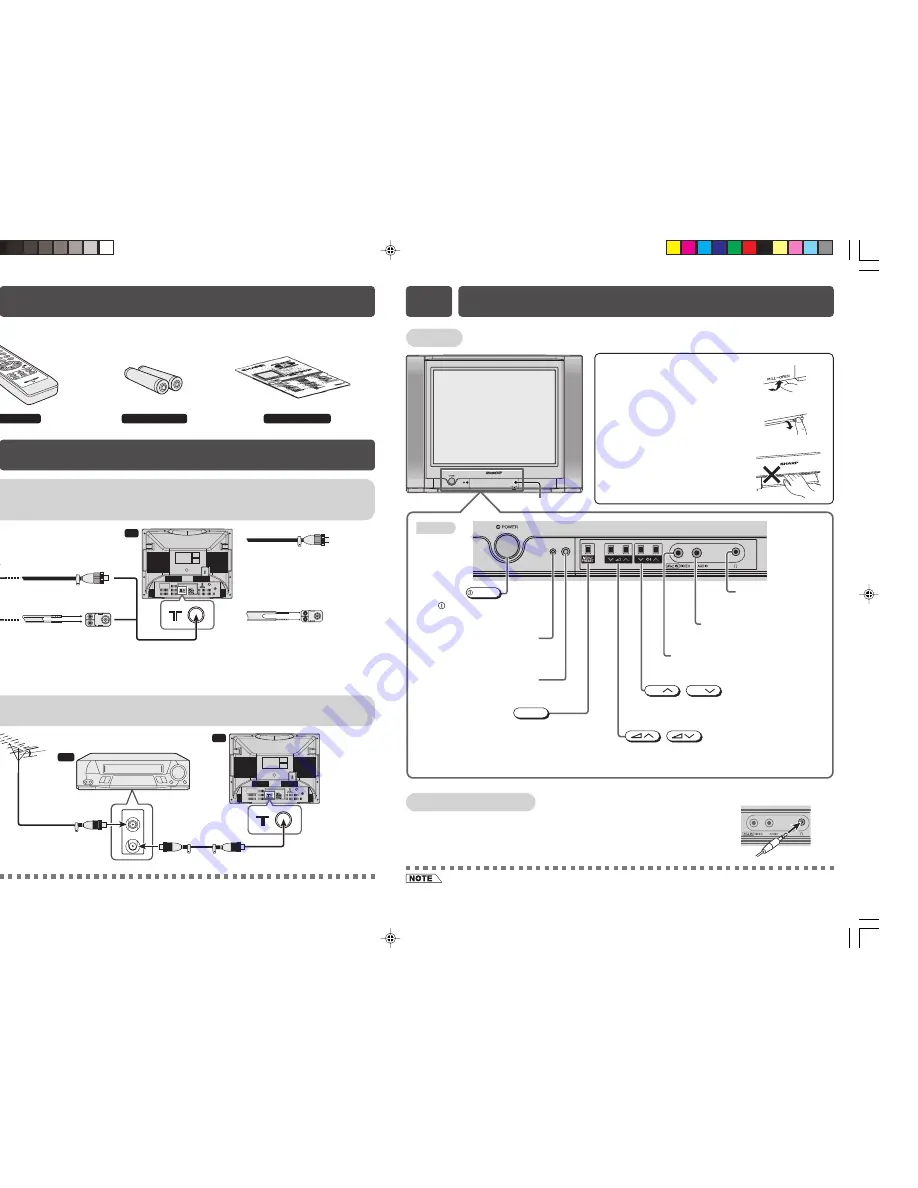
Connecting to an antenna
To enjoy a clearer picture, use an outdoor antenna. The following is a brief explanation of the
types of connections that are used for coaxial and feeder cables.
Connecting to an antenna via a VCR
You can also connect the TV set to the tuner on a VCR using the connection shown below.
If your outdoor antenna uses a
75-ohm coaxial cable with a
standard DIN45325 plug (IEC
169-2), plug it into the antenna
jack at the rear of the set.
If your outdoor antenna uses a
300-ohm twin-lead flat feeder,
connect a 300-ohm to 75-ohm
impedance converter and plug
it into the antenna jack at the
rear of the set.
TV set
[ Behind the door ]
Using headphone
Insert headphone plug into headphone jack to listen to audio with
headphone.
• The audio from the speakers is turned off.
The following accessories are included with this television.
Remote Control
Size-AA batteries
Operation manual
• When using the RF terminal connection, set the TV to channel zero to make initial adjustments for the VCR.
Door
Bottom
Power indicator
Power can be turned on by the
remote control when the indicator
is dimly.
MENU/PRESET button
Tunes the channels.
Used for MENU setup.
MENU/PRESET
Volume up/down buttons
Adjusts the volume.
Makes adjustments in PRESET.
/
Channel up/down buttons
Selects the channels.
Tunes or sets the channels.
CH
CH
/
Headphone jack
Use to listen to the audio
with headphone.
Video input terminal (AV-2)
Connects to a camcorder,
video game, etc.
Audio input terminals (AV-2)
Connects to a camcorder,
video game, etc.
Infrared sensor window
Receives the infrared wave from
the remote control.
POWER
POWER switch
Turns on and off the
main power.
• To avoid injuring your hearing, do not put on the headphone before plugging them into the headphone jack and before
the power is turned on.
E4
PART NAMES
E2
ACCESSORIES
E3
BEFORE OPERATING TELEVISION
To open the door
Using the projection located under
the “PULL-OPEN” indication, pull
and lift the door open.
To close the door
Using the projection, lower the door
until closed.
Caution:
• When opening or closing the door, do
not insert your fingers into the gap
between the door and front panel. This
may result in an injury.
21JF2-SA-EN
8/24/05, 4:55 PM
2


