


10
21HS-50H
•
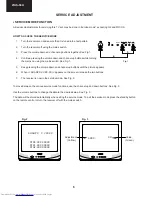
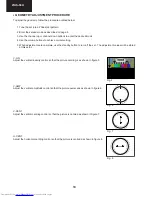
GEOMETRY ADJUSTMENT PROCEDURE
To adjust the geometry, follow the procedure outlined below:
1.Tune the set into a Philips test pattern.
2.Enter the service mode as described on page 6.
3.Use the channel up or channel down buttons to enter the desired mode
4.Use the volume buttons to achieve correct setting.
5.When adjustments are complete, use the standby button to turn off the set. The adjustment values will be stored
at this point.
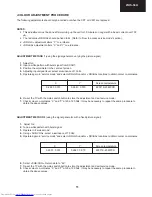
V-LIN
Adjust the vertical linearity control so that the picture centring is as shown in figure 5.
V-AMP
Adjust the vertical amplitude control so that the picture overscans as shown in figure 6.
V-CENT
Adjust the vertical centring control so that the picture is centred as shown in figure 7.
H-CENT
Adjust the horizontal centring control so that the picture is centred as shown in figure 8.
Fig. 5
Fig. 6
Fig. 7
Fig. 8
Summary of Contents for 21HS-50H
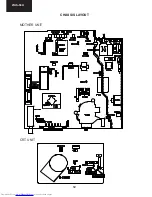
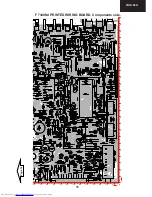
Page 12: ...12 21HS 50H CHASSIS LAYOUT MOTHER UNIT CRT UNIT ...
Page 27: ...27 21HS 50H ...
Page 31: ...31 21HS 50H SCHEMATIC DIAGRAM OF CRT F7341N0 00 Version 1 I H G F E D C B A 2 3 4 5 6 7 ...
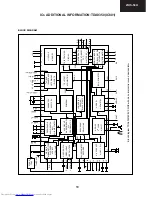
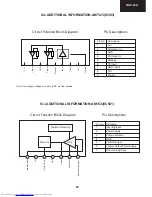
Page 32: ...32 21HS 50H CRT UNIT BLOCK DIAGRAM 1 I H G F E D C B A 2 3 4 5 6 7 ...
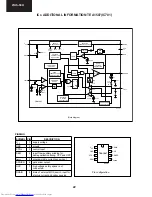
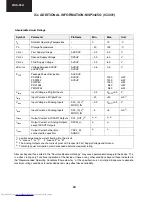
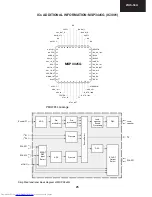
Page 33: ...33 21HS 50H MOTHER UNIT BLOCK DIAGRAM 1 I H G F E D C B A 2 3 4 5 6 7 ...
Page 43: ...43 21HS 50H NOTES ...