INSTALLATION
The easiest way to mount it is in a tilted position on the rear part of the quad bike.
ATTENTION: CAREFULLY SECURE ALL FASTENERS TO ENSURE SAFETY
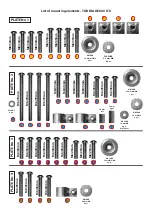
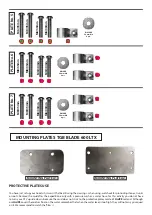
The manual provides a view of the placement of elements helping to localize fasteners and the use of individual connecting
elements.
Start the assembly sequence with the front plate
[1]
and the fastening plate
A1.
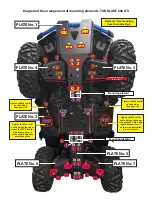
INSTALLATION OF PROTECTIVE PLATES (1, 2, 3, 4, 5, 6, 7)
[Plate no. 1]
When assembling the protective plate, do not unscrew the front metal plate that comes with your ATV. Start from
tightening the M6 screws
(points marked with red circles on the diagram)
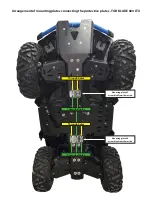
then perform the fastening with M8 screws, which
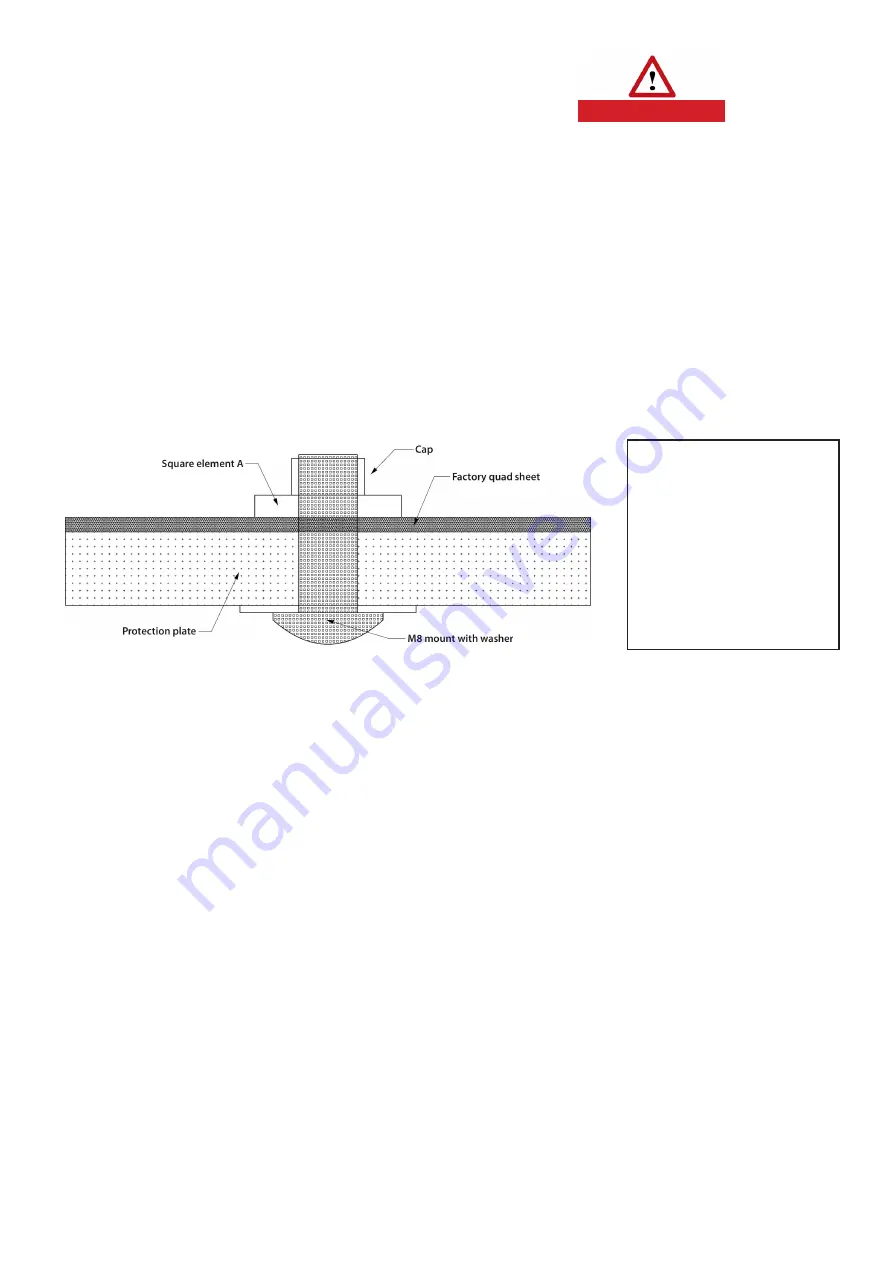
screw is marked in yellow on the diagram as screw no. 1 with square elements A (Fig. 3). Scheme 1+A. The last step is screwing
the connecting plate
A1
.
The mounting plate is installed between the screwed-on plastic cover and the quad’s chassis.
[Plate no. 2]
Place the washers on the screws. Screw in from above through the outer feet of the leg space. Install two hooks
and screw 2-3 threads into the center protection plate, the hooks will hold the plate on the quad frame. Install the plate on the
screws located in the leg space. Put washers on the bolts, then the nuts
B
twisting with your fingers. Attach the tabs through
the square holes to the frame tubes, tighten, so that the tabs do not fall out. Then adjust the position of the plate, place
the mounting plate
A2
and tighten it.
NOTE
Place the distance sleeves
C
on the bolt behind the protective plate
(points marked
with red circles in the diagram).
[Plate no. 3]
Place the back protection plate over the appropriate holes and install the screws with washers. Before tightening
the bolts, set the rear protection plate to the correct position and then fully tighten all 9 bolts.
[Plate no. 4 and 5]
First, put the cover and install the hooks (orientation on the diagram) to the
front rocker arms
covers,
do not fully tighten the screws, center the cover on the appropriate holes and tighten the screws, not forgetting the washers :-).
Position the cover and tighten the screws. Make a double check, if there is no contact between the wheel and the guard
by turning your steering wheel completely right and left, in the event of a contact, make the proper adjustment of the guard by
moving it to the correct position. Also check, if there is sufficient space between the
front protection plate
and the rocker arm
covers to avoid contact in the event of complete compression of the suspension.
[Plate no. 6 and 7]
First, put the cover and install the hooks (orientation on the diagram) to the
rear rocker arms
covers,
do not fully tighten the screws, center the cover on the appropriate holes and tighten the screws, not forgetting the washers :-).
Position the cover and tighten the screws. Make a check that there is no contact between the wheel and the guard by turning
your steering wheel completely right and left, in the event of a contact, make the proper adjustment of the guard by moving it
to the correct position. Also check that there is adequate space between the rear protective plate and the rocker arm covers to
avoid contact in the event of complete compression of the suspension.
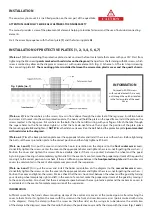
INFORMATION
Sufficient space for the hands allows mounting clamps of the control arm covers at the marked points after attaching the
cover to them. To do this, tighten the cover with the screws on the front and rear transverse arms (points marked with circles
in the diagram). Clamp the clamp (without the screw on the other side) on the swing arm tube (observe the orientation
of the clamps in the diagram), move the thread to the hole in the protective cover and fix the clamp with the screw (
Fig. 1 and 2
).
Fig. 3 plate [no. 1]
INFORMATION
Fastened with M8 screws
with square elements A we carry
out through the notches located
in the factory plate of the quad
cover
CAUTION


