7
8
www.sharkclean.eu
www.sharkclean.eu
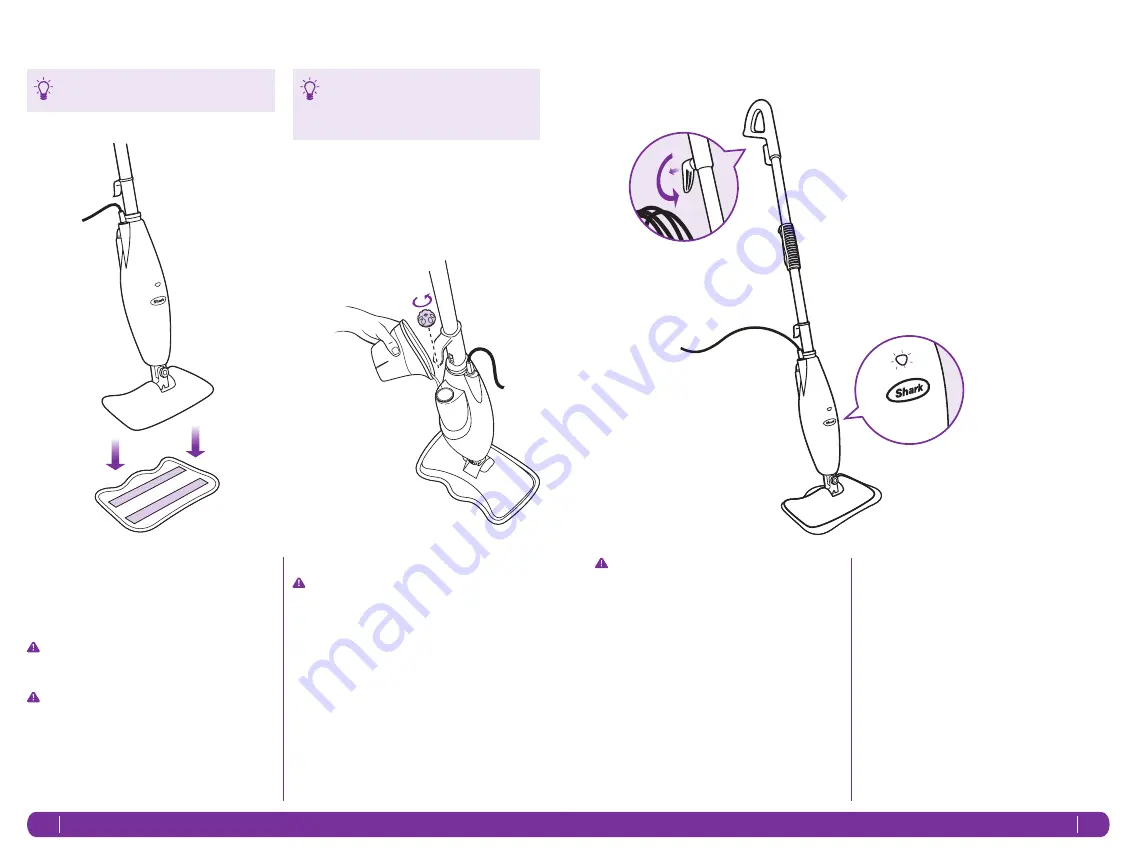
ATTACHING THE MICROFIBRE PAD
1
Place the microfibre cleaning pad on the floor with
the quick fastener strips facing up. Place the Light
& Easy
™
Steam Mop on the top of the pad to attach.
(fig. 4)
IMPORTANT: Only add water to the tank.
Chemicals or cleaning solutions may be
unsafe or cause damage.
IMPORTANT: Please wait 3-5 minutes for your
Light & Easy
™
Steam Mop to cool off before
removing the microfibre pad.
Getting Started
FILLING THE WATER TANK
IMPORTANT: Unplug the Light & Easy
™
Steam
Mop before filling the water tank with water.
1
Remove the water tank cap by turning it counter-
clockwise to the unlocked position.
(fig. 5)
2
A filling flask is included with your Light & Easy
™
Steam Mop to make filling the water tank easy. Fill
the flask with water and pour it into the tank. Keep
the water level under the MAX’ fill line.
3
Replace the water tank cap and turn it clockwise to
the locked position.
fig. 4
fig. 5
Your microfibre cleaning pads should be replaced
every 3 months to maximize cleaning performance.
Calcium and mineral deposits can build up and
impact the performance of your steam mop
over time. To extend the life of your product we
recommend that you use distilled water.
IMPORTANT: Your steam mop needs water
to make steam! Never use your steam mop
without water in the tank.
Sweep or vacuum your floors prior to cleaning with
your Light & Easy
™
Steam Mop.
Using Your Light & Easy
™
Steam Mop
1
Pull and twist the quick release cord holder to
unwrap the power cord completely.
(fig. 6)
Plug into
a 220-240 volt electrical outlet.
The “On” light will
turn blue. If the light does not turn on, reference the
troubleshooting section on page 12.
(fig. 7)
When you use your steam mop for the first time or
if you have not used the unit in awhile, it may take a
minute or two for the water to travel through the pump
and into the heater to create steam. Get it started by
pumping the handle a few times. If you have waited a few
minutes and you still do not see any steam, reference the
troubleshooting section on page 12.
fig. 6
fig. 7


