


3
2
Table of Contents
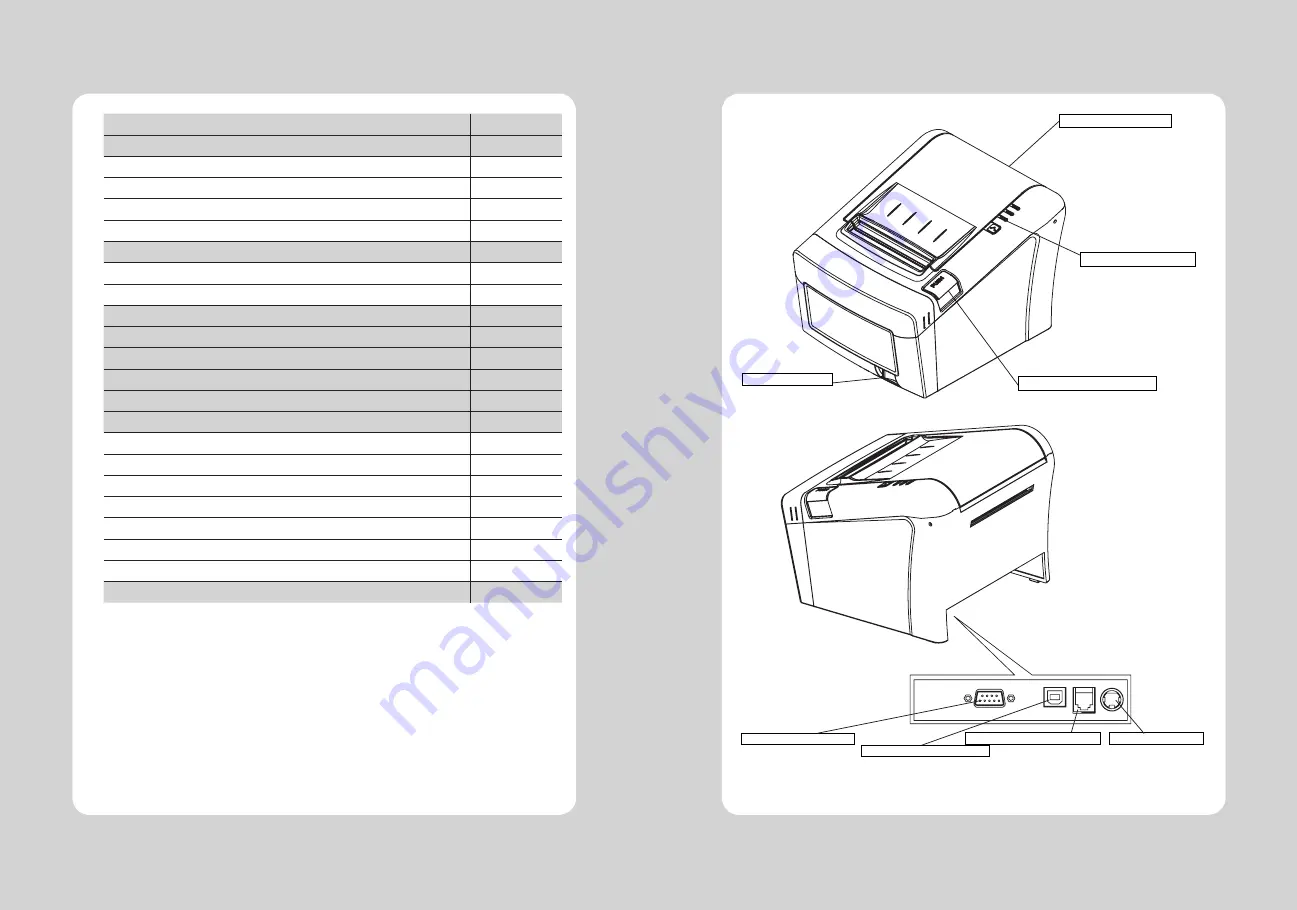
1. Parts Identifications
PRINTER COVER
POWER SWITCH
CONTROL PANEL
COVER OPEN PUSH BUTTON
INTERFACE CONNECTOR
PERIPHERAL DRIVE CONNECTOR
POWER CONNECTOR
INTERFACE CONNECTOR (USB)
Open this cover to load or
replace a paper.
Used to turn on/off
power to the printer.
Features LED indicators
to indicate printer status
and switches to operate
the printer.
Push down this button to
open the printer cover.
1. Parts Identifications
3
2. Setting up the printer
4
2.1 Unpacking
4
2.2 Connecting the cables
5
2.3 Loading the roll paper
8
2.4 Adjustment of paper width
11
3. Control panel and other functions
12
3.1 Control panel
12
3.2 Error Indicating
12
4. Self Test
13
5. ASCII Print
14
6. Select Baudrate Mode
14
7. Hexadecimal Dump
15
8. Printer cleaning
16
9. Specifications
17
9.1. General Specifications
17
9.2. Auto Cutter Specifications
19
9.3. Interface
19
9.4. Electrical Characteristics
19
9.5. Environmental Requirements
20
9.6. Reliability
20
9.7. Certification
20
10. Command List
21


