background image

6

3. How to use the menu

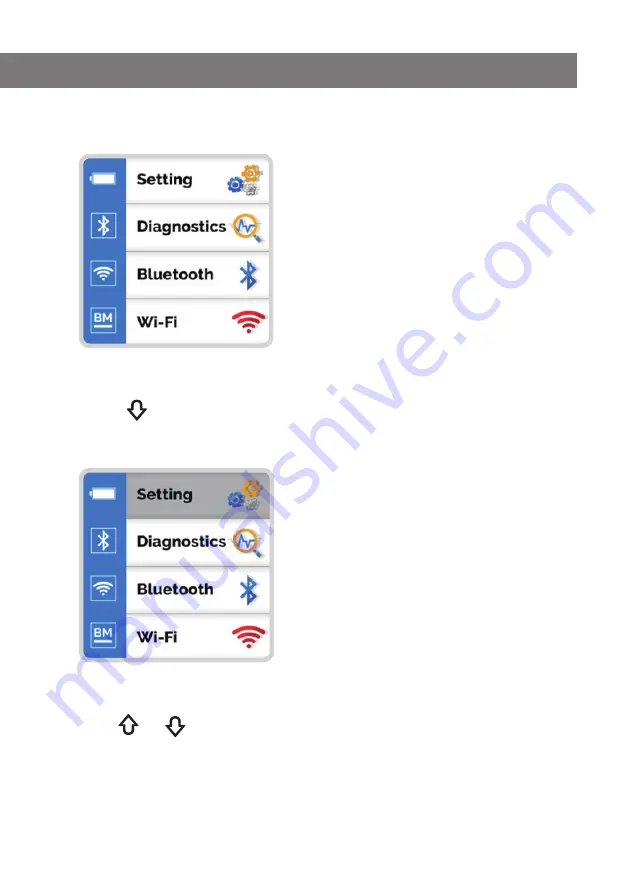
The main menu consists of 4 items, 

" Setting / Diagnostics / Bluetooth / Wi-Fi "

,  

as shown in the figure below. 

Press the 

 button to enter the main menu.


-

When entering the main menu, a gray toolbar is located in the 

"Setting"

 menu item.

Use the 

 and 

 buttons to move up and down the menu.

Summary of Contents for LK-P400

Page 1: ...LCD MANUAL Aroot Co Ltd Rev A 06 2020 Mobile Printer LCD Manual Model LK P400 The manual and product are protected by copyright...

Page 2: ...Setting paper Error status display 5 3 How to use the menu 6 4 Menu OSD Configuration and Description 8 Language Media type menu 8 Printer menu Left margin Top margin TOF margin Tone detailed setting...

Page 3: ...function When entering the LCD menu it switches to the normal mode UP button Scroll up the LCD menu tree Menu entry button DOWN button Enter the LCD main menu Scroll down the LCD menu tree FEED ENTER...

Page 4: ...con Description 100 charged 80 charged 50 charged 20 charged 10 charged 0 requires charging 2 Bluetooth Wi Fi status display Bluetooth Icon Description Bluetooth is connected Active Disabled Wi Fi Ico...

Page 5: ...lack marks on the printed surface Paper with black marks on the reverse side of the print Gap label paper Continuous paper 4 Error status display Icon Description There is no paper The set paper and a...

Page 6: ...of 4 items Setting Diagnostics Bluetooth Wi Fi as shown in the figure below 2 Press the button to enter the main menu When entering the main menu a gray toolbar is located in the Setting menu item 3...

Page 7: ...menu of the selected menu 5 The figure below is a typical detailed menu example Use the and buttons to specify the desired settings and press the button to set them to the specified values NOTE Press...

Page 8: ...ge DisplayLanguage Emulation Codepage OSD Description Print Language Select print language Display Language Select LCD display language English Italian French German Spanish Portuguese Chinese Polish...

Page 9: ...9 2 Media type menu Language Media Printer Exit OSD Description Media Select paper sensing Continuous Black mark Gap 4 Menu OSD Configuration and Description...

Page 10: ...ess or to change the cursor position Setting range is 127 to 127 3 Press the button to move the cursor to the position to change 4 When the cursor is positioned to the far right Press the button once...

Page 11: ...before printing Cover Setting Sets the function upon closing the cover Automatic alignment Reprint None Printing Speed Sets the max print speed 0 to 10 Level Overwrite Sets what happens when the prin...

Page 12: ...Displays the ADC value of the sensor located on the printing surface 5 Printer menu SensorCheck Print Exit Print Info Pattern Calibration OSD Description Printer Info This is the Self Test and prints...

Page 13: ...information Device Name Change the Bluetooth device name Pincode Change Change the pincode Discoverable Enable disable Bluetooth discoverable mode MITM Enable disable Numeric comparison Auto Connecti...

Page 14: ...the cursor position Setting range is 0 to 9 a to z A to Z 3 Press the button to move the cursor to the position to change 4 When the cursor is positioned to the far right Press the button once and th...

Page 15: ...When entering the menu the initial value is always 0000 Current set value 2 If you press or a bar shaped cursor appears at the bottom of the changeable position as shown below Active cursor Press or...

Page 16: ...cursor disappears Press the button twice to save the settings Press the button once and press the or button to move the cursor to the initial position The set value is displayed as 0000 when re enter...

Page 17: ...17 7 Wi Fi menu Wi Fi Info WPS OSD Description Wi Fi Info Print Wi Fi information WPS This is an automatic connection function 4 Menu OSD Configuration and Description...

Page 18: ...28 6 Gajangsaneopdong Road Osan City Gyeonggi Province South Korea T 82 31 8077 5000 F 82 31 459 8880 www miniprinter com Aroot Co Ltd...

Reviews: