background image

shaving head should have maximum
contact with the skin.

Trimming longer hair 

- Fit one of the push-on combs onto the

trimming head;  you may also trim the
hair over a normal comb.

- Adjust the push-on comb to the desired

length. We recommend, however, that
you start with a larger setting, as this will
help you to get a feel for cutting the hair
to the desired length.

- Use the On/Off switch to turn the

appliance on.

- Place the push-on comb with the head

against the skin. 

- Move the appliance against the natural

growth of the hair with the tips of the
comb leading. 

- For a shaped cut, reverse the appliance

and shorten the hair from top to bottom
without a push-on comb. 

General care and cleaning

Before cleaning the appliance, ensure it is
disconnected from the power supply and
has cooled down.

To avoid the risk of electric shock, do not
clean the charging base with water and
do not immerse it.

Do not use abrasives or harsh cleaning
solutions. 

- The head can be taken off for cleaning by

gently pushing it off the main unit by its
blades. The head may be cleaned with a
suitable brush or under running water,
but without the use of detergent. 

After cleaning, and also after the
appliance has been used for approx. 20
minutes, put a drop of acid-free oil
between the trimming comb and the
trimming blade (see picture I), and then
switch the appliance on briefly to ensure
that the oil is evenly distributed. Regular
oiling guarantees good cutting
performance over a long period and thus
a long service life.

- The charging base and the main housing

may be cleaned with a slightly damp
cloth.

Disposal of battery pack 

This appliance contains a nickel-
cadmium (Ni-Cd) rechargeable battery
pack, which may be removed for
disposal. To remove, loosen the screws in
the housing with a suitable small screw-
driver. Separate the two housing
elements, cut the connecting wires one by
one and remove the battery pack.

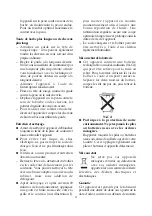
Ni-Cd

Remember to protect the environment.
Never dispose of old battery packs in
domestic garbage.

Old battery packs must be disposed of
through the proper public collection
points. This also applies to the battery
packs of defective appliances.

Disposal

Do not dispose of old or defective
appliances in domestic garbage;
this should only be done through
public collection points.

Guarantee

This product is guaranteed against defects in
materials and workmanship for a period of
two years from the date of purchase. Under
this guarantee the manufacturer undertakes
to repair or replace any parts found to be
defective, providing the product is returned
to one of our authorised service centres. This
guarantee is only valid if the appliance has
been used in accordance with the
instructions, and provided that it has not
been modified, repaired or interfered with
by any unauthorised person, or damaged
through misuse.

7

Summary of Contents for HS-7819

Page 1: ...para cortar el pelo Tagliacapelli ricaricabile Opladelig h rklipper Laddningsbar h rtrimmer Ladattava hiustenleikkuri kotiparturi Bezprzewodowa maszynka do strzy enia Manuale d uso Instrucciones de u...

Page 2: ...10 11 12 13 14 15 16 17 18 1 2 3 4 5 6 7 8 9...

Page 3: ...darf das Ger t nicht benutzt werden Lassen Sie das Ger t w hrend dem Betrieb niemals unbeaufsichtigt ACHTUNG Das Schermesser ist scharf Verletzungsgefahr Beachten Sie dass das Schermesser beim Haarsc...

Page 4: ...ose ziehen anschlie end den Anschlussstecker aus dem Ger t oder der Ladestation ziehen W hrend des Ladevorganges kann sich der im Netzteil befindliche Trafo erw rmen Dies ist ein normaler Vorgang und...

Page 5: ...nn mit einem Reinigungspinsel oder unter flie endem klarem Wasser ohne Reinigungsmittel gereinigt werden Nach der Reinigung sp testens nach 20 Betriebsminuten einige Tropfen s urefreies l zwischen Sch...

Page 6: ...sen Von der Garantie ausgenommen sind Sch den die auf Nichtbeachtung der Gebrauchsanweisung unsachgem e Behandlung oder normalen Verschlei zur ckzuf hren sind ebenso leicht zerbrechliche Teile wie z B...

Page 7: ...e in use CAUTION the trimming blade is extremely sharp to prevent injuries ensure at all times during use that the blade does not touch the skin Switch off and remove the plug from the wall socket in...

Page 8: ...former within the adapter will become warm This is perfectly normal and safe and does not indicate a malfunction of any kind If the appliance has not been used for a long period of time the capacity o...

Page 9: ...e I and then switch the appliance on briefly to ensure that the oil is evenly distributed Regular oiling guarantees good cutting performance over a long period and thus a long service life The chargin...

Page 10: ...such as glass and ceramic items bulbs etc If the product fails to operate and needs to be returned pack it carefully enclosing your name and address and the reason for return If within the guarantee p...

Page 11: ...e cordon pour vous assurer de son parfait tat Ne pas utiliser l appareil si le cordon est endommag Ne jamais faire fonctionner l appareil sans surveillance ATTENTION le couteau est extr mement ac r Po...

Page 12: ...rale avant de d brancher la fiche du bo tier de la tondeuse ou du socle Pendant la charge le transformateur de l adaptateur chauffe Ceci est absolument normal et sans danger et n indique aucun dysfonc...

Page 13: ...us pouvez nettoyer la t te avec une brosse adapt e ou sous l eau du robinet mais sans addition de d tergeant Apr s nettoyage et apr s environ 20 minutes de fonctionnement appliquez une goutte d huile...

Page 14: ...mploi Aucune garantie ne sera due si l appareil a fait l objet d une intervention titre de r paration ou d entretien par des personnes non agr es par nous m mes Si votre appareil ne fonctionne plus no...

Page 15: ...g op eventuele beschadiging worden gecontroleerd Wanneer een beschadiging wordt geconstateerd mag het apparaat niet meer worden gebruikt Laat dit apparaat nooit onbeheerd achter LET WEL het scheermes...

Page 16: ...olang de oplaadbasis aan het stroomnet is aangesloten Het oplaadproces start alleen als het apparaat is uitgeschakeld Als het oplaadproces gereed is moet eerst de adapter uit het stopcontact verwijder...

Page 17: ...choonmaken en deze nooit onderdompelen Gebruik geen schuurmiddel of bijtende schoonmaakprodukten De scheerkop kan verwijdert worden om schoon te maken door het voorzichtig bij de messen van de hoofdee...

Page 18: ...ing Voor dit apparaat geldt een garantie van twee jaar na de aankoopdatum voor materiaal en fabrieksfouten Uitgesloten van garantie is schade die ontstaan is door het niet in acht nemen van de gebruik...

Page 19: ...o El cable el ctrico deber a examinarse con regularidad para detectar cualquier da o Si descubre que el cable est da ado no debe utilizar el aparato No deje el aparato sin vigilar durante su funcionam...

Page 20: ...encendido durante todo el tiempo que la base de carga est conectada al suministro el ctrico El proceso de carga s lo se inicia si el aparato est apagado Cuando el proceso de carga haya concluido desen...

Page 21: ...sin acoplar un peine accesorio Limpieza y mantenimiento general Siempre desenchufe el aparato de la pared y espere a que se enfrie suficientemente antes de limpiarlo Para evitar el riesgo de sufrir u...

Page 22: ...st garantizado por un per odo de dos a os contado a partir de la fecha de compra contra cualquier defecto en materiales o mano de obra Esta garant a s lo es v lida si el aparato ha sido utilizado sigu...

Page 23: ...to dell apparecchio Controllate con regolarit che sul cavo di alimentazione non ci siano tracce di deterioramento Nell eventualit che tali tracce siano rinvenute l apparecchio non va pi usato Non lasc...

Page 24: ...to alla rete elettrica dello zoccolo di carica Il processo di carica ha inizio solo ad apparecchio spento Al completamento del processo di carica dovete sempre disinserite prima l adattatore dalla pre...

Page 25: ...ficientemente Per evitare il rischio di scosse elettriche non pulite lo zoccolo di carica con acqua e non immergetelo in acqua Non usate soluzioni abrasive o detergenti concentrati Per pulire la testi...

Page 26: ...bblici Dichiarazione di garanzia La garanzia sui nostri prodotti ha validit di 2 anni dalla data di vendita certificata da scontrino fiscale e comprende gli eventuali difetti del materiale o di partic...

Page 27: ...SEL Klippekniven er meget skarp for at undg skader skal man hele tiden s rge for at kniven ikke kommer i kontakt med huden under brug Sluk altid for apparatet og tag stikket ud af stikkontakten hvis d...

Page 28: ...re nedsat Fuld kapacitet vil imidlertid atter opn s efter yderligere op og afladninger Anvendelse F r brug P s tning og aftagning af trimmehovedet P s tning N r trimmehovedet skal s ttes p f res meta...

Page 29: ...I hvorefter apparatet t ndes kortvarigt for at sikre at olien er j vnt fordelt J vnlig sm ring sikrer gode klippeegenskaber i tiden fremover og derved ogs lang holdbarhed Opladeren og selve h rklipper...

Page 30: ...te kommer i kontakt med huden n r apparaten r i anv ndning St ng alltid av apparaten och dra stickproppen ur v gguttaget om fel skulle uppst under anv ndningen f re reng ring Tag stickproppen ur v ggu...

Page 31: ...Full kapacitet uppn s emellertid efter flera upp och urladdningar Anv ndning Innan du s tter ig ng S monterar du p och tar bort trimhuvudet Montering F r att montera trimhuvudet p plats s tter du met...

Page 32: ...ljan skall bli j mnt f rdelad Regelbunden oljning garanterar god klippf rm ga i l nga perioder och s ledes f r trimmern l ngre servicelivstid Laddningssockeln och h ljet kan reng ras med en l tt fukta...

Page 33: ...varmistamalla ettei ter kosketa ihoa k yt n aikana Irrota pistotulppa pistorasiasta aina jos laitteessa on toimintah iri ennen laitteen puhdistamista Kun irrotat pistokkeen pistorasiasta l ved liit n...

Page 34: ...llitappi p laitteen vastaavaan reik n Paina sitten p t kunnes se loksahtaa kuultavasti paikalleen Irrottaminen P irrotetaan ty nt m ll se ulos p laitteesta Leikkauspituuden s t minen Ty nt m ll kiinni...

Page 35: ...ll Akun h vitt minen Laitteessa on ladattava nikkelikadmiumakku Ni Cd jonka voi irrottaa ja h vitt Se irrotetaan avaamalla ensin kaksi kotelossa olevaa ruuvia sopivalla ruuvimeisselill Irrota sitten k...

Page 36: ...ujemny wp yw na jego dzia anie i bezpiecze stwo u ytkownika Nale y regularnie sprawdza czy przew d zasilaj cy nie jest uszkodzony W przypadku jakiegokolwiek uszkodzenia przewodu nale y natychmiast za...

Page 37: ...pozostaje zapalony tak d ugo jak d ugo jest pod czona do pr du podstawka aduj ca Proces adowania odbywa si jedynie wtedy kiedy urz dzenie jest wy czone Po zako czeniu adowania najpierw nale y wyj zas...

Page 38: ...ani rodk w cieraj cych G owic mo na zdj w celu wyczyszczenia delikatnie wypychaj c j z obudowy od strony ostrzy G owic mo na czy ci odpowiedni szczoteczk lub pod bie c wod ale bez adnego detergentu P...

Page 39: ...odstawie i wed ug warunk w karty gwarancyjnej wydanej przez wy cznego przedstawiciela SEVERIN w Polsce GAMMA Kluczbork Obs ug gwarancyjn i pogwarancyjn zapewnia autoryzowana sie serwisowa na terenie c...

Page 40: ...1 2 3 4 5 6 7 8 9 10 11 12 1 13 2 14 15 16 17 18 38...

Page 41: ...12 10 14 2 39...

Page 42: ...1 2 1 4 24 2 7 27 3 9 29 4 12 32 5 15 35 6 17 37 7 20 40 On Off On Off 20 I K 40...

Page 43: ...Ni Cd Ni Cd 41...

Page 44: ...1 2 3 4 5 6 7 8 9 10 11 12 1 13 2 14 15 16 17 18 42 RUS...

Page 45: ...12 10 43...

Page 46: ...14 1 2 1 4 24 2 7 27 3 9 29 4 12 32 5 15 35 6 17 37 7 20 40 0 3 4 0 44...

Page 47: ...20 I Ni Cd Ni Cd 0 0 6 Severin 2 45...

Reviews: