


Page 13
Connecting to the Print Server
1.
Start your Web Browser.
2.
In the
Address
box, enter
HTTP://
followed by the IP Address of the Print Server.
e.g.
http://192.168.0.100
3.
You will then be prompted for the password. If no password has been set, just press E
NTER
.
4.
Use the menu bar to move from one screen to another. Remember to save each screen
before changing to a different screen.
Configuration Screens
The following configuration screens are available.
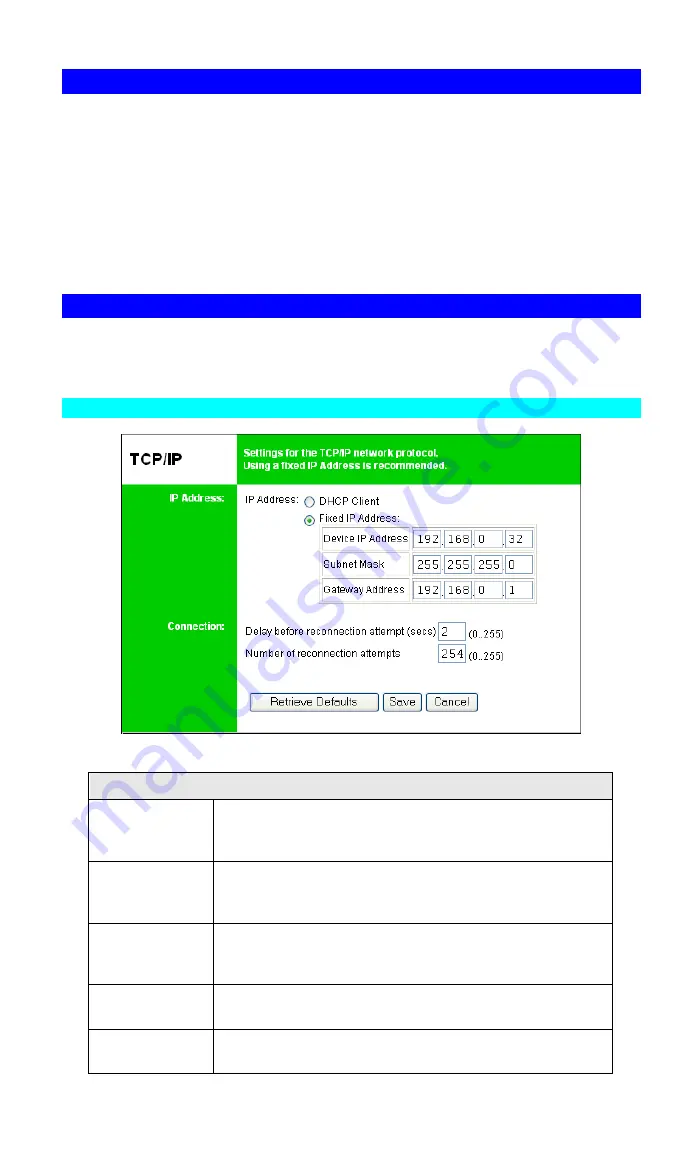
TCP/IP
Figure 9: TCP/IP Screen
IP Address
DHCP Client
Select this if your LAN has a DHCP Server.
The Print Server will then automatically obtain an IP address
from the DHCP Server.
Fixed IP
Address
Select this to assign a fixed IP address to the Print Server. If
selected, you must enter a the Device IP Address, Subnet
Mask, and Gateway.
Device IP
Address
IP Address assigned to the Print Server.
Enter an unused IP address from the address range used on
your LAN.
Subnet Mask
Use the same values as PCs on your LAN (or on the same LAN
segment, if you have a Router).
Gateway
Address
Use the same values as PCs on your LAN (or on the same LAN
segment, if you have a Router).