2
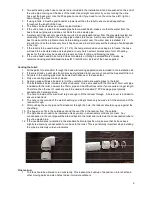
2. Two self-sealing urine hose connectors are included in the installation kit and are pushed on the end of
the urine pipe coming out the back of the toilet. Use straight connector if you are running the urine
hose out the back wall. Use the 90 degree connector if you need to run the urine hose left, right or
down through the floor.
3. If using a tank, it must be positioned at a lower level than the toilet to ensure an adequate flow
throughout the length of the hose.
4. The urine can be used as an excellent plant fertilizer.
5. If the urine hose is joined to the waste pipe below a wash basin, make sure that the water from the
basin flows out properly and does not block the urine waste pipe.
6. A water seal (trap) will only need to be required if an unpleasant odour from the greywater system are
emanating from the toilet or the venting pipe outside the house. As this very seldom happens, it is
best to wait until the problem occurs before adding a water seal. If a water seal is installed, it is
important to rinse the toilet every time it has been used in order to prevent the build-up of salt deposits
in the trap.
7. If the toilet is to be used below -6°C (21.2°F), the temperature when urine begins to freeze, the hose
will need to be insulated and on steep grade. In very harsh winter climates some form of heating
device for the pipe may be needed to prevent ice from forming and blocking the pipe.
8. If the urine hose needs to be routed close to radiators or through insulated floors or walls, we
recommend using standard plastic pipes (Ø 1-inch/32 mm) instead of the hose supplied.
Venting the toilet:
1. All the parts for a standard, through the back wall venting application are included in the installation kit.
2. If there is already a vent pipe from a previously installed toilet, you may connect the Separett Villa to it.
3. All joints in the venting pipe must be sealed with silicone or the equivalent.
4. Only use venting pipes made of plastic.
5. Applying soap will make it easier to join the ventilation and urine waste pipes to the toilet.
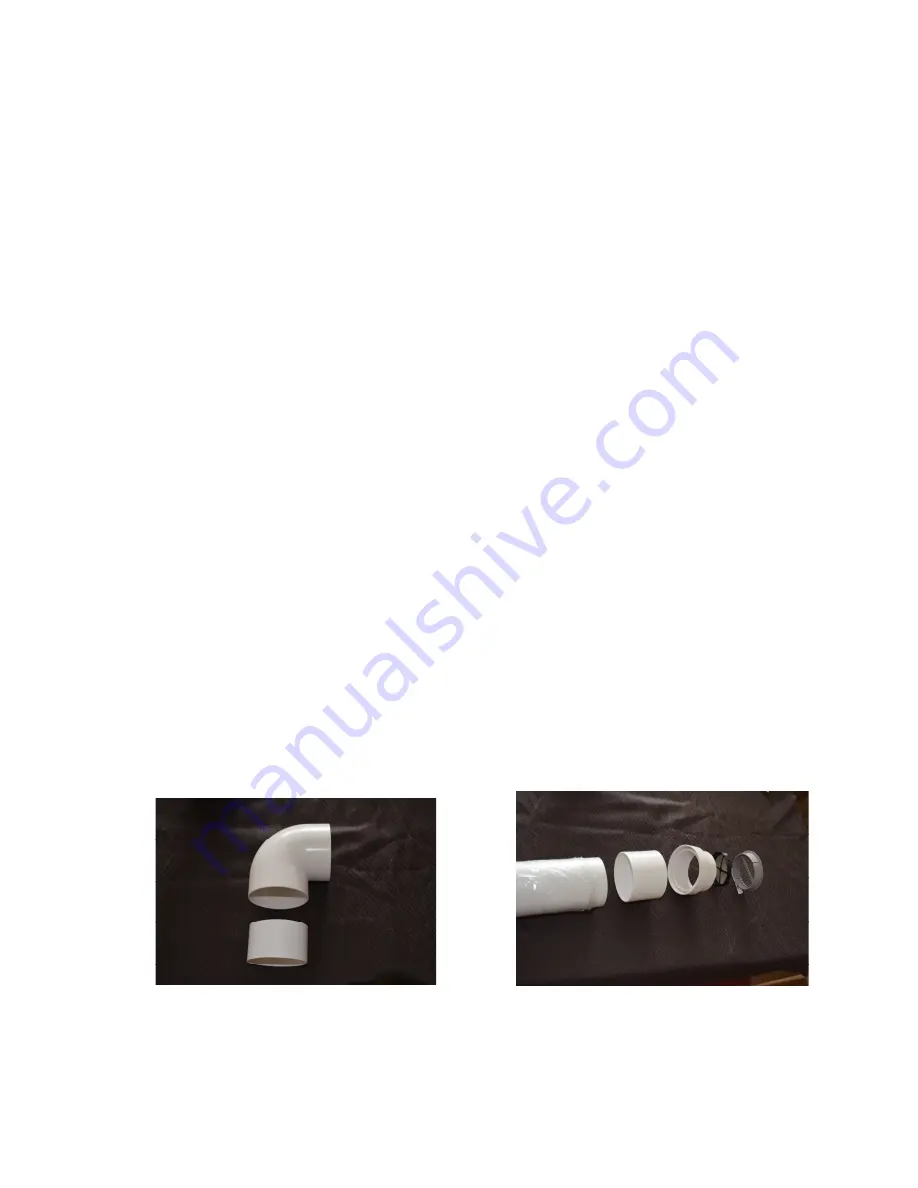
6. The installation kit also includes 2 sets of reducers. One set is used with the thin wall 75mm vent pipe
included with the toilet, however the 75mm pipe can be difficult to source if you require a longer length.
Therefore, the other set of reducers are to be used with standard 3” PVC sewage pipe typically
available at a hardware store.
7. The hole on inside of the wall must large enough to fit the reducer through. A hole cover is included to
ensure a neat look.
8. The hole on the outside of the wall (sheathing or siding) should only be made to fit the small end of the
reducer through.
9. After pushing the vent pipe and final reducer through the hole, the reducer should snug up against the
sheathing.
10. The bug screen fits in the outside vent and the vent fits in the reducer from the outside.
11. The pipe does not need to be insulated unless you are in an extremely cold environment. Any
condensation in the vent pipe will be drained back to the toilet and routed via the condensation tube to
the urine waste pipe.
12. If the ventilation pipe is installed in the standard horizontal position, make sure that it slopes back
slightly to allow any condensation to run back to the toilet. This is particularly important when installing
the pipe in extremely cold environments.
Final set-up:
1. The fan should be allowed to run constantly. This lessens the build-up of deposits on rotor shaft and
other moving parts and also helps to divert moisture outdoors.


