Basic Setup and Device Connections
15
Doc 01-G0181
Rev A
9
If during testing, the gate stops or
reverses due to entrapment, adjust
the entrapment settings (see the
SLMAX/SW2200 Programming
Manual
).
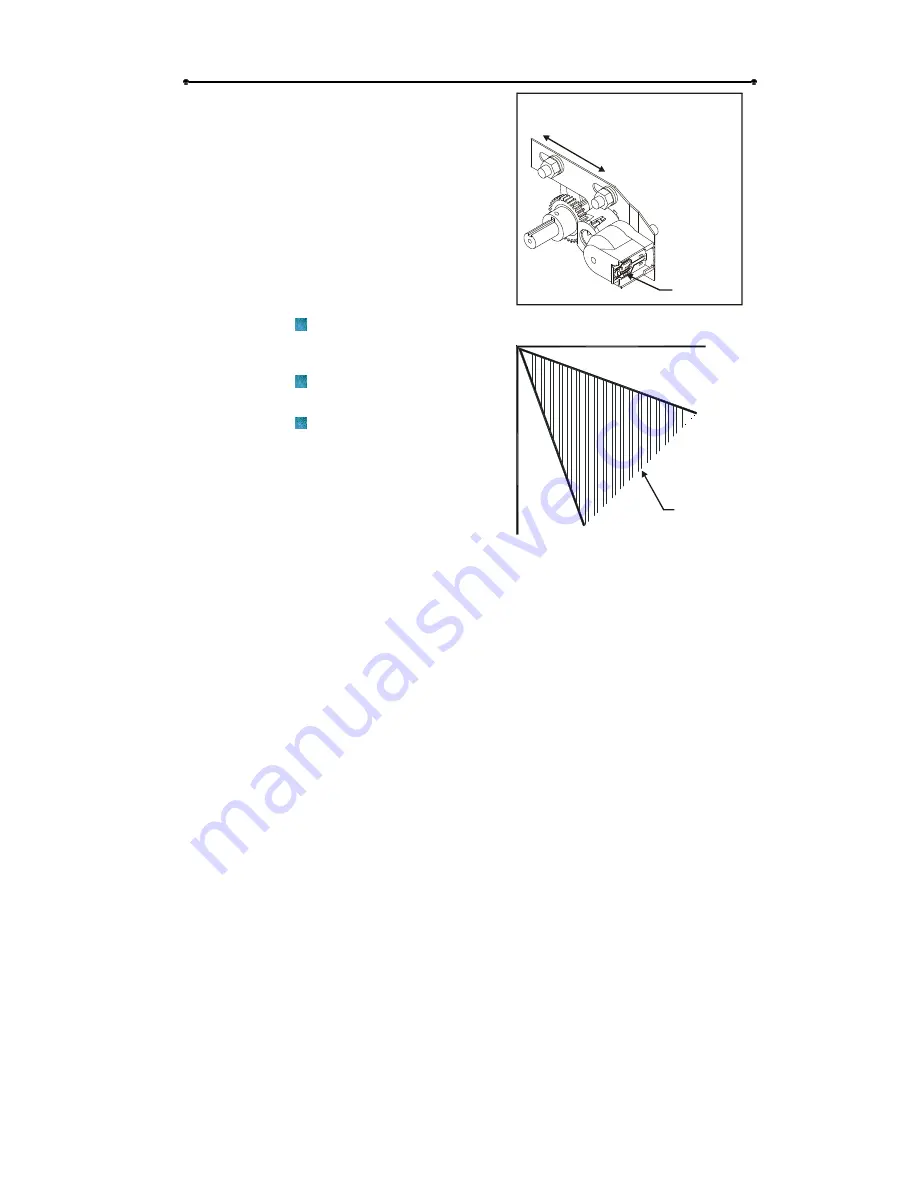
PUSH TO
ENGAGE
GEARS
PULL TO
DISENGAGE
GEARS
PASSPOINT
LED
01-G0181F17
Figure 18
10
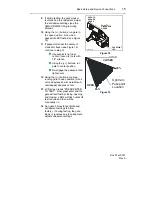
Using the {+/-} buttons, run gate to
the open position. stop when
passpoint LED flashes (see Figure
18).
11
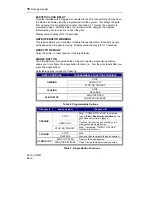
If passpoint is near the center of
crank arm travel (see Figure 19)
continue to step 12.
If passpoint is not near
center, loosen (2) nuts with
1/2” wrench.
Using the {+/-} buttons, run
gate to center position.
Re-engage the passpoint and
tighten nuts.
12
Using the {+/-} buttons, continue
running gate to open position (crank
arm and extension arm parallel and
overlapped) and press enter.
13
LCD screen reads "PRESS ENTER
TO TEST". Now press enter and the
gate will self test by closing, opening
and closing. LED’s will flash until self
test is done and then will be
continually on.
Optimum
Passpoint
Location
CLOSED
OPEN
80%
20%
01-G0181F18
Figure 19
14
Run gate 5 times to test limits and
entrapment settings (25 from
factory). If during testing, the gate
stops or reverses due to entrapment,
adjust entrapment settings.


