background image

32

SET 820 S

English

Changing the transmission channel

To avoid interference caused by 
the simultaneous operation of se-
veral transmitters, select a diffe-
rent channel on each transmitter.
To select a channel, set the 
CHANNEL switch at the rear of 
the transmitter to the desired po-
sition. Due to restrictions on frequency usage, only two channels are 
available:
Position 1 or 3 

= channel 1

Position 2         

= channel 2

Turning the automatic compression system on

Use the COMP switch (compression) at the rear of the transmitter to turn 
the automatic compression system on. This system reproduces soft 
passages louder and decreases loud sounds. Choose the setting that 
suits your listening preferences.

Set 820 S_511981_0106_Sp7.book  Seite 32  Freitag, 9. Dezember 2005  10:27 10

Summary of Contents for Set 820s

Page 1: ...Set 820 S Bedienungsanleitung Instruction Manual Notice d emploi Set 820 S_511981_0106_Sp7 book Seite 1 Freitag 9 Dezember 2005 10 27 10 ...

Page 2: ...Set 820 S_511981_0106_Sp7 book Seite 2 Freitag 9 Dezember 2005 10 27 10 ...

Page 3: ...Deutsch 3 English 25 Français 47 Set 820 S_511981_0106_Sp7 book Seite 1 Freitag 9 Dezember 2005 10 27 10 ...

Page 4: ...Set 820 S_511981_0106_Sp7 book Seite 2 Freitag 9 Dezember 2005 10 27 10 ...

Page 5: ...or similar sound sources at the volume you choose The transmitter has a range of up to 100 m which allows you to move around freely without the constrictions of cables The system uses RF audio signals for sound transmission Set 820 S_511981_0106_Sp7 book Seite 25 Freitag 9 Dezember 2005 10 27 10 ...

Page 6: ...The Set 820 S consists of the following components and accessories Receiver RR 820 S Transmitter charging unit TR 820 Rechargeable battery BA 151 Set 820 S_511981_0106_Sp7 book Seite 26 Freitag 9 Dezember 2005 10 27 10 ...

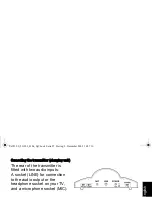
Page 7: ...it The rear of the transmitter is fitted with two audio inputs A socket LINE for connection to the audio output or the headphone socket on your TV and a microphone socket MIC Set 820 S_511981_0106_Sp7 book Seite 27 Freitag 9 Dezember 2005 10 27 10 ...

Page 8: ...r cable to the POWER socket on the transmitter Plug the power supply into a household electrical outlet Pull the power supply unit out of the electrical outlet when the unit will not be used for extended periods of time Set 820 S_511981_0106_Sp7 book Seite 28 Freitag 9 Dezember 2005 10 27 10 ...

Page 9: ...oose a suitable place near or on top of your hi fi system or TV set Do not place the transmitter close to metal objects such as shelf bars reinforced concrete walls etc Set 820 S_511981_0106_Sp7 book Seite 29 Freitag 9 Dezember 2005 10 27 10 ...

Page 10: ...tomatically as soon as a 3 5 mm stereo jack plug is insert ed into the socket at the top of the receiver Affix the receiver to the clothing by means of its integrated attachment clip Set 820 S_511981_0106_Sp7 book Seite 30 Freitag 9 Dezember 2005 10 27 10 ...

Page 11: ... volume with the operating control If you are not using the receiver pull the 3 5 mm stereo jack plug out of the receiver s socket to avoid di scharging the battery The receiver Set 820 S_511981_0106_Sp7 book Seite 31 Freitag 9 Dezember 2005 10 27 10 ...

Page 12: ...d by the simultaneous operation of se veral transmitters select a diffe rent channel on each transmitter To select a channel set the CHANNEL switch at the rear of the transmitter to the desired po Set 820 S_511981_0106_Sp7 book Seite 32 Freitag 9 Dezember 2005 10 27 10 ...

Page 13: ... ST switch to choose between mono and stereo transmission For mono TVs and when using the MKE 800 TV microphone the switch must be set to MONO MO Set 820 S_511981_0106_Sp7 book Seite 33 Freitag 9 Dezember 2005 10 27 10 ...

Page 14: ...the transmitter As soon as the receiver is turned on it au tomatically tunes itself to the first strong si gnal found normally the transmitter frequency If for some reason the selec ted channel is not the correct one e g be Set 820 S_511981_0106_Sp7 book Seite 34 Freitag 9 Dezember 2005 10 27 10 ...

Page 15: ...mitter s charging compartment with the operating control at the front Pull the 3 5 mm stereo plug out of the receiver to turn the receiver off The left LED on the transmitter must li ght up Set 820 S_511981_0106_Sp7 book Seite 35 Freitag 9 Dezember 2005 10 27 10 ...

Page 16: ...ses Sennheiser batteries can be recycled Please dispose of the batteries as special waste or return them to your specialist dealer To protect the envi ronment only dispose of totally exhausted batteries which cannot be re charged Set 820 S_511981_0106_Sp7 book Seite 36 Freitag 9 Dezember 2005 10 27 10 ...

Page 17: ...loudspeakers However if your hearing has deteriorated and you need to rely on an assitive listening system please avoid listening at high volume levels for a long time Please protect your hearing ATTENTION Danger of short circuit Set 820 S_511981_0106_Sp7 book Seite 37 Freitag 9 Dezember 2005 10 27 10 ...

Page 18: ... L 151 2 Additional receiver RR 820 S Transmitter TR 820 External microphone MKE 800 TV Induction couplers EZT 1011 Dynamic headphones HD 25 SP HZL series connecting cable Set 820 S_511981_0106_Sp7 book Seite 38 Freitag 9 Dezember 2005 10 27 10 ...

Page 19: ...ys store the spare battery in the small charging compartment at the right of the transmitter The right LED on the transmitter lights up green to show charging is taking place When char ging a battery in the small charging compartment the charging time is 10 12 hours Set 820 S_511981_0106_Sp7 book Seite 39 Freitag 9 Dezember 2005 10 27 10 ...

Page 20: ...r Set 820 S together with the MKE 800 TV microphone Fix the microphone to the loudspeaker of your TV by means of Velcro tape Connect the microphone connector to the MIC socket on the transmitter and set the transmitter s MO ST switch to MONO MO Set 820 S_511981_0106_Sp7 book Seite 40 Freitag 9 Dezember 2005 10 27 10 ...

Page 21: ...operly into the receiver Have you charged the rechargeable battery for at least 20 minutes Are you too far from the transmitter if so move closer Choose a different channel Adjust the setting with the TUNE button Should the problem persist please contact your authorized dealer for Set 820 S_511981_0106_Sp7 book Seite 41 Freitag 9 Dezember 2005 10 27 10 ...

Page 22: ...erence free reception only use the potentiometers shown below Turn the operating control fully to the left 0 Remove the operating control by carefully lifting it over the guide notch on the inside Use the 4 potentiometers on the Bass response R Bass response L Set 820 S_511981_0106_Sp7 book Seite 42 Freitag 9 Dezember 2005 10 27 10 ...

Page 23: ...ure the projections on the inside of the operating control point in the direction of the attachment clip After replacing the operating control synchronize the operating control with the volume control by once turning it fully in both directions Set 820 S_511981_0106_Sp7 book Seite 43 Freitag 9 Dezember 2005 10 27 10 ...

Page 24: ...g without battery Dimensions diameter 150 mm height 47 mm Receiver AF frequency response 40 Hz 15 kHz S N ratio 60 dB A rms Power supply 2 4 V via BA 151 battery Operating time approx 4 hours per battery Weight approx 35 g without battery Set 820 S_511981_0106_Sp7 book Seite 44 Freitag 9 Dezember 2005 10 27 10 ...

Page 25: ...her relevant provisions of Directi ves 1999 5 EC 89 336 EC or 73 23 EC The declaration is available on the internet site at www sennhei ser com Before putting the device into operation please observe the respective country specific regulations WEEE Declaration Set 820 S_511981_0106_Sp7 book Seite 45 Freitag 9 Dezember 2005 10 27 10 ...

Page 26: ...Set 820 S_511981_0106_Sp7 book Seite 2 Freitag 9 Dezember 2005 10 27 10 ...

Reviews: