background image

EN - 6

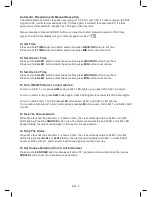
To Select Time Zone 

Press 

TIME 

and

 SNOOZE 

button together, time display changes to “01”, release

 SNOOZE 

button 

and keep pressing 

TIME 

button, then press 

MIN

 button to set time zone:


“00” = GMT + 0 hour (e.g. UK)


“01” = GMT + 1 hour (Central European time e.g. Germany)


“02” = GMT + 2 hours (Eastern European time e.g. Finland)

To Use The Hi-Lo Dimmer

Press 

SNOOZE 

button to adjust the LED brightness to a comfortable level to you in the dark.

If You Lose The Outdoor Temperature

When the outdoor temperature digits show “—“, the wireless transmission is either interrupted 
or lost. Press the 

RESET

 button of the outdoor transmitter. If you continue to lose the outdoor 

temperature display, try placing the transmitter in a different location until you have smooth 
transmission of temperature data.

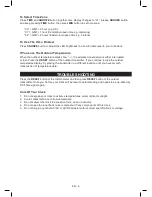
TROUBLE SHOOTING 

Press the 

RESET

 button of the thermometer and then press 

RESET 

button of the outdoor 

transmitter. Once you do this, your clock will be reset to default setting and needs to be up-dated by 
DCF time signal again.

Care Of Your Clock

1.  Do not expose your clock to extreme temperatures, water or direct sunlight. 
2.  Avoid contact with any corrosive materials.
3.  Do not subject the clock to excessive force, dust or humidity.
4.  Do not open the inner back case or tamper with any components of this clock.
5.  Do not plug in any other AC/AC or AC/DC adaptor with incorrect speci

fi

 cations or voltage.

Summary of Contents for SWS 211

Page 1: ...OR TEMPERATURE R DIEM ZEN BUD K S LED DISPLEJEM A BEZDR TOV M M EN M VNIT N VENKOVN TEPLOTY R DIOM RIADEN BUD K S LED DISPLEJOM A BEZDR TOV M MERAN M VN TORNEJ VONKAJ EJ TEPLOTY LED KIJELZ S R DI S BR...

Page 2: ......

Page 3: ...ENTAL RECEPTION EFFECTS 3 QUICK SETUP 3 TROUBLE SHOOTING 6 SPECIFICATIONS 7 INSTRUCTIONS AND INFORMATION REGARDING THE DISPOSAL OF USED PACKAGING MATERIALS 8 DISPOSAL OF USED ELECTRICAL AND ELECTRONIC...

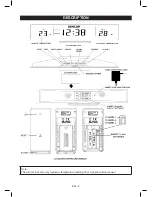
Page 4: ...EN 2 DESCRIPTION Note The alarm clock can only receive a temperature reading from a single outdoor sensor...

Page 5: ...nto the battery compartment to the back of your thermometer by observation the correct polarity sign inside the battery compartment Replace the battery cover Step 3 Keep your thermometer and wireless...

Page 6: ...oor temperature it will starts to receive DCF signal icon blinks Display shows 2 When strong DCF signal is detected display shows with 3 bars When weak or no DCF signal is detected display shows with...

Page 7: ...s MIN button to set minute To Turn ON OFF Alarm 1 or and Alarm 2 To turn on Alarm 1 only press ALM button ALM 1 LED lights up on upper left of the hour digits To turn on Alarm 2 only press ALM button...

Page 8: ...utdoor transmitter If you continue to lose the outdoor temperature display try placing the transmitter in a different location until you have smooth transmission of temperature data TROUBLE SHOOTING P...

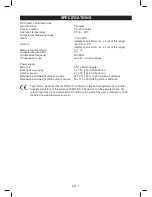
Page 9: ...m in open space Power supply Main unit 4 5V 200mA adapter Backup power supply 3 x 1 5V type AAA batteries Outdoor sensor 2 x 1 5V type AAA batteries Dimensions and weight of the main unit 285 x 75 x...

Page 10: ...ct will help save valuable natural resources and help in preventing the potential negative impact on the environment and human health which could be caused as a result of improper liquidation of waste...

Page 11: ...installation This warranty is void especially if apply as follows Defects which were put on sale Wear out or damage caused by common use The product was damaged by unprofessional or wrong installation...

Page 12: ...EN 10...

Reviews: