background image

SENAO

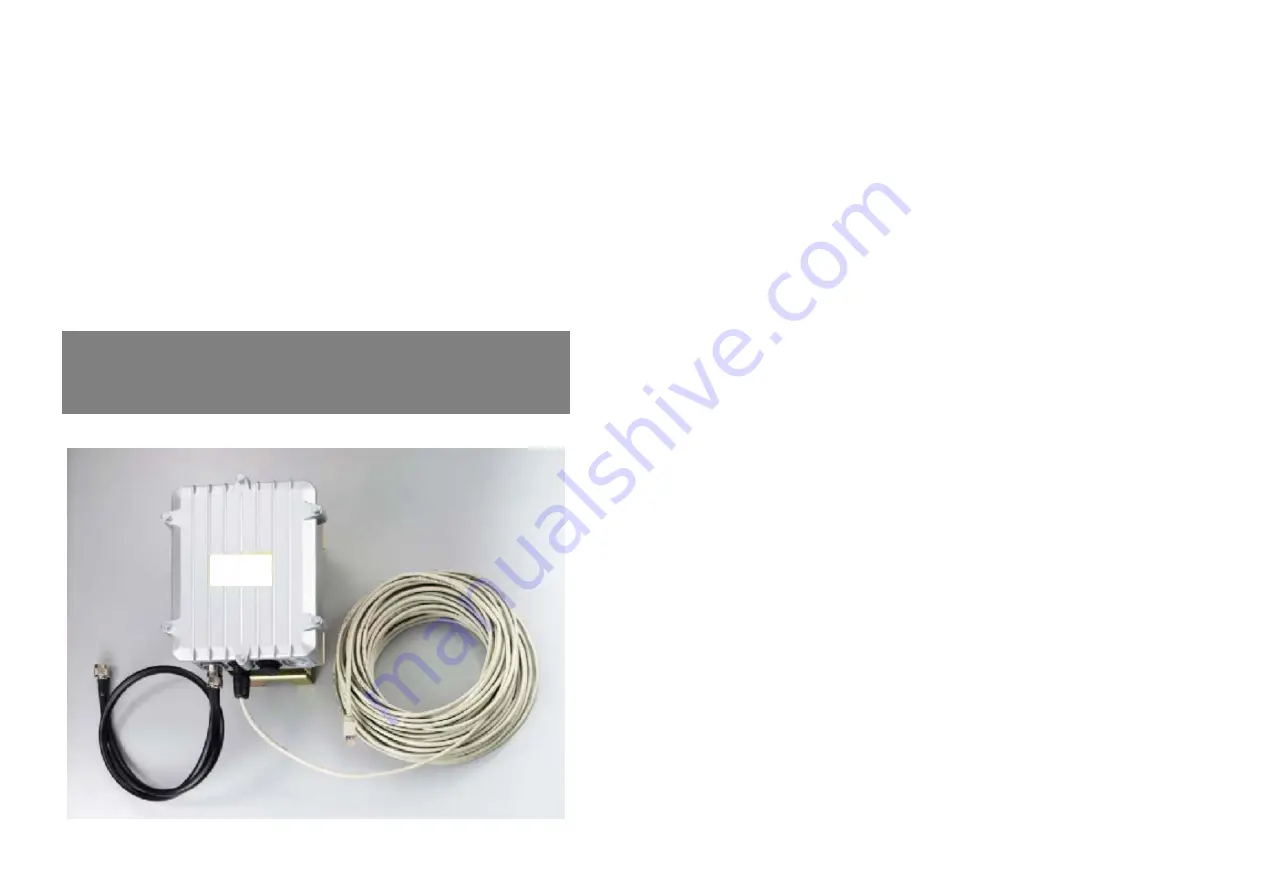
Wireless Outdoor Bridge

SL-2511BG PLUS

User’s Manual

Before operating the unit, please read this manual thoroughly, and retain it
for future reference.

Contents

Chapter 1 – Hardware Installation

Before You Start    .................................................................................... 1-1
Locate the Router/Bridge and Inline Power Injector Ports ………............ 1-2
Preparing Installation  ………....................................................….......... 1-3
Outdoor Installation      ...........................…………………………………… 1-5

Chapter 2 – Quick Setup

Configure Requirements  ........................................................................ 2-1
Configure the RB 


......…………………………….................…...….......... 2-4

Configure the RB as bridge mode Root AP 


.......................…...….......... 2-

5
Configure the RB as Root AP


with PPPoE Ethernet connection   ........ 2-11

Configure the RB as Root AP with dynamic IP address Ethernet    …..... 2-13
Configure the RB as Root AP with static IP address Ethernet    ….......... 2-15
Configure the RB as Remote Extension Bridge    ....................…...…..... 2-17

Chapter 3 – Further Configuration

Configure Requirements  ........................................................................ 3-2
Configure the RB 


......…………………………….................…...….......... 3-5

Security  ……………………………………........................…...…......…. 3-20
Configure DHCP server  …………………........................…...…......…. 3-24
Configure Virtual Server    ………………….......................…...…......…. 3-25
Configure Routing Table    …………………………….........…...…......…. 3-27
Configure Bridge    …………………………........................…...…......…. 3-28
Configure SNMP………………………………………..........…...…......…. 3-29
Configuration Review and Apply the New Settings    …………….…..…. 3-30
Utility  …………………………………….........……............…...…......…. 3-31

Chapter 4 – Command Line Interface

Appendix A – Specifications


Appendix B – Default Settings


Appendix C – Regulatory Compliance Information

Summary of Contents for SL-2511BG PLUS

Page 1: ...the RB as Root AP with PPPoE Ethernet connection 2 11 Configure the RB as Root AP with dynamic IP address Ethernet 2 13 Configure the RB as Root AP with static IP address Ethernet 2 15 Configure the R...

Page 2: ...ge 3 Reverse Polarity N Female RF Cable 4 Cross over Ethernet Cable 5 Mast Mounting Kit 6 Wall Mounting Kit 7 MIL C 5015 style RS232 Console Port Cable 8 Inline Power Injector 9 AC Power Cord 10 User...

Page 3: ...the Inline Power Injector to the Ethernet Port on a PC NOTE This connection is required for setting up initial configuration 1 4 information After configuration is completed this cable will be removed...

Page 4: ...nized or stainless steel construction pipe 1 6 b Typical diameter of the mast should be between 35 mm 1 4 in and 41 mm 1 625 in Subject to the type of antenna that you intend to install other diameter...

Page 5: ...n the Web Configure as described in the Utility section to analyze the radio link quality The Wireless Link Info will enable you to display the levels of signal strength and link quality Looking at th...

Page 6: ...nnect the Ethernet cable for connecting the RB to the network 2 2 3 Connect a computer to the same network with this RB 4 Start your Microsoft Internet Explorer web browser program from a LAN attached...

Page 7: ...2 3 Figure 2 2 Figure 2 3 2 4 Figure 2 4...

Page 8: ...eb user interface can be grouped into Quick setup Basic Configuration Advanced Configuration and Utility as shown in Figure 2 5 Figure 2 5 2 6 The left frame contains in a tree structure the contents...

Page 9: ...he bottom of this page to complete the modification of this page Figure 2 7 2 8 Step 3 Configure TCP IP parameters as shown in Figure 2 8 In this page enter the Bridge IP Address default is 192 168 2...

Page 10: ...r enable 64 128 bit WEP services default is disable if WEP is enabled you must input corresponded Default Key index and WEP Key After that click NEXT at the bottom of this page to complete the modific...

Page 11: ...face IP default is 192 168 1 1 and Wireless interface Net Mask default is 255 255 255 0 that are suitable for your wireless network and specify the Ethernet IP address default is 192 168 2 1 and Ether...

Page 12: ...ct the Ethernet connection type in Dynamic IP address DHCP Client and then click NEXT at the bottom of this page to complete the modification of this page Step 3 Configure TCP IP parameters as shown i...

Page 13: ...In this page enter the Wireless interface IP default is 192 168 1 1 and Wireless interface Net Mask default is 255 255 255 0 that are suitable for your wireless network and specify the Ethernet IP ad...

Page 14: ...and specify the Ethernet IP address default is 192 168 2 1 and Ethernet Net Mask default is 255 255 255 0 of the Ethernet interface Specify the Default Gateway Default is 192 168 2 254 as the Wireless...

Page 15: ...ion changes Hint Users may to configure correct network settings as following sample Remote Extension Bridge 1 Root AP Remote Extension Bridge 2 Wireless link Wireless link Wireless IP 192 168 1 1 SSI...

Page 16: ...ault configuration is as a bridge between an Ethernet and wireless network Users simply need to attach the RB to your wired LAN Default wireless SSID is rb8100 respectively If users would like to conf...

Page 17: ...3 3 Figure 3 2 3 4 Figure 3 3 Figure 3 4...

Page 18: ...uters to a broadband ADSL or Cable modem or an Ethernet switch to surf the Internet you need to configure the RB as a broadband wireless router to share a single IP address with the multiple wireless...

Page 19: ...this page you can click radio button and enter MODIFY to choice which one that you want to change it as shown in Figure 3 10 In interface 1 Make sure this wireless interface status is Active enter the...

Page 20: ...rs are Virtual it means that every communications through the PPPoE interface needs NAT transfer 4 The RB supports PPPoE auto dial up please make sure your default route is zero In here click Basic Co...

Page 21: ...P default is 192 168 1 1 and Wireless interface Net Mask default is 255 255 255 0 that are suitable for your wireless network In interface 2 Make sure this Ethernet interface status is Active and othe...

Page 22: ...int Make sure interface 3 and 4 within status Disable Hint In order to enable NAT service choice the Network Type in the interface Wireless and Ethernet For example make sure Ethernet interface within...

Page 23: ...is 192 168 1 1 and Wireless interface Net Mask default is 255 255 255 0 that are suitable for your wireless network and specify the Default Gateway Default is 192 168 2 254 as the Wireless IP Address...

Page 24: ...gure 3 17 This page will present the current settings of the RB to system administrator the operator can easy to view all running configuration in here After that click Save button to store the change...

Page 25: ...20 3 3 Security 3 3 1 WEP encryption 1 Click Basic Config select Wireless LAN page and configure it to disable or enable 64 128 bit WEP services default is disable as shown in Figure 3 13 2 Key in the...

Page 26: ...can specify the username password of a accessible 802 1x user All user information entries in the Local User Database are permitted to connect to the RB You can also click ADD DELETE MODIFY button to...

Page 27: ...r service 1 Click Basic Config select DHCP as shown in Figure 3 12 and Enable the DHCP server service Default is Disable 2 Specify the DHCP server parameters Assign Gateway Assign Subnet Mask Assign D...

Page 28: ...cess Port number Virtual Server IP address and Virtual Server Port Number to allow Internet user to access the Internal servers Service Name Alias name of this internal server such as FTP Access Inter...

Page 29: ...complete the modification of this page Hint The operator must to configure correct routing settings following the network infrastructure Figure 3 23 3 28 3 7 Configure Bridge 1 Click Advence Config a...

Page 30: ...ick FINISH at the bottom of this page to complete the modification of this page Figure 3 24 3 30 3 9 Configuration Review and Apply the New Settings 1 Click Basic Config or Advence Config and select t...

Page 31: ...ility select Software Upgrade page as shown in Figure 3 27 and then you can use TFTP to upgrade your RB In here you must specify the TFTP server IP and the File Name that you want to upgrade After tha...

Page 32: ...shown in Figure 3 28 and then you can view the Link Quality and the Signal Strength of this wireless connection 2 The Link Quality and the Signal Strength are valid only in the role of Extension RB In...

Page 33: ...type of Telnet is VT100 default IP address of the RB is 192 168 2 1 Then click OK as shown in Figure 4 1 Figure 4 1 2 In the Telnet window enter the User Name and User Password as shown in Figure 4 2...

Page 34: ...isable Ethernet PPP Attrib PPPoE Enable Disable Global Virtual ether_interface interface Bridge Enable Disable ISP ISP Index idle disconnect time Dial priority ISP ISP_ profile ISP name ISP destinatio...

Page 35: ...ser_edit modify 5 profile name pass_set0 delete address_pool ip_pool ip 1 127 authenticate Userpool RADIUS Userpool RADIUS assign_address Address_Pool RADIUS Address_Pool RADIUS 4 6 Figure 4 4 IP _ sh...

Page 36: ...d Dynamic lan2 _ port Filter Forward Dynamic wan 1 _ port Filter Forward Dynamic wan 2 _ port Filter Forward Dynamic add delete 1 20 4 8 Figure 4 4 modify 20 mac _ address mac lan1_ port Filter Forwar...

Page 37: ...1 com 2 user _ profile add attrib 13 30 command Menu VT100 ANSI LINUX XTerm source 1 10 profile name pass _ conf Level 1 Level 2 Level 3 Unlimited delete 1 5 attrib 13 30 command Menu VT100 ANSI LINUX...

Page 38: ...Mbps DQPSK 2Mbps DBPSK 1Mbps Operation Channels 11 for North America 14 for Japan 13 for Europe 2 for Spain 4 for France RF Output Power 13dBm ETS FR model RB 8100E 19dBm FCC model RB 8100 RF Connecto...

Page 39: ...tached wired or wireless No 1 192 168 1 1 No 2 192 168 2 1 No 3 192 168 3 1 Appendix 4 computer to configure the AP through using a web browser or telnet program on a LAN attached computer No 4 192 16...

Page 40: ...DHCP as shown in Table B 5 Parameter Description Default Value Appendix 6 DHCP Client Setting Enable or disable the specified interface to obtain an IP address automatically Disable Trigger DHCP Servi...

Page 41: ...nnel for the AP 11 RTS Threshold Set RTS Request To Send threshold value 250 Fragmentation Threshold Set fragmentation threshold value 1600 SSID Wireless LAN service area rb8100 Appendix 8 identifier...

Page 42: ...ht Deny Read Write Create for SNMP Manager Read Community Specify the type of community public or private for SNMP Manager Public Table B 10 B 1 11 SNMP Trap as shown in Table B 11 Parameter Descripti...

Page 43: ...erference is experienced moving the equipment away from them will often reduce or eliminate the interference However there is no guarantee that interference will not occur in a particular installation...

Reviews: