La Ditta costruttrice si riserva di apportare qualunque modifica ritenga utile senza preavviso.
Manufacturer reserve itself all the rights to change without notice.
File Name: k02.cdr
Rev: 0.5 Date: 29/05/19
K02
Turin / Torino - Piemont - Italy
E-mail: [email protected]
WEB: www.selet.it
USCITA CAVO /
CABLE OUTPUT
USCITA CONNETTORE
M12
CONNECTOR OUTPUT
SCHERMATO /
SHIELDED
NON SCHERMATO /
UNSHIELDED
SCHERMATO /
SHIELDED
NON SCHERMATO /
UNSHIELDED
PNP NO / NC
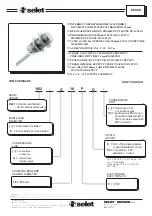
K02G18PO
K02EG18PO
K0218POC5
K02E18POC5
PNP NO+NC
K02G18PSC
-
K0218PSCC5
-
18 mm DIAMETER
DIAMETRO 18 mm
ELENCO PRODOTTI
PRODUCTS LIST
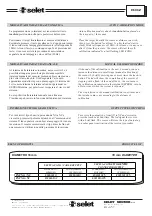
La programmazione (o taratura) avviene tramite il tasto
posizionato nella parte posteriore del sensore.
Posizionare il target frontalmente al sensore alla distanza
desiderata, premere il tasto per almeno 1s, dopo questo tempo
il led comincierà a lampeggiare lentamente (alla frequenza di
10Hz). Al suo rilascio, o comunque dopo 2s di pressione del
tasto, il sensore avvierà la procedura di auto-taratura
segnalata da un lampeggio veloce del led (20Hz).
teach-in
Al termine della taratura automatica, nei successivi 3s, è
possibile allungare a piccoli step la distanza sensibile
(taratura manuale del sensore) premendo brevemente una o
più volte il tasto teach in. Il led segnalerà l’avvenuto
apprendimento dello step con un lampeggio. Al termine dei
3s il sensore termina la taratura salvando i parametri su
EEPROM interna, per poterli così recuperare al riavvio del
sistema.
Lo step riferito alla taratura manuale non è lineare e
l’incidenza può variare in funzione della distanza di taratura.
Per invertire il tipo di uscita, passando da NO a NC e
viceversa, premere il pulsante di teach-in all’accensione del
sistema. Il led segnalerà con un breve lampeggio l’avvenuta
inversione. Il sensore memorizzerà il tipo di uscita fino ad
una successiva riattivazione della procedura di inversione.
MODALIT DI TARATURA AUTOMATICA
À
MODALIT DI TARATURA MANUALE
À
INVERSIONE TIPOLOGIA DI USCITA
At the end of the calibration, in the next 3 seconds, you can
increase the distance in small steps (manual calibration of
the sensor) by briefly pressing one or more times the teach-in
button. The led will show the completion of the process of
stepping with a flash. At the end of the 3s, the sensor save
the calibration parameters on the internal EEPROM, so to be
able to recover when the system is rebooted.
The step referred to the manual calibration is not linear and
the incidence may vary according to the distance of
calibration.
To reverse the output type, from NO to NC and viceversa,
press the teach-in at boot time. The led signal the reverse
with a brief flash. The sensor will store the type of output up
to a subsequent reactivation of the reversal procedure.
Auto calibration mode is done by
button placed on
the rear part of the sensor.
Place the target frontally the sensor at distance you wish,
then press the button for at least 1s, after that led start to
slowly blink (at frequency of 10Hz). At release, or in any case
after 2s from the pressure, the sensor will start the self-
calibration indicated by a fast flashing LED (20Hz).
teach-in
MANUAL CALIBRATION MODE
AUTO CALIBRATION MODE
OUTPUT TYPE SWITCHING


