background image

2

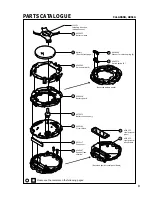
PARTS CATALOGUE

Cal. A860A, A861A

Disassembling procedures Figs. :

1

21

Reassembling procedures Figs. :

21

1

Lubricating:

Types of oil

Oil quantity

Silicone oil 500,000

Normal quantity

Please see the remarks on the following pages.

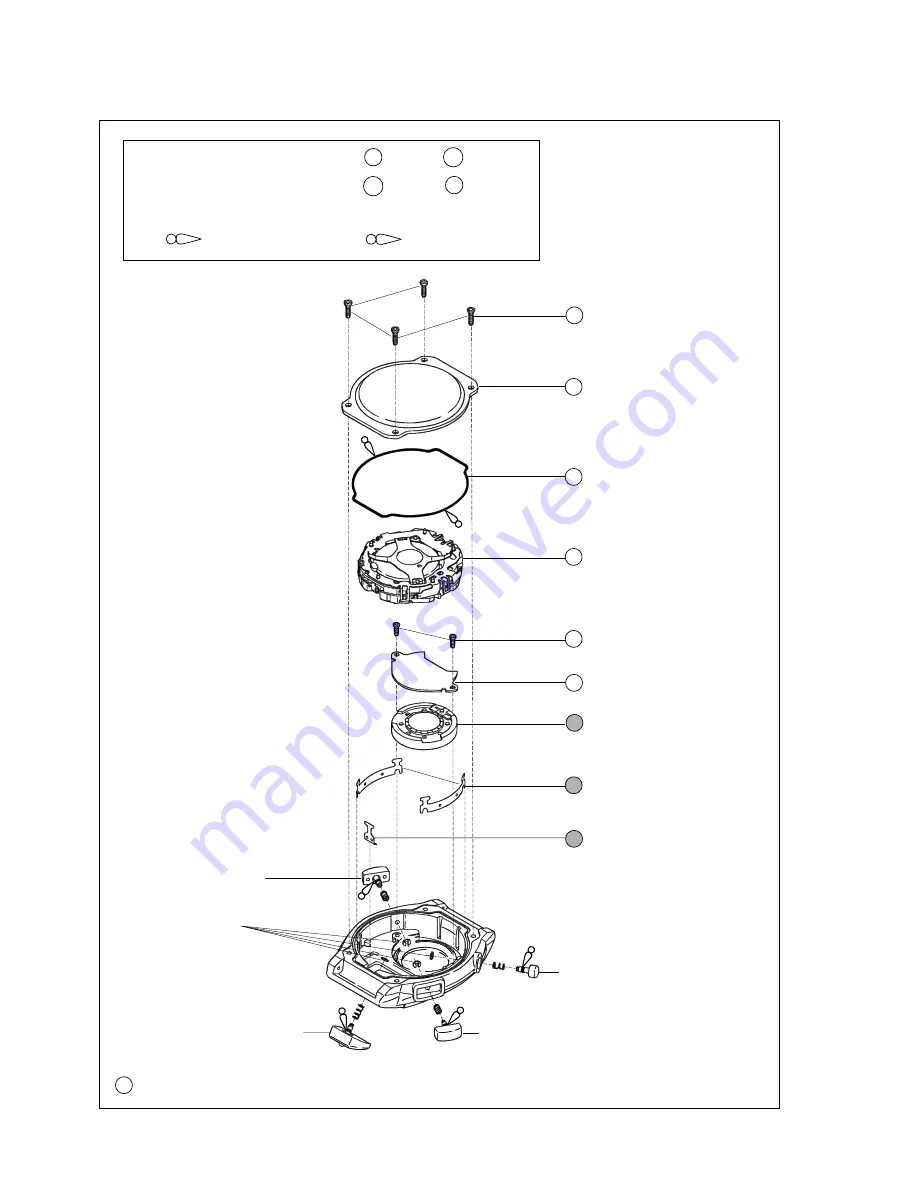
1

Case back screw

2

Case back

3

Case back gasket

4

Module

5

Spacer screw

6

Spacer

7

4580 009
Speaker block

8

Conductive plate for the side button

9

Conductive plate for the front button

Button B

Button A

Button C

Button spring clip

Button D

(Front button)

Summary of Contents for A860A

Page 1: ...ving system Multiplex driving system Display system Time display Stopwatch display In 1 100 second increments for the first 20 minutes Alarm display Additional mechanism Speaking function Current time...

Page 2: ...y Silicone oil 500 000 Normal quantity Please see the remarks on the following pages 1 Case back screw 2 Case back 3 Case back gasket 4 Module 5 Spacer screw 6 Spacer 7 4580 009 Speaker block 8 Conduc...

Page 3: ...panel frame 10 4225 435 Battery clamp 11 Battery See the front page 12 4245 280 Switch spring A 13 4408 068 Washer for switch spring B 14 4245 270 Switch spring B 15 4395 038 Battery guard 16 4270 371...

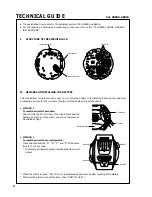
Page 4: ...be sure to follow either of the two methods below to reset the circuit METHOD 1 To reset the circuit of a module Short circuit the AC terminal of the circuit block and the battery positive surface wit...

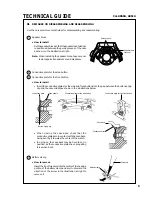
Page 5: ...tes for the side and front buttons into the gap between the button spring clip and the case middle as shown in the illustrations below Conductive plate Case middle Button spring clip Conductive plate...

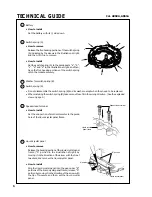
Page 6: ...tions of the switch spring catch the module securely a e c b d 13 Washer for switch spring B 14 Switch spring B How to install Set the end portion of smaller diameter to the guide hole of the liquid c...

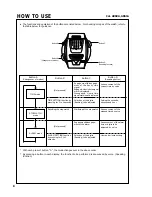
Page 7: ...TING display and then press buttons C and D at the same time to light up all the segments of the display With all the segments lit up check for abnormal displays etc All the segments lit up To return...

Page 8: ...time signal Engaged Hourly time signal mark is displayed Disengaged Hourly time signal mark is not displayed Resetting the stopwatch Start stop of the stopwatch Not pressed Engagement disengage ment o...

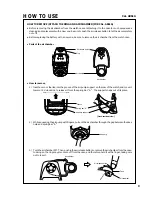
Page 9: ...Insert a coin or the like into the groove of the air pump support on the rear of the watch and move it toward 12 o clock side to release it from the spring bar A The support snaps out of its place Ai...

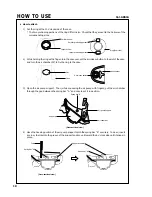
Page 10: ...and turn the air chamber 90 to fix the ring to the case Slot Case Air release button Air chamber 3 Open the air pump support Then while squeezing the air pump with fingers put the air chamber through...

Page 11: ......

Page 12: ...99 1 Printed in Japan...

Reviews: