background image

ST-EZ16 QUICK START GUIDE

20 

Option 2:

Steps:

1.

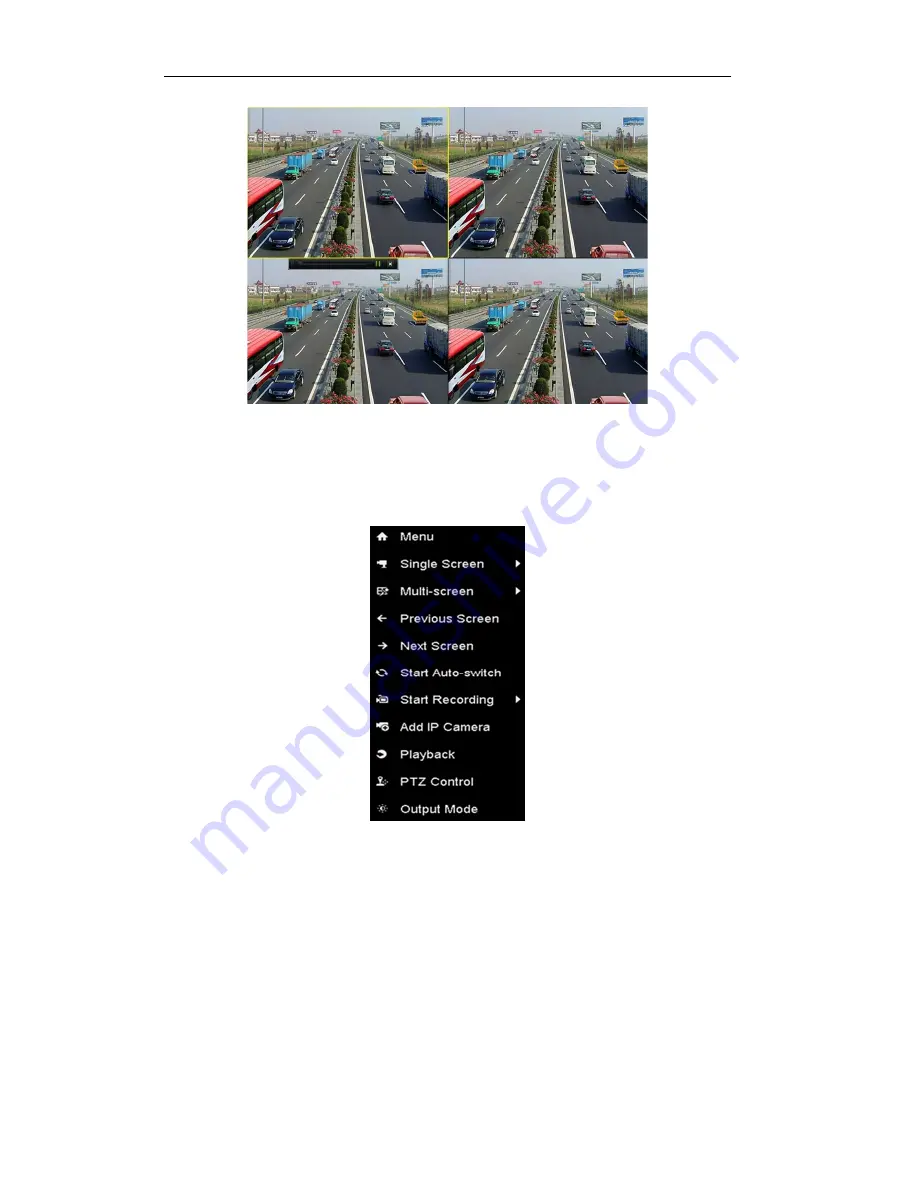
Enter the Playback menu.

Mouse: right click a channel in live view mode and select Playback from the menu.

Under multi-screen live view, record files of the selected channel will be played back. 

2.

Playback management.

The toolbar in the bottom part of Playback interface can be used to control 

the 

play

back functions.

Summary of Contents for ST-EZ16

Page 1: ...ST EZ16 QUICK START GUIDE www securitytronix com www nacebrands com ...

Page 2: ...n Chart 12 Menu Operation 13 Menu Structure 13 Startup and Shutdown 13 Setting the Admin Password 14 Login and Logout 15 User Login 15 User Logout 15 Live View 16 Adding IP Cameras 16 Recording 19 Instant Recording 19 All day Recording 19 Playback 19 Backup 21 VCA Detection 22 VCA Search 22 Accessing by Web Browser 24 Logging In 24 Live View 25 Recording 26 Playback 28 Mobile Device Access 29 ...

Page 3: ...ENTIAL DAMAGES INCLUDING BUT NOT LIMITED TO PROCUREMENT OF SUBSTITUTE GOODS OR SERVICES LOSS OF USE DATA OR PROFITS OR BUSINESS INTERRUPTION HOWEVER CAUSED AND ON ANY THEORY OF LIABILITY WHETHER IN CONTRACT STRICT LIABILITY OR TORT INCLUDING NEGLIGENCE OR OTHERWISE ARISING IN ANY WAY OUT OF THE USE OF THIS HARDWARE AND SOFTWARE EVEN IF ADVISED OF THE POSSIBILITY OF SUCH DAMAGE THE USE OF THE PRODU...

Page 4: ...that may cause undesired operation EU Conformity Statement This product and if applicable the supplied accessories too are marked with CE and comply therefore with the applicable harmonized European standards listed under the EMC Directive 2004 108 EC the RoHS Directive 2011 65 EU 2012 19 EU WEEE directive Products marked with this symbol cannot be disposed of as unsorted municipal waste in the Eu...

Page 5: ...y regulations of the nation and region Please refer to technical specifications for detailed information Input voltage should meet both the SELV Safety Extra Low Voltage and the Limited Power Source with 100 240 VAC or 12 VDC according to the IEC60950 1 standard Please refer to technical specifications for detailed information Do not connect several devices to one power adapter as adapter overload...

Page 6: ...operly secured to a rack or shelf Major shocks or jolts to the unit as a result of dropping it may cause damage to the sensitive electronics within the unit Use the device in conjunction with an UPS if possible Power down the unit before connecting and disconnecting accessories and peripherals Surveillance grade HDDs should be used for this device Improper use or replacement of the battery may res...

Page 7: ... space between racks mounted devices 6 Ensure the NVR is grounded 7 Environmental temperature should be within the range of 14ºF 131ºF 8 Environmental humidity should be within the range of 10 90 Hard Disk Installation Before you start Disconnect the power from the NVR before installing a hard disk drive HDD Surveillance grade HDDs should be used for this installation Up to 2 SATA hard disks can b...

Page 8: ...ST EZ16 QUICK START GUIDE 7 4 Place the HDD on the bottom of the device and then fasten the screws on the bottom to fix the HDD 5 Re install the cover of the NVR and fasten screws ...

Page 9: ...recorded video The Left and Right button will select the next and previous record files In Live View mode these buttons can be used to cycle through channels In PTZ control mode it can control the movement of the PTZ camera ENTER The ENTER button is used to confirm selection in any of the menu modes It can also be used to tick checkbox fields In Playback mode it can be used to play or pause the vi...

Page 10: ...ce 1 10 100 1000 Mbps self adaptive Ethernet interface 5 Audio Out RCA connector for audio output 6 VGA Interface DB9 connector for VGA output Display local video output and menu 7 USB Interface Universal Serial Bus USB ports for additional devices such as USB mouse and USB Hard Disk Drive HDD 8 Ground Ground needs to be connected when the NVR starts up 9 Power Switch Switch for turning on off the...

Page 11: ...ion 6MP 5MP 3MP 1080P UXGA 720P VGA 4CIF DCIF 2CIF CIF QCIF Capability 4 ch 1080P 8 ch 720P 6 ch 1080P Hard disk SATA 1 SATA interface for 1 HDD 2 SATA interfaces for 2 HDDs Capacity Up to 6TB for each disk External interface Network interface 1 RJ 45 10 1000 Mbps self adaptive Ethernet interface USB interface 1 USB 2 0 and 1 USB 3 0 PoE Interface 4 independent 100 Mbps PoE network interfaces 8 in...

Page 12: ...ution 6MP 5MP 3MP 1080P UXGA 720P VGA 4CIF DCIF 2CIF CIF QCIF Capability 16 ch 4CIF 12 ch 720P 6 ch 1080P Hard disk SATA 2 SATA interfaces for 2 HDDs Capacity Up to 6TB for each disk External interface Network interface 1 RJ 45 10 100 1000 Mbps self adaptive Ethernet interface USB interface 1 USB 2 0 and 1 USB 3 0 PoE Interface 8 independent 100 Mbps PoE network interfaces 16 independent 100 Mbps ...

Page 13: ...ge Used 96K 42M 128K 56M 160K 70M 192K 84M 224K 98M 256K 112M 320K 140M 384K 168M 448K 196M 512K 225M 640K 281M 768K 337M 896K 393M 1024K 450M 1280K 562M 1536K 675M 1792K 787M 2048K 900M 4096K 1 8G 8192K 3 6G 16384K 7 2G Please note that supplied values for storage space used is just for reference The storage values in the chart are estimated by formulas and may have some deviation from actual val...

Page 14: ...d Hot Spare are not available for this series Startup and Shutdown Proper startup and shutdown procedures are crucial to expanding the life of the NVR To start your NVR Steps 1 Check the power supply is plugged into an electrical outlet It is HIGHLY recommended that an Uninterruptible Power Supply UPS be used in conjunction with the device The Power indicator LED on the front panel should be red i...

Page 15: ...assword STRONG PASSWORD RECOMMENDED We highly recommend you create a strong password of your own choosing using a minimum of 8 characters including upper case letters lower case letters numbers and special characters in order to increase the security of your product And we recommend you reset your password regularly especially in the high security applications resetting the password monthly or wee...

Page 16: ... dropdown list 2 Input Password 3 Click OK to log in The device gets locked for 60 seconds if the admin user performs 7 failed password attempts 5 attempts for the guest operator User Logout Purpose After logging out the monitor turns to the live view mode and if you want to do any operation you need to enter the user name and password to log in again Steps 1 Enter the Shutdown menu Menu Shutdown ...

Page 17: ... or sensor alarm Record manual record continuous record motion detection VCA and alarm triggered record Alarm Record Event Exception event and exception information appears at the lower left corner of the screen Adding IP Cameras Purpose Before you can get a live view or record video you should add the network cameras to the connection list of the device Before you start Ensure the network connect...

Page 18: ...2 Steps 1 Select the Add IP Camera option from the right click menu in live view mode or click Menu Camera Camera to enter the IP camera management interface 2 The online cameras with same network segment will be detected and displayed in the camera list 3 Select the IP camera from the list and click the button to add the camera Or you can click the One touch Adding button to add all cameras from ...

Page 19: ...weak password and risky password Explanation of the icons Icon Explanation Icon Explanation Edit basic parameters of the camera Add the detected IP camera The camera is disconnected you can click the icon to get the exception information of the camera Delete the IP camera Play the live video of the connected camera Advanced settings of the camera Upgrade the connected IP camera Security Show the s...

Page 20: ...k the icon to enable record and the icon turns to And click icon to disable the recording then the icon turns to All day Recording Steps 1 On the live view window right lick the window and move the cursor to the Start Recording option and select Continuous Record or Motion Detection Record on your demand 2 And click the Yes button in the popup Attention message box to confirm the settings Then all...

Page 21: ...ight click a channel in live view mode and select Playback from the menu Under multi screen live view record files of the selected channel will be played back 2 Playback management The toolbar in the bottom part of Playback interface can be used to control the playback functions ...

Page 22: ...multiple channels Backup Recorded files can be backed up to various devices such as USB flash drives USB HDDs or a DVD writer Steps 1 Enter Video Export interface Choose the channel s you want to back up and click on the Quick Export button 2 Enter Export interface choose backup device and click Export button to start exporting 3 Check backup result ...

Page 23: ...a Management and select a camera you want to detect VCA alarm Menu Camera VCA 2 Enable the VCA detection and configure the rule settings Please refer to the User Manual for detailed instructions VCA Search The NVR supports the VCA search for behavior analysis face capture people counting and heat map Face Search Search the captured face picture results triggered by face detection Behavior Search S...

Page 24: ...ST EZ16 QUICK START GUIDE 23 graphical representation of data represented by colors ...

Page 25: ...er input the IP address of the device and then press Enter 2 Login to the device If the device has not been activated you need to activate the device first before login 1 Set the password for the admin user account 2 Click OK to login to the device STRONG PASSWORD RECOMMENDED We highly recommend you create a strong password of your own choosing using a minimum of 8 characters including upper case ...

Page 26: ...e of channel and multi window division is supported 3 Play Control Bar Play control operations are supported 4 PTZ Control Pan tilt zoom operations are supported as well as preset editing and calling PTZ function can only be realized if the connected camera supports PTZ control The PTZ control is supported by certain series NVR Start Live View Steps 1 In the live view window select a playing windo...

Page 27: ...ding Before you start Make sure the device is connected with an HDD or network disk and the HDD or network disk has been initialized for first time to use Two recording types can be configured Manual and Scheduled The following section introduces the configuration of scheduled recording Steps 1 Click Configuration Storage Schedule Settings to enter Schedule Settings interface 2 Select the camera t...

Page 28: ...ck the icon of the day to copy the settings of the current day to other days of the week if required 5 Click OK to save the settings 5 Click Advanced to configure advanced record parameters and click the OK button to save the settings 6 You can click to configure advanced record parameters to copy the schedule of current camera to other cameras 7 Click Save to activate the above settings ...

Page 29: ...rked with different colors 5 Playback Status Displays the playback status including channel number and playback speed 6 Calendar You can select the date to play Start Playback Steps 1 Click Playback on the menu bar to enter playback interface 2 Click the camera from the device list for playback 3 Select the date from the calendar and click Search 4 Click the Play button to play the video file sear...

Page 30: ...curity risks To mitigate network attacks and information leakage please ensure the network is protected If the product does not work properly please contact your dealer or the nearest service center Purpose Once the device is configured on the network and there are no restrictions in place preventing the recorder from accessing the internet you can access the NVR from a mobile device to view live ...

Page 31: ... number used Figure 4 4 Verification 5 Click on the icon in the upper right corner then scan the QR code displayed in the MENU CONFIGURATION NETWORK ACCESS PLATFORM sub menu of the DVR 6 You will then need to enter the Verification code on that same screen into the mobile app 7 Once added you can now access Live Playback streams from the mobile device Figure 4 5 QR Scan Figure 4 4 Add Device ...

Page 32: ...media not approved by the Company tampering with or altering of the hardware war invasion act of foreign enemies hostilities regardless of whether war is declared civil war rebellion revolution insurrection military or usurped power or confiscation terrorist activities nationalization government sanction blockage embargo labor dispute strike lockout or interruption or failure of electricity air co...

Reviews: