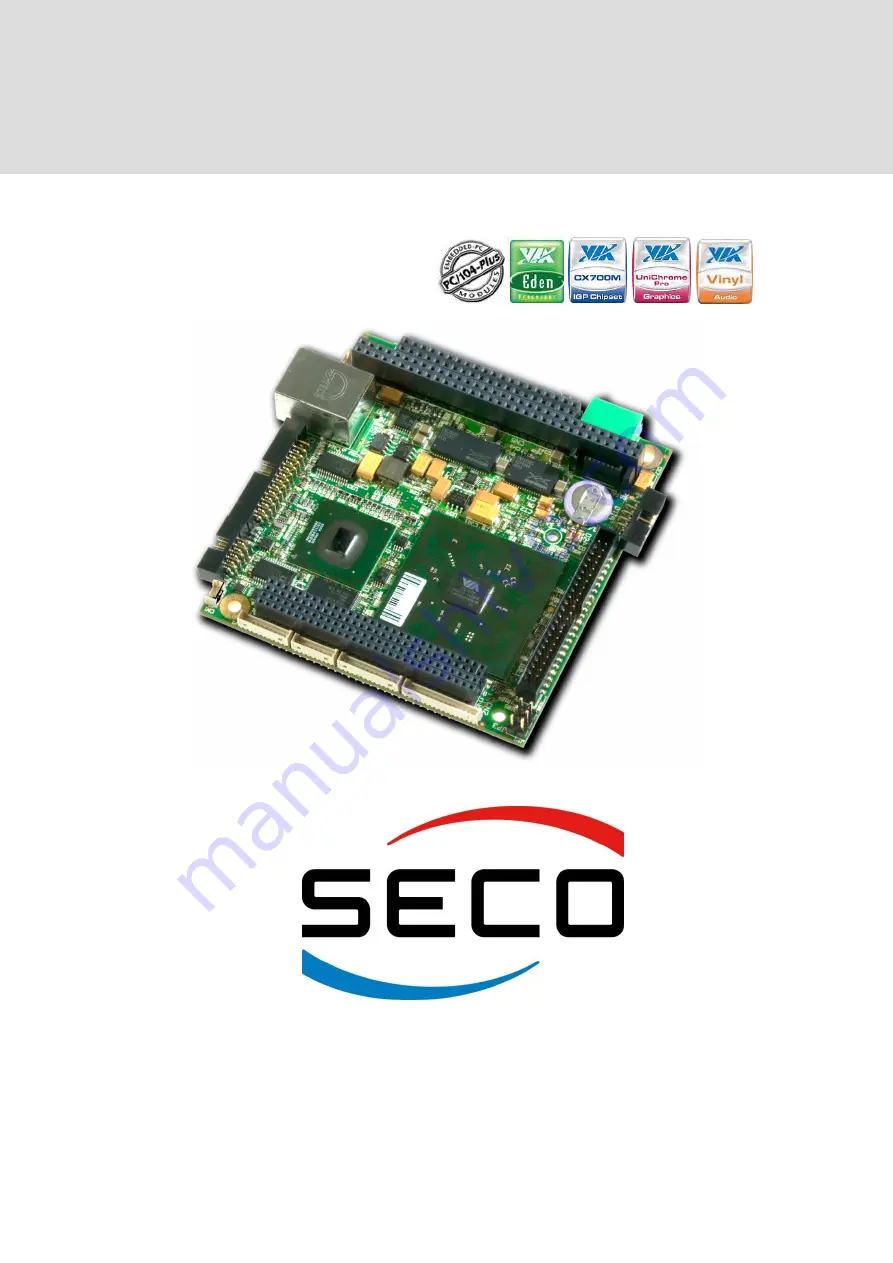
SECO104-CX700M
PC/104-Plus CPU with VIA EDEN
®
Ultra Low Voltage Technology
Us
e
r Manual
StockCheck.com
Page 1: ...SECO104 CX700M PC 104 Plus CPU with VIA EDEN Ultra Low Voltage Technology SECO104 CX700M User Manual S t o c k C h e c k c o m ...
Page 2: ...ll information contained in this manual is confidential material and property of SECO S r l Unauthorised use duplication modification or disclosure of the information to a third party by any means without prior consent of SECO S r l is prohibited Every effort has been made to ensure the accuracy of this manual however SECO s r l accepts no responsibility for any inaccuracies errors or omissions he...
Page 3: ...I BUS Expansion connector 20 3 3 7 Parallel Port Floppy Disk Connector 22 3 3 8 USB Ports connector 22 3 3 9 Utility Connector 23 3 3 10 COM2 RS232 RS422 RS485 Serial Port Connector 23 3 3 11 COM1 Serial Port Connector 24 3 3 12 Dual Audio Amplified connector 24 3 3 13 Speaker L R and MIC connector 25 3 3 14 SATA connector 25 3 3 15 HDD EIDE connector 26 3 3 16 SO DIMM DDR2 Connector 27 3 3 17 Jum...
Page 4: ...HIPSET CONFIGURATION 35 4 4 1 Internal COMA COMB I O 35 4 4 2 Internal COMA COMB IRQ 35 4 4 3 Internal COMB Interface 35 4 4 4 Parallel connected to 36 4 4 5 Internal LPT 36 4 4 6 Internal LPT IRQ 36 4 4 7 Internal USB Port Enabled 36 4 4 8 PCI INTA Video IRQ 36 4 4 9 Internal Audio 36 4 4 10 PCI INTB audio IRQ 36 4 4 11 Internal LAN 36 4 4 12 PCI INTC LAN IRQ 36 4 4 13 PCI INTD USB 2 0 IRQ 36 4 4...
Page 5: ...1 0 Last Edition 3 1 Author S B Reviewed by G M Copyright 2011 SECO s r l SECO104 CX700M pag 5 Chapter 1 INTRODUCTION Warranty Information and assistance RMA number request Safety Electrostatic Discharges RoHS compliance S t o c k C h e c k c o m ...
Page 6: ...uthorization number for returning the item must be put both on the packaging and on the documents brought with the items which have to be not damaged not tampered with all accessories in their original packaging Error analysis form identifying the fault type has to be compiled by the customer and has to be sent in the packaging of the returned item If some of the above mentioned requirements for r...
Page 7: ...centre it is possible to send the faulty product to SECO Repairing Centre In this case follow this procedure Returned items have to be provided with RMA Number Items sent without RMA number will be not accepted Returned items have to be packed in the appropriate manner SECO is not responsible for damages caused by accidental drop improper usage or customer neglects Note We ask to prepare the follo...
Page 8: ...ed contacts with other components of the board Never connect the board to an external power supply unit or battery if the board has become wet Make sure that all cables are correctly connected and are not damaged 1 5 Electrostatic Discharges SECO104 CX700M like any other electronic product is an electrostatic sensitive device and some components on board could be damaged by high voltages caused by...
Page 9: ...n 1 0 Last Edition 3 1 Author S B Reviewed by G M Copyright 2011 SECO s r l SECO104 CX700M pag 9 Chapter 2 OVERVIEW Introduction Technical Specifications Electrical specifications Mechanical specifications Block Diagram S t o c k C h e c k c o m ...
Page 10: ...0BaseT and the PC 104 Plus format give the possibility for many additional features of the embedded system All this also is in fanless mode 2 2 Technical Specifications CPU VIA EDEN Ultra Low Voltage 500 MHz VIA EDEN Ultra Low Voltage 1 GHz DRAM up to 1 GB DDR2 533 400 on SO DIMM socket Chipset VIA CX700MTM Graphic Controller VIA UniChrome Pro II IGP with integrated MPEG 2 MPEG 4 and WMV9 hardware...
Page 11: ...ched by a MOSFET driven by the graphic controller allowing to turn on and off the inverter unit If SECO104 CX700M board has to be used with PC 104 expansion boards is recommended to power the board via PC 104 pins because these pins are capable of supplying greater currents Since using expansion boards increases sensibly power consumptions this solution has to be preferred is possible 2 3 2 RTC Ba...
Page 12: ...104 CX700M board remove the batteries from the board in order to collect and dispose them according to the requirement of the same European Directive above mentioned Even when replacing the batteries the disposal has to be made according to these requirements 2 4 Mechanical specifications According to PC 104 Plus Standard specifications board dimensions are 90 x 96 mm 3 6 x 3 8 The printed circuit...
Page 13: ...SECO104 CX700M User Manual Rev First Edition 1 0 Last Edition 3 1 Author S B Reviewed by G M Copyright 2011 SECO s r l SECO104 CX700M pag 13 2 5 Block Diagram S t o c k C h e c k c o m ...
Page 14: ...l Rev First Edition 1 0 Last Edition 3 1 Author S B Reviewed by G M Copyright 2011 SECO s r l SECO104 CX700M pag 14 Chapter 3 CONNECTORS Connectors placement Connectors overview Connectors description S t o c k C h e c k c o m ...
Page 15: ...nectors placement CN15 Power Connector Jumper JP2 CN12 Dual Audio CN10 COM2 JP1 JP4 Jumpers CN11 COM1 CN7 Parallel Floppy CN2 LVDS Primary Channel PC 104 Exp Bus PCI FAN CN13 SPKR L R MIC P1 CRT CN4 Ethernet CN8 USB0 1 SATA Connector PC 104 Exp Bus ISA IDE Connector CN9 Utility Connector Battery CN3 LVDS Secondary Channel S t o c k C h e c k c o m ...
Page 16: ...N4 Fast Ethernet 10 100baseT connector CN5 CN6 PC 104 ISA Bus expansion connectors CN7 Parallel port connector CN8 USB 0 1 Port connector CN9 Utility connector CN10 COM2 serial port connector CN11 COM1 serial port connector CN12 Dual Audio Amplified connector CN13 Speaker L R MIC connector CN15 Power connector PCI1 PC 104 PCI Bus expansion connector SATA Serial ATA connector IDE1 Primary IDE HD Co...
Page 17: ...graphic controller First channel available on CN2 connector has to be used for connection of standard 18 or 24 bit TFT displays VCCLCD voltage can be set at the value of 5VDC or 3 3VDC using jumper JP1 see paragraph 3 3 17 VBACKLIGHT is fixed at 12VDC Second channel has to be used only for connection of 18 or 24 bit dual pixel clock displays in this case it is necessary to use both connectors CN2 ...
Page 18: ...s a RJ45 type connector type HALO HFJ11 2450E S1RL or equivalent with integrated magnetics that provides direct connection to a 10 100 BaseTx Ethernet CN4 Fast ETHERNET CONNECTOR PIN SIGNAL 1 TX 2 TX 3 RX 4 Termination to GND 5 Termination to GND 6 RX 7 N C 8 GND 3 3 5 ISA PC 104 BUS Expansion connector CN5 connector is a 64 pins double row female one 2 x 32 pin pitch 2 54 mm and carries out ISA s...
Page 19: ... B11 MEM WR A12 ADDRESS A19 B12 MEM RD A13 ADDRESS A18 B13 I O WRITE A14 ADDRESS A17 B14 I O READ A15 ADDRESS A16 B15 DMA ACK 3 A16 ADDRESS A15 B16 DMA REQ 3 A17 ADDRESS A14 B17 DMA ACK 1 A18 ADDRESS A13 B18 DMA REQ 1 A19 ADDRESS A12 B19 MEM REFRESH A20 ADDRESS A11 B20 ISA CLOCK 8 or 16 MHz A21 ADDRESS A10 B21 IRQ7 A22 ADDRESS A9 B22 IRQ6 A23 ADDRESS A8 B23 IRQ5 A24 ADDRESS A7 B24 IRQ4 A25 ADDRESS...
Page 20: ...9 ADDRESS A17 D9 DMA ACK 0 C10 MEMORY READ D10 DMA REQ 0 C11 MEMORY WRITE D11 DMA ACK 5 C12 DATA 8 D12 DMA REQ 5 C13 DATA 9 D13 DMA ACK 6 C14 DATA 10 D14 DMA REQ 6 C15 DATA 11 D15 DMA ACK 7 C16 DATA 12 D16 DMA REQ 7 C17 DATA 13 D17 5 VDC C18 DATA 14 D18 N C C19 DATA 15 D19 GROUND C20 KEY LOCATION D20 GROUND 3 3 6 PC104 PCI BUS Expansion connector PCI1 connector is a 120 pins 4 rows female connecto...
Page 21: ... Command Byte En 2 A15 AD18 B15 N C C15 AD17 D15 GND A16 AD21 B16 AD20 C16 GND D16 AD19 A17 N C B17 AD23 C17 AD22 D17 N C A18 AD20 IDSEL0 B18 GND C18 AD21 IDSEL1 D18 AD22 IDSEL2 A19 AD24 B19 Command Byte En 3 C19 5VDC 3 3VDC D19 AD23 IDSEL3 A20 GND B20 AD26 C20 AD25 D20 GND A21 AD29 B21 5 VDC C21 AD28 D21 AD27 A22 5 VDC B22 AD30 C22 GND D22 AD31 A23 REQ 0 B23 GND C23 REQ 1 D23 5VDC 3 3VDC A24 GND ...
Page 22: ...Signal Pin Signal Pin Signal 1 STB 14 N C 1 14 N C 2 Autofeed DataStrobe 15 PD6 2 Density_Select Data_Rate_1 15 Data_Rate_0 3 PD0 16 N C 3 Index 16 N C 4 Error 17 PD7 4 Head_Select 17 Media_Sense1 5 PD1 18 N C 5 Track0 18 N C 6 Init 19 Acknowledge 6 DIR 19 Drive_Select_1 7 PD2 20 N C 7 Write_Protected 20 N C 8 Select_Input Address_Strobe 21 Busy Wait 8 Step 21 Motor1 9 PD3 22 N C 9 Read_Data 22 N ...
Page 23: ...he internal battery fails remember the board does not provide recharge circuitry for this external battery CN9 UTILITY CONNECTOR PIN SIGNAL 1 Auxiliary backup battery 2 GND 3 SW_RESET 4 MSDATA 5 KBDATA 6 KBDCLK 7 GND 8 5 VDC 9 NC 10 MSCLK 3 3 10 COM2 RS232 RS422 RS485 Serial Port Connector CN10 connector provides RS232 full modem RS422 RS485 configurable signals for COM2 serial port Relative I O b...
Page 24: ...ation resistor If these resistors are needed you need to provide them externally to the board 3 3 11 COM1 Serial Port Connector CN11 connector provides RS232 full modem signals for COM1 serial port Relative I O base address and IRQ can be selected via CMOS SETUP BIOS utility It is a single row 10 pin male straight P1 25 connector type MOLEX 53047 1010 or equivalent CN11 COM1 CONNECTOR PIN SIGNAL 1...
Page 25: ...al microphone are carried on connector CN13 The connector is a 1 x 6p male straight P1 25 type MOLEX 53047 0610 or equivalent CN13 L R and MIC connector PIN SIGNAL 1 MIC 2 GND 3 SR_OUT_R 4 GND 5 SR_OUT_L 6 GND 3 3 14 SATA connector It is possible to use standard S ATA Hard Disks using relative connector provided on the board Serial ATA connector is type STARCONN 030B07 03100A T2 or equivalent Seri...
Page 26: ...e Primary IDE connector IDE1 which is a standard 2 mm pitch 44 pin male Hard Disk Connectors IDE1 HDD EIDE Connector PIN Signal PIN Signal 1 RESET 23 IDEIOW 2 GND 24 GND 3 HD7 25 IDEIOR 4 HD8 26 GND 5 HD6 27 IORDY 6 HD9 28 GND 7 HD5 29 IDEACKJ 8 HD10 30 GND 9 HD4 31 IRQ14 10 HD11 32 N C 11 HD3 33 IDE_A1 12 HD12 34 N C 13 HD2 35 IDE_A0 14 HD13 36 IDE_A2 15 HD1 37 IDEPCS1J 16 HD14 38 IDEPCS3J 17 HD0...
Page 27: ...on 1 2 to set VCCLCD at the value 5VDC Place jumper in position 2 3 to set VCCLCD at the value 3 3VDC JP2 controls if pin 2 of power connector CN15 can be used as an additional 5VDC input rail or for legacy 12VDC Place jumper in position 1 2 to use pin 2 of CN15 as an input rail for 5VDC voltage Place jumper in position 2 3 to use pin 2 of CN15 as an input rail for 12VDC voltage JP4 controls volta...
Page 28: ...Edition 1 0 Last Edition 3 1 Author S B Reviewed by G M Copyright 2011 SECO s r l SECO104 CX700M pag 28 Chapter 4 BIOS SETUP Introduction Basic CMOS Configuration Advanced CMOS Configuration Chipset Configuration S t o c k C h e c k c o m ...
Page 29: ...irst three items allow modifying setup parameters They will be discussed more exhaustively in the following paragraphs Fourth item is used to change the password required to enter into the setup menu factory default is a blank password and it can be changed by the final user in order to prevent unauthorised accesses to this part of the system Fifth item restores CMOS situation to last known good v...
Page 30: ...e Memory and Extended Memory can be modified choosing the right field with arrows keys selecting the field with Enter or Tab and modifying the value with PgUp PgDn and Each of two Floppy drive fields can have one of the following values Not installed 360 KB 5 25 1 2 MB 5 25 720 KB 3 5 1 44 MB 3 5 Hard Disk field offers the following choices Not installed Automatic search It visualises also six fie...
Page 31: ...s in Mb The most commonly used selection when a hard disk is installed is Automatic search This selection enables the BIOS to check automatically if a hard disk is actually installed and to know its specifications Not installed selection is used to speed up the boot in the case of not used Hard Disk eliminating the time to check its presence Display Type field has four possibilities EGA VGA SVGA C...
Page 32: ...equence Please notice that this option is less effective than other ones that can avoid time waste during the boot sequence i e the seek of an Hard Disk or a Floppy Disk Drive if we already know that there are not 4 3 2 Display setup message If enabled this option displays the message PRESS CTRL ALT ESC OR DEL FOR SETUP 4 3 3 Wait to ease setup entry This option inserts a wait state to facilitate ...
Page 33: ...CD Disabled 4 3 13 External PCI video master This option allows disabling external PCI controller therefore using internal video section 4 3 14 W D T time out at boot This option allows setting the Watchdog time out to reset the system and it can vary between 1 minute 3 minutes and Infinite 4 3 15 No zero extended RAM Enabling or disabling this option it is possible to speed up the boot sequence W...
Page 34: ...Rate If enabled it allows programming the keyboard repetition time i e the number of characters per second that are automatically repeated until the key is held down The possible rate are from 30 0 to 2 00 cps 4 3 22 Typematic Rate Delay The typematic rate delay is the time that occurs before of the beginning of this repetition and it can vary between 250 500 750 and 1000 msec 4 3 23 Flat Panel ce...
Page 35: ... COMA COMB I O It allows selection of base address for COMx serial port Allowed I O addresses are 3F8 standard for COM1 2F8 standard for COM2 3E8 standard for COM3 2E8 standard for COM4 220 228 238 338 Disabled 4 4 2 Internal COMA COMB IRQ It allows associating the IRQ number to serial ports COMA and COMB IRQ lines can be selected in the list None 3 4 5 6 7 9 10 11 and 12 4 4 3 Internal COMB Inter...
Page 36: ... ports 4 4 9 Internal Audio It enables or disables internal AUDIO section 4 4 10 PCI INTB audio IRQ This option allows to choose which IRQ assign to PCI INTB line possibilities are IRQ 3 4 5 6 7 9 10 11 12 or None which is shared with internal audio section 4 4 11 Internal LAN It enables or disables internal Ethernet section 4 4 12 PCI INTC LAN IRQ This option allows to choose which IRQ assign to ...
Page 37: ...00 D 1600x1200 Dual Channel 24 bit 4 4 18 Internal EIDE Controller This option allows disabling the internal Hard Disk EIDE Controller 4 4 19 Maximum UDMA mode It allows choosing which Ultra DMA Mode has to be set for EIDE section Possible choices are 2 ATA 33 3 ATA50 4 ATA66 5 ATA100 6 ATA133 and None 4 4 20 IDE prefetching To speed up data transfer from hard disk to memory the IDE controller can...
Page 38: ...SECO104 CX700M User Manual Rev First Edition 1 0 Last Edition 3 1 Author S B Reviewed by G M Copyright 2011 SECO s r l SECO104 CX700M pag 38 www seco com S t o c k C h e c k c o m ...