TRIDENT-3000
3000mm dia. Ocean Buoy
Latest products and information available at www.sealite.com
11
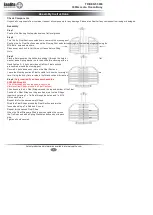
Step 11
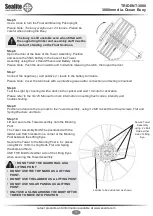
Slide the Day Marks into position. The top of the Day Mark post fits over the Locating Post on the Day
Mark Mounting Bracket, fitted below the corners of the Solar Panels. Secure the base of the Day Mark
Post to the base of the Tower Assembly using two M12 x 100mm Long Bolts Nuts, Flat and Spring
Washers per post.
Please Note: The Locating Post on the Day Mark Mounting Bracket may have to be loosened when
fitting Day Marks. Please ensure the Location Posts are secured afterward.
Step 12
Fit the ladder to the Tower Assembly.
Secure the Ladder Mounting Plate to the base of the ladder using two M10 x 25mm Long Bolts, Nuts,
Flat and Spring Washers.
Secure the Ladder Mounting Plate to the Mooring Post using 2 x M10 x 45mm Bolts, Nuts, Flat and
Spring Washers.
Step 13
Finish securing the Tower Assembly to the Mooring Post.
Check that all M12 x 100mm Long Bolts Nuts, Flat and Spring Washers are secured correctly.
Step 14
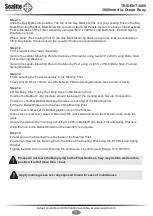
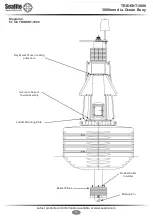
Lift the Buoy, ONLY using the Lifting Eyes on the Mooring Post.
Position the Rubber Collar Insulator around the base of the mooring post. Secure it in position.
Position 4 x Rubber Ballast Mounting Squares on each leg of the Mooring Post.
Fit the 2 x Ballast Plates on to the base of the Mooring Post.
Position a second set of 2 x Ballast plates on top of the first set.
Make sure second set of plates is fitted with the joint perpendicular to the first pair. Criss-cross the
joints.
Secure the plate to the mooring post using 4 x 20mm Ballast Rods, Nuts, Flat and Spring Washers.
Weld the nuts to the Ballast Rod when the assembly is complete.
Step 15
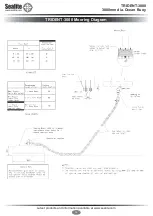
Fit and secure the Mooring Pin in the base of the Mooring Post.
Position and Secure the Mooring Pin to the base of the Mooring Post using the M10 Bolt and Spring
Washer.
Tighten the M48 Nut on to the Mooring Pin and secure it by drilling and fitting a 5/16” Roll Pin.
Please do not leave the Buoy lying on the Float Sections, they may deform while in this
position if left of more than 1 hour.
Apply marine grease over any exposed thread for ease of maintenance


